
“You’re not seriously going to serve store-bought rolls, are you?” my partner teased from the kitchen doorway, eyeing the sad little bag of hard, stale bread I’d grabbed on a busy night. Honestly, I thought the same. I was juggling a wild week, and the thought of making dinner rolls from scratch felt like a luxury I couldn’t afford. But that night, with a pinch of desperation and a sprinkle of curiosity, I found myself mixing up a batch of these tender cloud-like dinner rolls. And let me tell you, they turned out so soft they basically melted in our mouths—no joke.
What started as a quick fix for a last-minute meal became my go-to recipe for any occasion where soft, pillowy bread was called for. The smell of the dough rising, the gentle golden crust straight from the oven—it all felt like a quiet reset in the chaos. I couldn’t stop thinking about how a few simple ingredients could come together to create something that felt both comforting and special. It’s funny how a humble roll can steal the spotlight at the dinner table, isn’t it?
These dinner rolls didn’t just save one frazzled evening; they’ve been my comforting companion on many hectic nights since. You know that feeling when you bite into something so soft and fresh that it almost disappears before you can savor it? That’s exactly what these rolls do. If you’ve ever wished for a bread recipe that’s straightforward but yields that bakery-quality softness, this is it. And yes, they pair beautifully with almost any meal—whether it’s a cozy chili night or alongside a creamy dip like the creamy deviled eggs I recently whipped up for a gathering.
Turns out, the secret isn’t magic—it’s a combination of patience, just the right kneading, and a touch of butter that keeps these rolls unbelievably tender. This recipe stuck with me because it’s not just about making bread; it’s about creating a moment of calm, a little cloud of softness you can hold in your hand. No fancy equipment, no weird ingredients—just real, honest-to-goodness rolls that melt in your mouth every single time.
Why You’ll Love This Tender Cloud-Like Dinner Rolls Recipe
After countless trials (and a few doughy disasters), I can confidently say this recipe is one of those rare gems that hits every mark. Here’s why it quickly became a favorite around my kitchen:
- Quick & Easy: The entire process takes less than 2 hours from start to finish, including rise time, perfect for busy weeknights or spontaneous dinners.
- Simple Ingredients: No need for fancy flours or exotic yeast varieties—just pantry staples like all-purpose flour, yeast, butter, and milk.
- Perfect for Any Occasion: These rolls shine at holiday dinners, casual family meals, or even paired with appetizers like the creamy baked crab dip for get-togethers.
- Crowd-Pleaser: Kids love them, adults ask for seconds, and they’re always the first thing to disappear from the bread basket.
- Unbelievably Delicious: The tender crumb and buttery flavor create a melt-in-your-mouth sensation that feels like comfort food without the heaviness.
What sets this recipe apart is the technique—specifically, the gentle folding of the dough to create layers of softness and the addition of a small amount of milk, which keeps the crumb moist and tender. Unlike many rolls that can turn dense or dry, these stay light even after reheating. I’ve made versions swapping in whole wheat flour for a nuttier flavor without losing that cloud-like texture.
This isn’t just another bread recipe; it’s the one that turns a simple meal into a little celebration. Whether you’re serving it alongside a rich stew or using it as the base for sliders, these dinner rolls promise that satisfying softness that makes you close your eyes after the first bite.
What Ingredients You Will Need
This recipe relies on straightforward, wholesome ingredients that come together to create that signature soft texture and rich flavor. You probably have most of these on hand already, making it a perfect spontaneous baking project.
- All-purpose flour (about 4 cups / 480 grams) – I recommend a trusted brand like King Arthur for consistent results.
- Active dry yeast (2 ¼ teaspoons or one packet) – Fresh yeast works too if you have it, but dry yeast is easier to store.
- Warm whole milk (1 cup / 240 ml, around 110°F/43°C) – The warmth activates the yeast; you can substitute with almond or oat milk for a dairy-free option.
- Granulated sugar (2 tablespoons) – Just enough to feed the yeast and add a touch of sweetness.
- Unsalted butter (4 tablespoons / 57 grams, softened) – Adds richness and keeps the rolls tender; feel free to use vegan butter if needed.
- Large eggs (1, room temperature) – Helps with structure and gives a beautiful golden color.
- Salt (1 ½ teaspoons) – Balances flavor and enhances yeast activity.
- Optional: melted butter for brushing the tops – Adds a lovely sheen and extra softness.
Each ingredient plays a key role: the milk hydrates the flour and keeps rolls soft, butter adds richness, and eggs contribute to that tender crumb. When I’m short on time, I’ve even skipped the egg, and while the texture changes slightly, the rolls still come out wonderfully soft.
Equipment Needed
- Mixing bowl: A large bowl for combining ingredients. A stand mixer with a dough hook is a bonus but not necessary.
- Measuring cups and spoons: Accurate measurements make a big difference in baking success.
- Kitchen thermometer: Helpful to check the milk temperature so it’s warm but not hot enough to kill the yeast.
- Baking sheet or round cake pan: For shaping and baking the rolls.
- Clean kitchen towel or plastic wrap: To cover the dough during proofing.
- Pastry brush: For applying melted butter on top (optional).
If you don’t have a stand mixer, no worries—hand kneading works just fine (and it’s a great way to feel the dough’s texture). I’ve tried this recipe both ways, and while the mixer saves time, there’s something satisfying about working the dough by hand. Just be ready to get a bit flour-dusted!
Preparation Method
- Activate the yeast: In a small bowl, stir the sugar into warm milk (110°F / 43°C), then sprinkle the yeast on top. Let it sit for about 5-7 minutes until foamy and bubbly. This tells you the yeast is alive and ready to work.
- Mix the dough: In a large bowl, combine 3 ½ cups (420 grams) of the flour with the salt. Add the softened butter, egg, and the yeast-milk mixture. Stir with a wooden spoon or dough hook until the dough starts to come together. It will be sticky.
- Knead the dough: Turn the dough out onto a lightly floured surface. Knead for about 8-10 minutes, gradually adding the remaining flour as needed, until the dough is smooth, elastic, and slightly tacky but not sticky. If using a stand mixer, knead with the dough hook on medium speed for 6-8 minutes.
- First rise: Place the dough in a lightly oiled bowl, cover with a towel or plastic wrap, and let it rise in a warm spot for 1 to 1 ½ hours until doubled in size. I like to put it near the stove or inside an oven warmed to 90°F (off heat).
- Shape the rolls: Punch down the dough gently to release air. Divide into 12 equal portions (about 2 oz / 57 grams each). Shape each piece into a smooth ball by pulling the edges under and pinching the bottom. Arrange the rolls on a greased baking sheet or in a round cake pan, spacing them evenly.
- Second rise: Cover the rolls loosely and let them rise again for 30-40 minutes until puffy and nearly doubled.
- Bake: Preheat your oven to 375°F (190°C). Brush the tops of the rolls with melted butter if desired. Bake for 18-22 minutes until golden brown on top and hollow-sounding when tapped.
- Cool and enjoy: Let the rolls cool slightly on a wire rack before serving warm. Brush again with butter for extra softness and shine.
Pro tip: If your dough feels too sticky during kneading, resist the urge to add too much flour—slightly tacky dough yields softer rolls. Also, don’t rush the rising times; patience here makes all the difference in creating that cloud-like texture.
Cooking Tips & Techniques
Here are a few things I’ve learned from making these dinner rolls dozens of times (sometimes more than once a week—honestly, they can be addictive):
- Milk temperature matters: Too hot, and the yeast dies; too cold, and the dough won’t rise well. Aim for around 110°F (43°C) and use a kitchen thermometer to be sure.
- Kneading technique: Knead until the dough is smooth but still slightly soft. Over-kneading can make rolls tough, while under-kneading leads to dense texture.
- Don’t skimp on resting time: The double rise is key. Each proofing step lets the gluten relax and the yeast develop flavor and texture.
- Roll shaping: Take your time shaping the dough balls tightly to get a smooth top and even rise.
- Watch your baking time: The rolls should be golden but not dark brown. If your oven runs hot, start checking at 18 minutes.
- Butter finish: Brushing with melted butter right out of the oven locks in moisture and adds a beautiful sheen.
I once skipped the second rise in a rush and ended up with flat, chewy rolls—not a good look. Now, I’ve learned the slow and steady approach really pays off. Also, if you don’t have whole milk, I’ve made these with a mix of milk and cream for an extra tender crumb.
Variations & Adaptations
This recipe is a great base for customization depending on your mood, diet, or what’s in your pantry:
- Herb-Infused Rolls: Add 1-2 tablespoons of finely chopped fresh herbs like rosemary, thyme, or chives to the dough for a fragrant twist.
- Gluten-Free Option: Substitute with a gluten-free all-purpose flour blend designed for yeast breads (check for xanthan gum included), though texture will be a bit denser.
- Whole Wheat Version: Replace half the all-purpose flour with whole wheat flour for a nuttier flavor and heartier texture.
- Sweet Rolls: Increase sugar to ¼ cup and add a teaspoon of cinnamon or vanilla extract for a soft, slightly sweetened roll perfect for breakfast.
- Vegan Friendly: Use plant-based milk and vegan butter, and replace the egg with a flax egg (1 tablespoon flaxseed meal + 3 tablespoons water).
One personal favorite is brushing the rolls with garlic herb butter after baking, especially when serving alongside a rich main like the red wine braised short ribs. It turns a simple roll into a seriously tasty treat.
Serving & Storage Suggestions
These tender dinner rolls are best served warm, straight from the oven, brushed with a little melted butter for that irresistible shine and softness. They pair wonderfully with soups, stews, or as a side for hearty mains.
If you’re hosting a brunch or party, these rolls go hand-in-hand with creamy spreads like the classic hummus or the creamy dill pickle dip, making them a versatile crowd-pleaser.
To store, keep the rolls in an airtight container at room temperature for up to 2 days. For longer storage, freeze cooled rolls in a zip-top bag for up to 3 months. When ready to eat, thaw overnight and warm in the oven at 300°F (150°C) for 5-10 minutes to revive that fresh-baked softness.
Flavors tend to mellow and deepen slightly after a day, so these rolls are actually great for making sandwiches or toast the next day. Just don’t be surprised if everyone sneaks one warm before dinner!
Nutritional Information & Benefits
Each tender dinner roll (based on 12 rolls per batch) contains approximately:
| Nutrient | Amount per Roll |
|---|---|
| Calories | 140 |
| Carbohydrates | 22g |
| Protein | 4g |
| Fat | 4g |
| Fiber | 1g |
| Sugar | 2g |
The key ingredients like milk and eggs contribute protein and essential nutrients like calcium and B vitamins, while butter adds a touch of healthy fats that help keep the texture soft. For those mindful of allergens, this recipe contains dairy, eggs, and gluten, but can be adapted for many dietary needs as mentioned earlier.
From a wellness perspective, homemade bread like this lets you control the ingredients—no preservatives or strange additives—and provides a comforting, nourishing food to enjoy with loved ones.
Conclusion
If you’ve been searching for a tender, soft dinner roll recipe that doesn’t require a ton of fuss but delivers bakery-worthy results, this one’s for you. The combination of simple ingredients, patient rising, and gentle kneading creates rolls that are light, buttery, and melt in your mouth with every bite.
Feel free to make these rolls your own—add herbs, swap out flours, or serve them with your favorite dips like the brie cherry pastry cups at your next party. I love how these rolls bring a little softness and warmth to my table, no matter the meal or mood.
Give them a try, and don’t hesitate to share your tweaks or stories—they’re the kind of recipe that feels better when shared. Happy baking!
FAQs About Tender Cloud-Like Dinner Rolls
How can I tell if my yeast is still active?
When you mix yeast with warm milk and sugar, it should foam and bubble within 5-7 minutes. If it doesn’t, your yeast may be expired or the liquid temperature was off.
Can I use instant yeast instead of active dry yeast?
Yes, you can use instant yeast. Reduce the warm liquid slightly and add the yeast directly to the flour before mixing. Instant yeast usually works faster, so watch the rising times.
Why are my rolls dense instead of soft and fluffy?
You might be using too much flour, kneading too little, or not allowing enough rising time. Make sure the dough is slightly sticky and give it enough time to double in size during both rises.
Can I make the dough ahead of time?
Absolutely! After the first rise, punch down the dough, cover tightly, and refrigerate overnight. Let it come to room temperature and rise again before shaping and baking.
How do I keep the rolls soft after baking?
Brush them with melted butter immediately after baking and store in an airtight container. Reheat gently with a little foil to keep moisture locked in.
Pin This Recipe!

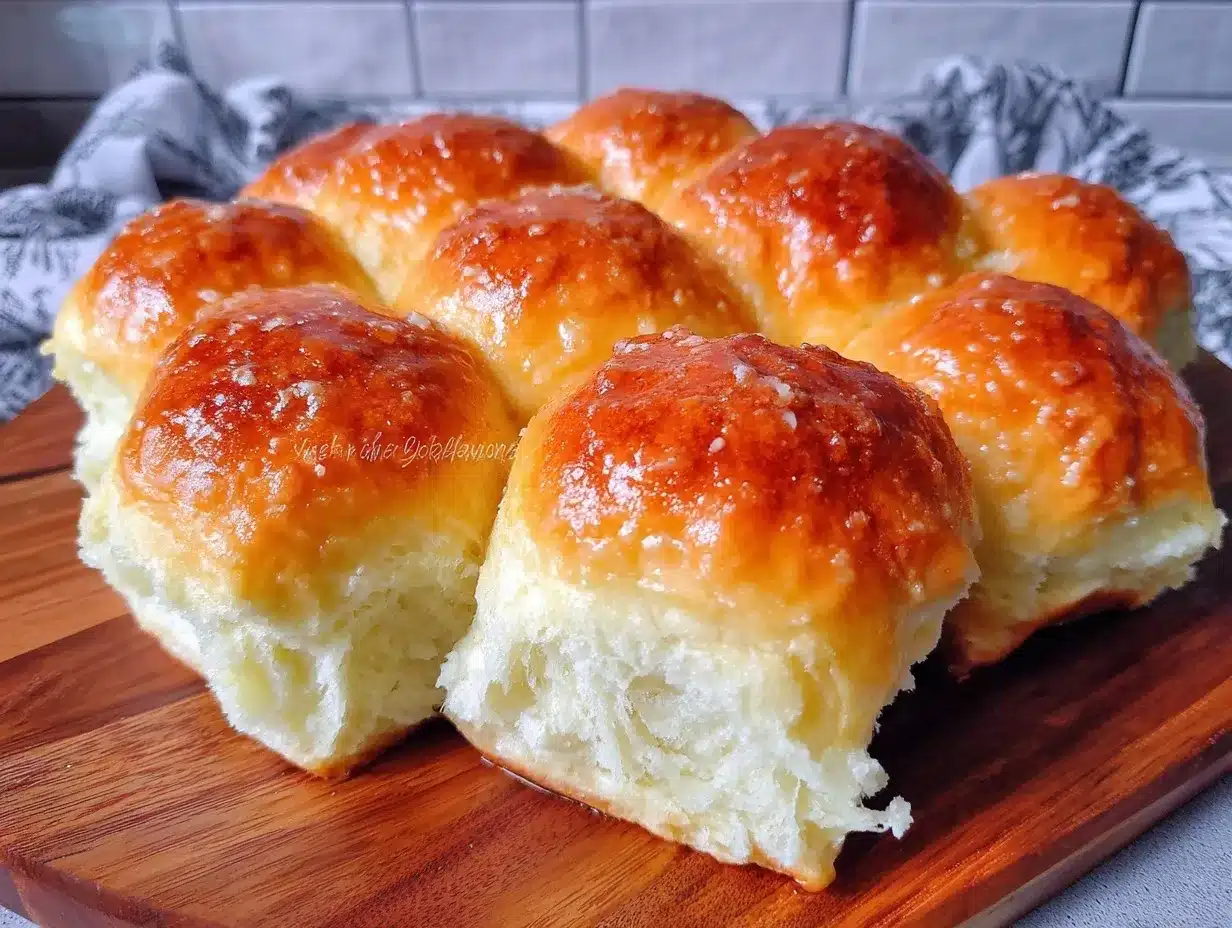
Tender Cloud-Like Dinner Rolls

These tender, soft dinner rolls melt in your mouth with every bite. Made with simple ingredients and a gentle kneading technique, they are perfect for any occasion and pair well with a variety of meals.
- Prep Time: 20 minutes
- Cook Time: 20 minutes
- Total Time: 1 hour 50 minutes
- Yield: 12 rolls 1x
- Category: Bread
- Cuisine: American
Ingredients
- 4 cups (480 grams) all-purpose flour
- 2 ¼ teaspoons (one packet) active dry yeast
- 1 cup (240 ml) warm whole milk (around 110°F / 43°C)
- 2 tablespoons granulated sugar
- 4 tablespoons (57 grams) unsalted butter, softened
- 1 large egg, room temperature
- 1 ½ teaspoons salt
- Optional: melted butter for brushing the tops
Instructions
- Activate the yeast: In a small bowl, stir the sugar into warm milk (110°F / 43°C), then sprinkle the yeast on top. Let it sit for about 5-7 minutes until foamy and bubbly.
- Mix the dough: In a large bowl, combine 3 ½ cups (420 grams) of the flour with the salt. Add the softened butter, egg, and the yeast-milk mixture. Stir with a wooden spoon or dough hook until the dough starts to come together. It will be sticky.
- Knead the dough: Turn the dough out onto a lightly floured surface. Knead for about 8-10 minutes, gradually adding the remaining flour as needed, until the dough is smooth, elastic, and slightly tacky but not sticky. If using a stand mixer, knead with the dough hook on medium speed for 6-8 minutes.
- First rise: Place the dough in a lightly oiled bowl, cover with a towel or plastic wrap, and let it rise in a warm spot for 1 to 1 ½ hours until doubled in size.
- Shape the rolls: Punch down the dough gently to release air. Divide into 12 equal portions (about 2 oz / 57 grams each). Shape each piece into a smooth ball by pulling the edges under and pinching the bottom. Arrange the rolls on a greased baking sheet or in a round cake pan, spacing them evenly.
- Second rise: Cover the rolls loosely and let them rise again for 30-40 minutes until puffy and nearly doubled.
- Bake: Preheat your oven to 375°F (190°C). Brush the tops of the rolls with melted butter if desired. Bake for 18-22 minutes until golden brown on top and hollow-sounding when tapped.
- Cool and enjoy: Let the rolls cool slightly on a wire rack before serving warm. Brush again with butter for extra softness and shine.
Notes
Use a kitchen thermometer to ensure milk is about 110°F to activate yeast properly. Knead until dough is smooth but slightly tacky for soft rolls. Do not rush rising times; patience is key for fluffy texture. Brushing rolls with melted butter after baking adds softness and shine. Dough can be refrigerated overnight after first rise for convenience.
Nutrition
- Serving Size: 1 roll
- Calories: 140
- Sugar: 2
- Fat: 4
- Carbohydrates: 22
- Fiber: 1
- Protein: 4
Keywords: dinner rolls, soft rolls, homemade bread, easy bread recipe, yeast rolls, tender rolls, baking, bread recipe


