
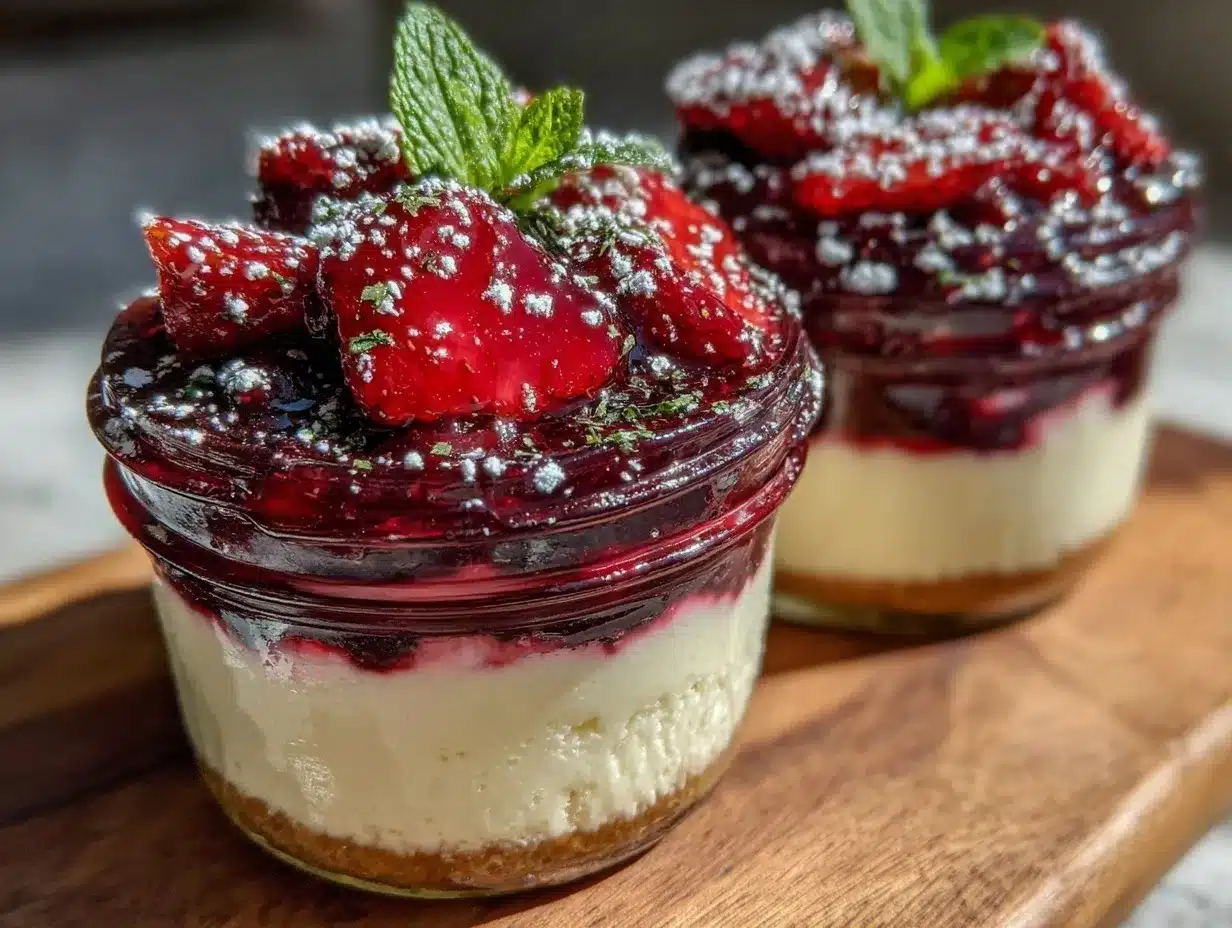
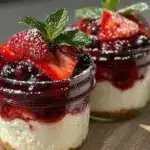
Stacking jars on the counter while the kids were running around yelling about fireworks, I realized I was out of my usual dessert idea for the Fourth of July party. Half a bag of frozen blueberries, some leftover strawberries, and a frantic dash to the pantry for cream cheese—there was no time to mess around. Honestly, I wasn’t sure if these red white and blue layered cheesecake jars would come together in time or if anyone would even like them. But as I layered the creamy cheesecake filling between vibrant berry layers, that sweet tang mixed with the cool, smooth texture reminded me why this recipe stuck around.
It’s funny how the chaos of a holiday rush can lead to the best discoveries. These jars aren’t just festive; they’re a quick, grab-and-go treat that somehow manages to feel special without the fuss. The colors pop beautifully, the flavors balance just right, and the best part? No slicing or serving plates needed when you’re juggling kids and sparklers. This recipe is now my go-to, especially when I want a patriotic dessert that’s easy and actually tastes like something homemade — not just store-bought sugar in a fancy cup.
So, if you’re in the middle of your own party prep scramble or just want a dessert that makes you smile quietly after the first bite, these cheesecake jars are the ticket. They’ve become a little tradition in my kitchen, a reminder that sometimes the best recipes come from last-minute saves and a bit of improvisation.
Why You’ll Love This Recipe
After testing multiple versions of these red white and blue layered cheesecake jars, I can confidently say this recipe hits all the right notes — and then some. Here’s what makes it stand out:
- Quick & Easy: Ready in under 30 minutes, perfect when you’re juggling family, friends, and fireworks.
- Simple Ingredients: No exotic grocery runs — just cream cheese, berries, sugar, and a few pantry staples.
- Perfect for Patriotic Celebrations: Whether it’s July 4th, Memorial Day, or any summer BBQ, these jars fit the vibe.
- Crowd-Pleaser: Kids love the bright layers, adults appreciate the balance of sweet and tangy creaminess.
- Unbelievably Delicious: The creamy cheesecake contrasts beautifully with fresh berries — it’s like summer in a jar.
- Unique Layering Technique: The cheesecake filling is whipped to a silky smooth texture, making each spoonful melt in your mouth.
What really sets this apart is the ease of assembly and the way the layers stay distinct yet harmonious. Unlike some layered desserts that can get soggy or blend into a mess, this holds up well, making it perfect for potlucks or picnics. Honestly, it’s the kind of dessert that will make you close your eyes after a bite and just savor the moment. And if you want a lighter twist, swapping in Greek yogurt for part of the cream cheese adds a subtle tang and cuts the richness without losing that creamy goodness.
What Ingredients You Will Need
This recipe uses simple, wholesome ingredients to deliver bold flavor and a satisfying texture without any fuss. Most of these are pantry or fridge staples, and the berries bring fresh, seasonal brightness that’s just right for patriotic celebrations.
- For the Cheesecake Filling:
- 8 oz (225g) cream cheese, softened (I prefer Philadelphia for its smooth texture)
- 1/2 cup (100g) granulated sugar
- 1 tsp vanilla extract
- 1 cup (240ml) heavy whipping cream, chilled
- 1 tbsp lemon juice (adds a subtle brightness)
- For the Red Layer:
- 1 cup (150g) fresh strawberries, hulled and sliced
- 1 tbsp sugar (optional, depending on berry sweetness)
- 1 tsp lemon juice
- For the Blue Layer:
- 1 cup (150g) fresh or frozen blueberries
- 1 tbsp sugar (optional)
- 1 tsp lemon juice
- For the Base:
- 1 cup (100g) graham cracker crumbs (or digestive biscuits)
- 3 tbsp unsalted butter, melted
- 1 tbsp sugar
Feel free to swap the graham cracker crumbs with gluten-free cookies or almond flour for a gluten-free base. For a dairy-free twist, cream cheese alternatives like cashew-based cheese work surprisingly well, though texture will differ slightly. In the summer, I love using fresh, ripe berries for the best natural sweetness, but frozen berries are a solid backup if you’re prepping ahead.
Equipment Needed
These red white and blue layered cheesecake jars don’t call for fancy gadgets. Here’s what I used and recommend:
- Mixing bowls (one large for the cheesecake filling, smaller ones for berry prepping)
- Electric hand mixer or stand mixer (to whip the cream cheese and heavy cream smoothly)
- Measuring cups and spoons (precision helps with balance)
- Spatula (for folding ingredients without losing air)
- Small jars or clear glasses (4 to 6 oz size works well for individual servings)
- Food processor or rolling pin (to crush graham crackers into fine crumbs)
If you don’t have a food processor, placing the crackers in a zip-top bag and crushing them with a rolling pin works just fine. I’ve done that plenty of times when my processor was buried under kitchen clutter. For whipping cream, while a hand mixer is easiest, a whisk and some elbow grease can get you there — just expect it to take a bit longer. Pro tip: chilling your bowl and beaters beforehand helps the cream whip faster.
Preparation Method
- Prepare the crust base: Combine graham cracker crumbs, melted butter, and sugar in a bowl. Mix until the crumbs are evenly coated and look like wet sand. Divide the mixture evenly among your jars and press down firmly with the back of a spoon to create a compact base. This step should take about 5 minutes.
- Make the strawberry layer: In a small bowl, mash the strawberries with sugar and lemon juice using a fork or potato masher. You want a chunky puree, not a smooth sauce — the texture adds character. Set aside for 5-10 minutes to let the flavors meld.
- Prepare the blueberry layer: Repeat the process with blueberries, sugar, and lemon juice. If using frozen berries, thaw and drain excess juice before mashing. This keeps the layers from becoming too watery.
- Whip the cheesecake filling: In a large mixing bowl, beat the softened cream cheese with sugar and vanilla extract until smooth and creamy. Add lemon juice and mix briefly. In a chilled bowl, whip the heavy cream until stiff peaks form. Gently fold the whipped cream into the cream cheese mixture using a spatula, trying not to deflate the air you just incorporated. This step is crucial to keep the filling light and fluffy. Expect about 10 minutes for this whole process.
- Assemble the jars: Spoon a layer of the whipped cheesecake filling over the crust in each jar (about 2 tablespoons). Follow with a layer of strawberry puree (about 1 tablespoon), then another cheesecake layer. Next, add the blueberry layer, and finish with a final cheesecake dollop on top. You want the layers distinct and colorful, so take your time with spoon placement. This step will take roughly 10-15 minutes.
- Chill and set: Refrigerate the jars for at least 2 hours, ideally overnight. This helps the crust firm up and the flavors meld together. If you’re in a rush, 1 hour is the bare minimum but the texture won’t be quite as perfect.
If the cheesecake filling feels too soft during assembly, a quick chill in the fridge for 10-15 minutes can help it firm up so your layers stay neat. And don’t worry if your berries release a little juice while chilling; that natural syrup just seeps into the cheesecake for extra flavor.
Cooking Tips & Techniques
When making layered desserts like these cheesecake jars, a few little tricks make a big difference. First, whipping the cream cheese and the heavy cream separately and folding gently keeps the cheesecake filling light — you don’t want a dense, heavy blob. I’ve learned this the hard way after ending up with a thick, gluey texture that no one wanted to eat.
Another tip: use ripe but firm berries. Overripe fruit can get mushy and watery, making your layers bleed into each other. If you’re pressed for time, chill the mashed berries before layering; it helps keep the layers intact.
Don’t skip the crust pressing — a well-packed base stops the dessert from feeling crumbly and messy. I recommend pressing firmly with the back of a spoon or even your fingers (clean, of course!).
Timing is key — assemble just before chilling so the layers don’t get soggy. If you’re juggling multiple dishes, like the creamy deviled eggs or the brie cherry pastry cups I like to make ahead, these cheesecake jars can chill while you handle those savory starters.
Variations & Adaptations
These cheesecake jars are surprisingly flexible, so you can tweak them to suit your taste or dietary needs:
- Berry swap: Use raspberries or blackberries instead of strawberries or blueberries for a different berry profile. In summer, fresh peaches or mangoes layered with blueberries create a sweet, tropical vibe.
- Yogurt twist: Substitute half the cream cheese with Greek yogurt to add tang and lighten the richness — great if you want something less heavy but still creamy.
- Gluten-free crust: Swap graham crackers for gluten-free cookie crumbs or crushed nuts like almonds or pecans. The texture is slightly different but still deliciously crunchy.
- Vegan adaptation: Use vegan cream cheese and coconut cream whipped until fluffy. Use maple syrup instead of sugar for sweetness.
I once tried adding a swirl of homemade blueberry jam in the blue layer; it turned out beautifully vibrant and added a rich sweetness that balanced the tang of the cheesecake filling. Feel free to experiment — these jars are forgiving and fun!
Serving & Storage Suggestions
Serve these cheesecake jars chilled, straight from the fridge, so each spoonful stays cool and creamy. They look especially festive topped with a few fresh berries or a sprig of mint for that extra pop of color.
Pair them with a light sparkling lemonade or an iced tea with lemon slices to keep the celebration fresh and bright. These jars also make a neat contrast to rich, savory dishes like creamy baked crab dip, balancing out the flavors on your party table.
Store leftovers in the refrigerator, covered tightly with plastic wrap or lids if your jars have them. They keep well for 3-4 days, but honestly, they rarely last that long! For longer storage, freeze the jars (without the fresh berry layers) and thaw overnight in the fridge. Fresh berries don’t freeze well, so add them fresh after thawing if you like.
The flavors deepen and meld after a day or two, so if you can wait, it tastes even better the next day. Just give the jars a gentle stir before serving to freshen up the layers.
Nutritional Information & Benefits
Each jar (serving size approx. 4 oz / 120g) contains roughly:
| Calories | 280-320 kcal |
|---|---|
| Protein | 5-7 grams |
| Fat | 18-22 grams (mostly from cream cheese and butter) |
| Carbohydrates | 20-25 grams (from berries and sugar) |
| Fiber | 2-3 grams (thanks to fresh berries) |
The cream cheese provides a decent amount of calcium and protein, while the fresh berries offer antioxidants and vitamin C — a little indulgence with a touch of nutrition. For those watching carbs, reducing sugar or substituting with a sugar alternative can cut down the carbs without losing much of the flavor. Be mindful of allergies to dairy or gluten, but as mentioned, substitutions are possible to accommodate those needs.
Conclusion
These perfect red white and blue layered cheesecake jars have earned a permanent spot in my holiday dessert lineup. They’re easy enough to whip up last-minute but taste like you spent hours fussing over them. You can switch up the berry layers, adjust sweetness, or even lighten the filling to make them your own.
What I love most is how they bring a little festive joy with every bite — colorful, creamy, and just the right amount of sweet. If you try them out, I’d love to hear how you made them your own or what berry combos you chose. Sharing food stories like this makes the kitchen feel a little cozier, don’t you think?
Here’s to simple desserts that shine as bright as the fireworks — enjoy every bite!
FAQs About Red White and Blue Layered Cheesecake Jars
Can I make these cheesecake jars ahead of time?
Absolutely! They taste even better after chilling for a few hours or overnight. Just add fresh berries right before serving if you want them to stay vibrant and firm.
What if I don’t have fresh berries?
Frozen berries work fine — just thaw and drain excess juice before using to prevent watery layers.
How can I make the cheesecake filling less rich?
Try swapping half the cream cheese with Greek yogurt or use reduced-fat cream cheese for a lighter texture.
Are these jars suitable for kids?
Yes! Kids love the colorful layers and creamy texture. Just watch out for any berry allergies.
Can I use other types of cookies for the crust?
Definitely! Graham crackers are classic, but digestive biscuits, vanilla wafers, or gluten-free cookies all work well depending on your preference.
Pin This Recipe!
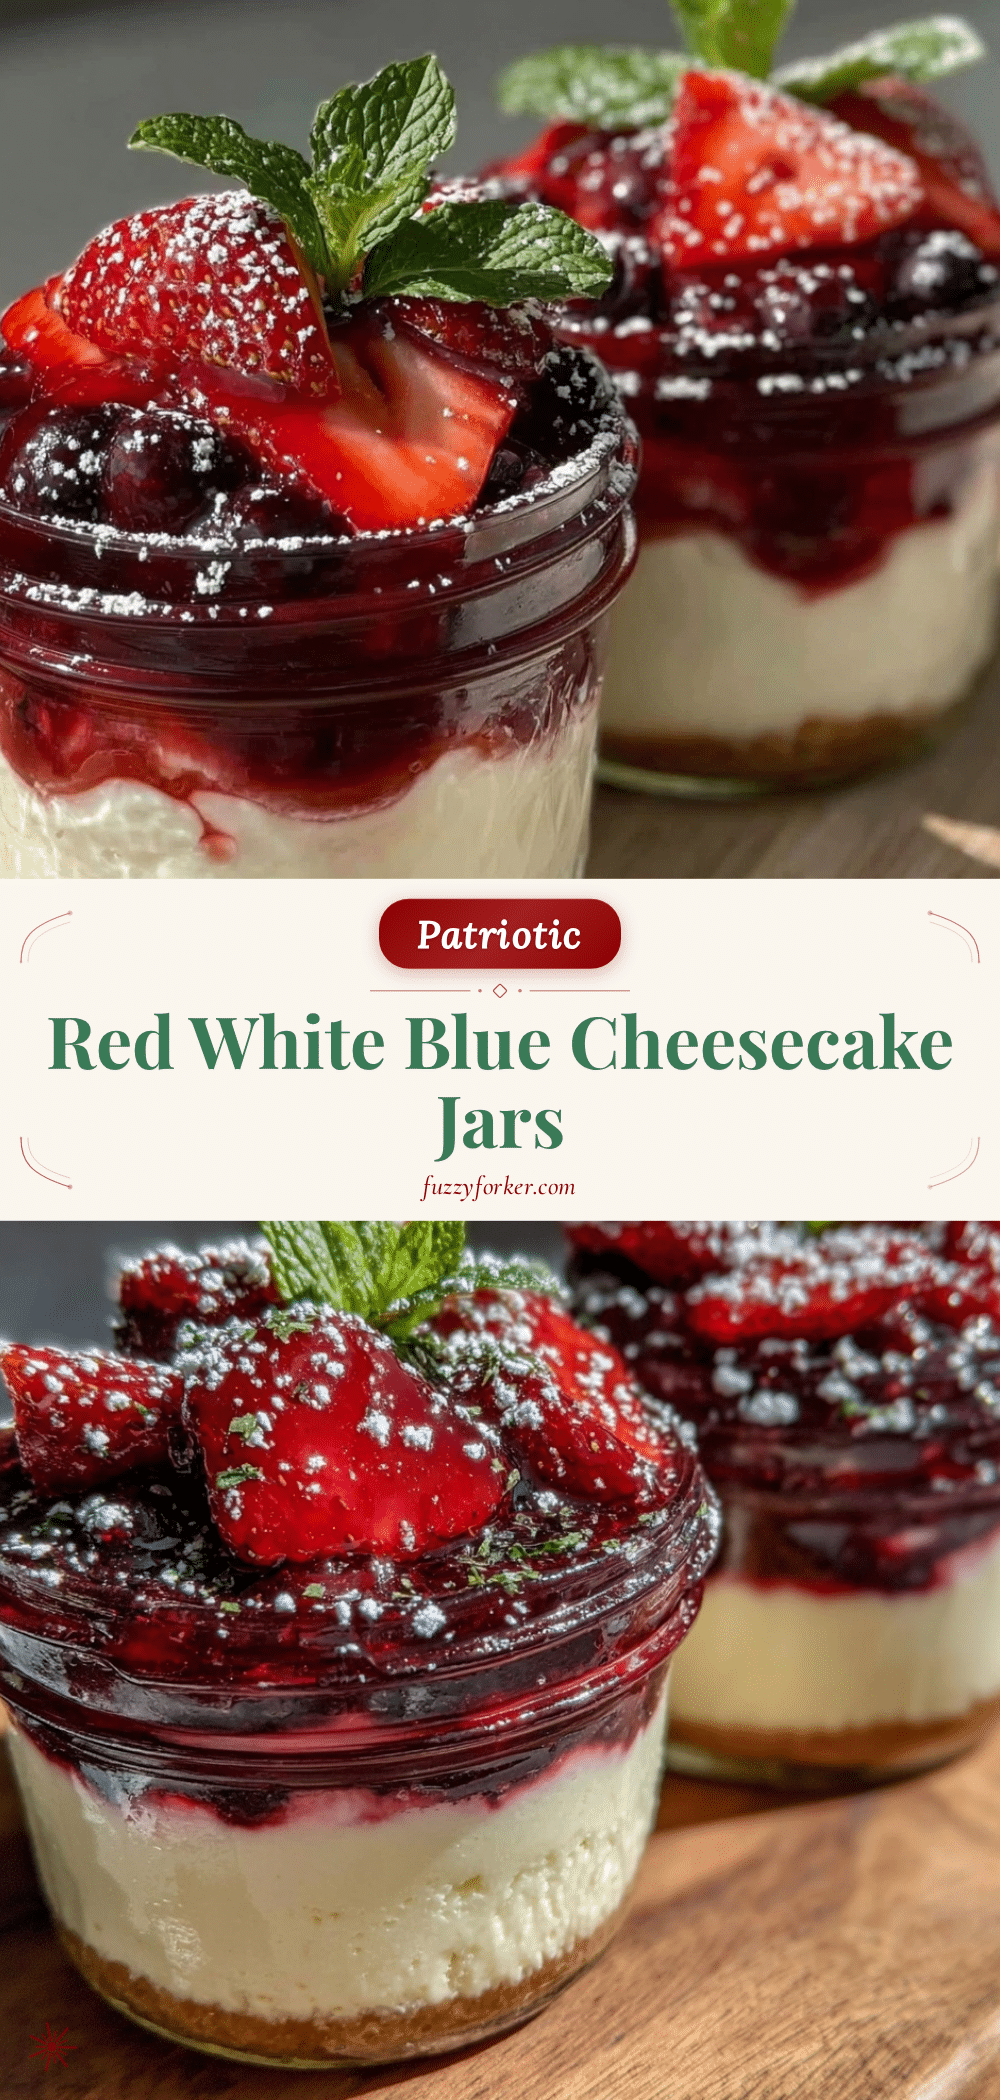
Perfect Red White and Blue Layered Cheesecake Jars
A quick and easy patriotic dessert featuring layered cheesecake filling with fresh strawberries and blueberries in individual jars, perfect for Fourth of July celebrations.
- Prep Time: 15 minutes
- Cook Time: 0 minutes
- Total Time: 2 hours 15 minutes
- Yield: 6 servings 1x
- Category: Dessert
- Cuisine: American
Ingredients
- 8 oz cream cheese, softened
- 1/2 cup granulated sugar
- 1 tsp vanilla extract
- 1 cup heavy whipping cream, chilled
- 1 tbsp lemon juice
- 1 cup fresh strawberries, hulled and sliced
- 1 tbsp sugar (optional, depending on berry sweetness)
- 1 tsp lemon juice
- 1 cup fresh or frozen blueberries
- 1 tbsp sugar (optional)
- 1 tsp lemon juice
- 1 cup graham cracker crumbs (or digestive biscuits)
- 3 tbsp unsalted butter, melted
- 1 tbsp sugar
Instructions
- Prepare the crust base: Combine graham cracker crumbs, melted butter, and sugar in a bowl. Mix until the crumbs are evenly coated and look like wet sand. Divide the mixture evenly among your jars and press down firmly with the back of a spoon to create a compact base. This step should take about 5 minutes.
- Make the strawberry layer: In a small bowl, mash the strawberries with sugar and lemon juice using a fork or potato masher. You want a chunky puree, not a smooth sauce — the texture adds character. Set aside for 5-10 minutes to let the flavors meld.
- Prepare the blueberry layer: Repeat the process with blueberries, sugar, and lemon juice. If using frozen berries, thaw and drain excess juice before mashing. This keeps the layers from becoming too watery.
- Whip the cheesecake filling: In a large mixing bowl, beat the softened cream cheese with sugar and vanilla extract until smooth and creamy. Add lemon juice and mix briefly. In a chilled bowl, whip the heavy cream until stiff peaks form. Gently fold the whipped cream into the cream cheese mixture using a spatula, trying not to deflate the air you just incorporated. This step is crucial to keep the filling light and fluffy. Expect about 10 minutes for this whole process.
- Assemble the jars: Spoon a layer of the whipped cheesecake filling over the crust in each jar (about 2 tablespoons). Follow with a layer of strawberry puree (about 1 tablespoon), then another cheesecake layer. Next, add the blueberry layer, and finish with a final cheesecake dollop on top. You want the layers distinct and colorful, so take your time with spoon placement. This step will take roughly 10-15 minutes.
- Chill and set: Refrigerate the jars for at least 2 hours, ideally overnight. This helps the crust firm up and the flavors meld together. If you’re in a rush, 1 hour is the bare minimum but the texture won’t be quite as perfect.
Notes
Chill the bowl and beaters before whipping cream for faster results. Use ripe but firm berries to prevent watery layers. Press crust firmly to avoid crumbly texture. Assemble just before chilling to keep layers distinct. For a lighter version, substitute half the cream cheese with Greek yogurt. Gluten-free and vegan adaptations are possible with ingredient swaps.
Nutrition
- Serving Size: Approximately 4 oz (
- Calories: 280320
- Fat: 1822
- Carbohydrates: 2025
- Fiber: 23
- Protein: 57
Keywords: cheesecake jars, patriotic dessert, Fourth of July dessert, layered cheesecake, berry dessert, easy cheesecake, no bake cheesecake


