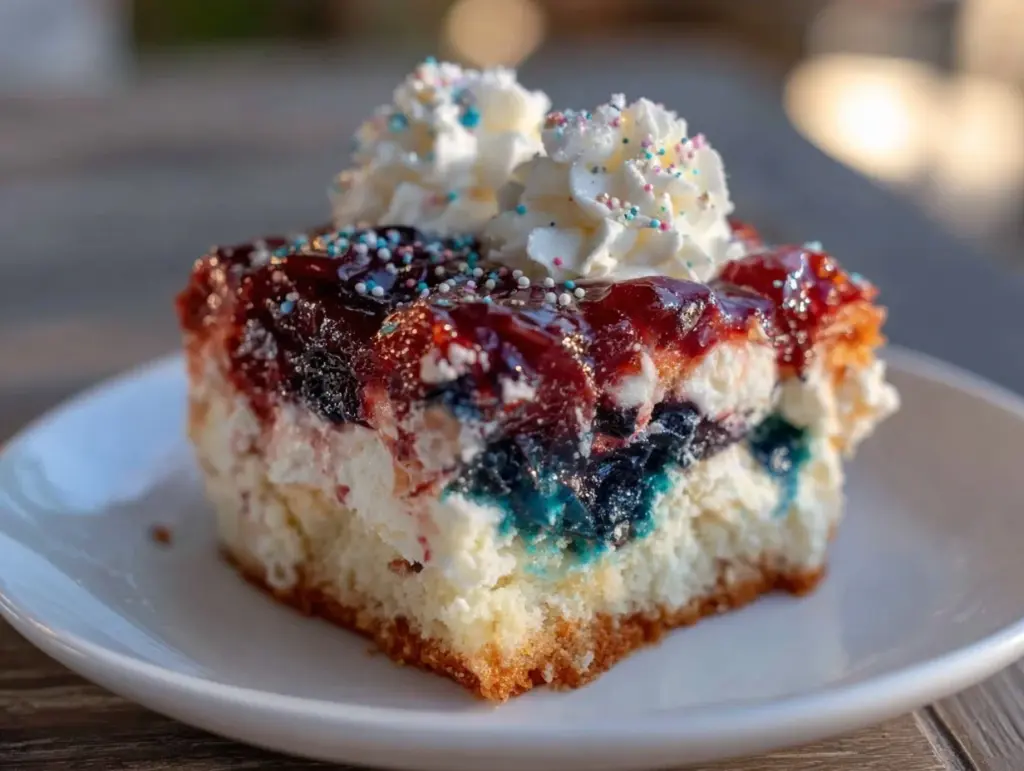
“Hey, have you ever tried a poke cake that actually looks like a celebration on a plate?” my neighbor asked me one summer afternoon, holding a plate dripping with vibrant colors. Honestly, I was skeptical at first — poke cakes always seemed like a lazy shortcut, but this one? It had Jello layers that shimmered red, white, and blue, perfectly capturing that festive vibe without the fuss.
That afternoon, I found myself in my kitchen poking holes into a simple vanilla cake, watching the Jello seep in and settle into those tiny pockets. The smell of sweet berries mixed with the creamy notes of whipped topping filled the air. It wasn’t just a dessert; it felt like a patriotic moment on a plate, easy yet full of personality. I couldn’t help but smile, thinking how this Flavorful Stars and Stripes Poke Cake with Jello Layers would be the perfect companion for any summer barbecue or Fourth of July picnic.
What struck me most was how the layers weren’t just visually stunning — they tasted like a nostalgic remix of childhood flavors, but with a grown-up twist. It quickly became one of those recipes I made multiple times in a week, especially when friends dropped by unexpectedly or when I needed a sweet reminder that simple treats can bring people together. This cake isn’t just about the colors; it’s about the joy in sharing something fun and delicious without spending all day in the kitchen.
So if you’re looking for a dessert that’s as much about the vibe as it is the flavor, this poke cake might just be your new favorite. It’s one of those recipes that sticks around because it’s easy, festive, and honestly, it feels like a small celebration with every bite.
Why You’ll Love This Recipe
After countless tries and tweaks, this Flavorful Stars and Stripes Poke Cake with Jello Layers stands out for plenty of reasons:
- Quick & Easy: Ready in about 45 minutes, this recipe fits right into busy schedules or last-minute party planning.
- Simple Ingredients: No need for fancy or hard-to-find items — everything is likely sitting in your pantry or fridge already.
- Perfect for Patriotic Occasions: Whether it’s a Fourth of July cookout, Memorial Day picnic, or Labor Day gathering, this cake screams celebration.
- Crowd-Pleaser: Kids love the bright Jello layers, and adults appreciate the light, refreshing texture — it’s a true all-ages hit.
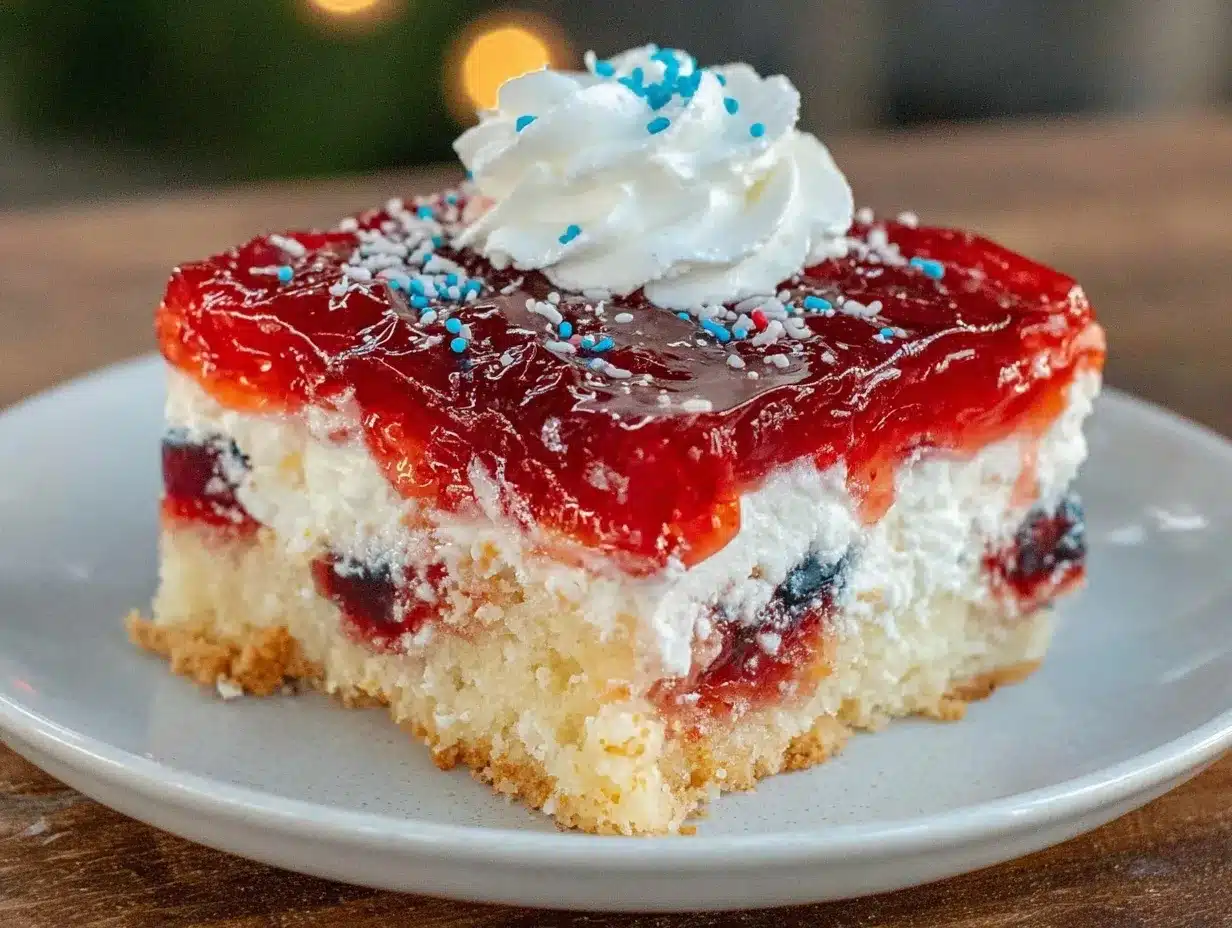
- Unbelievably Delicious: The way the Jello soaks into the cake’s nooks keeps every bite moist and bursting with flavor, cutting through the richness with a fruity zing.
What makes this poke cake different? It’s that balance of nostalgia and freshness — the hidden Jello layers add a fun surprise, while the whipped cream topping rounds it out with a silky finish. Instead of just pouring gelatin over cake, poking holes lets the flavors seep right in, making each forkful a little flavor explosion that you didn’t expect but definitely want.
Also, this recipe is forgiving. You can swap out flavors or colors without messing up the texture, and honestly, it’s become my go-to when I want something festive but don’t want to fuss over complicated baking techniques. It’s comfort food that’s lightened up just enough to feel special. Plus, if you’ve enjoyed the creamy goodness of my strawberry cheesecake bites, you’ll find this poke cake hits a similar sweet spot with a bit more showmanship.
What Ingredients You Will Need
This recipe uses simple, wholesome ingredients that come together to deliver bold flavors and a satisfying texture without fuss. Most are pantry or fridge staples, making it easy to whip up anytime.
- For the Cake Base:
- 1 box yellow or white cake mix (about 15.25 oz / 432 g) – I like Betty Crocker for consistent results
- Ingredients called for on the cake mix box (usually 3 large eggs, 1 cup water / 240 ml, and 1/3 cup vegetable oil / 80 ml)
- For the Jello Layers:
- 1 package (3 oz / 85 g) strawberry-flavored Jello – bright red and fruity
- 1 package (3 oz / 85 g) blueberry or berry mix Jello – deep blue/purple color
- 1 package (3 oz / 85 g) lemon or pineapple-flavored Jello – for the white-ish layer, subtle citrusy twist
- For the Topping:
- 2 cups heavy whipping cream (480 ml), chilled
- 1/4 cup powdered sugar (30 g) – adds sweetness without graininess
- 1 teaspoon vanilla extract (5 ml) – makes the cream extra luscious
- Optional Garnishes:
- Fresh berries like strawberries, blueberries, or raspberries – adds freshness
- Red and blue sprinkles or edible stars – for that extra festive touch
Feel free to swap the Jello flavors for other patriotic-inspired ones or use sugar-free options if you prefer. For a dairy-free whip topping, coconut cream works surprisingly well too, though texture changes slightly. If you want to get creative, check out my orange creamsicle poke cake for inspiration on layering flavors with Jello.
Equipment Needed
- 9×13 inch (23×33 cm) baking pan – glass or metal works fine
- Mixing bowls – at least two for cake batter and whipped cream
- Electric mixer or hand whisk – for whipping cream smoothly
- Wooden skewer or fork – to poke holes evenly in the baked cake
- Measuring cups and spoons – for precision
- Rubber spatula – handy for folding whipped cream
If you don’t have an electric mixer, a sturdy whisk and some patience will do. The poke holes don’t have to be perfectly spaced, just evenly distributed so the Jello seeps in nicely. Glass pans are great for watching the colors shine through the sides, but metal pans bake more evenly — I’ve tried both and it’s really a matter of preference.
Also, if you’re prepping in advance, a good airtight container to store leftovers is a must to keep the cake fresh and moist. Nothing worse than a dry poke cake, you know?
Preparation Method
- Preheat your oven to 350°F (175°C). Grease your 9×13 inch baking pan with butter or non-stick spray. This prevents sticking and helps the cake come out cleanly.
- Prepare the cake batter according to the box instructions — usually 3 large eggs, 1 cup water (240 ml), and 1/3 cup vegetable oil (80 ml). Mix until smooth but don’t overbeat; a few lumps are okay.
- Bake the cake in the preheated oven for 30-35 minutes or until a toothpick inserted in the center comes out clean. The cake should spring back lightly when pressed.
- Let the cake cool in the pan for about 15 minutes. It needs to be warm but not hot for the Jello to soak in properly.
- Prepare the Jello packets one at a time. Dissolve each Jello flavor in 1 cup (240 ml) of boiling water. Stir until fully dissolved, then add 1/2 cup (120 ml) cold water. Let each Jello cool slightly but remain liquid.
- Using a wooden skewer or fork, poke holes all over the cake, about 1 inch (2.5 cm) apart. This lets the Jello seep into every bite.
- Spoon or pour the first Jello flavor (e.g., strawberry) evenly over one-third of the cake. Try to get the liquid into the holes rather than just on top.
- Chill the cake in the refrigerator for about 30 minutes to let the first layer set slightly.
- Repeat the process with the second and third Jello flavors, letting each layer chill for 20-30 minutes before adding the next. This keeps the layers distinct and vibrant.
- Whip the heavy cream with powdered sugar and vanilla extract until soft peaks form. Be careful not to overwhip — that can turn it grainy or buttery.
- Spread the whipped cream evenly over the top of the cake once all Jello layers are set. This adds a creamy, cloud-like finish that balances the fruity layers beneath.
- Garnish with fresh berries and edible stars or sprinkles for an extra pop of color and texture.
- Refrigerate the cake for at least an hour before serving to let all the flavors meld beautifully.
Pro tip: When poking holes, don’t press too hard or you might break the cake apart. Also, pouring Jello slowly helps it seep in instead of pooling on top. If you’re short on time, you can prepare the Jello layers in advance and pour right before serving for a fresher look.
Cooking Tips & Techniques
One thing I learned early on is that the temperature of the cake when you pour the Jello makes all the difference. If it’s too hot, the Jello melts and mixes messily; too cold and it won’t soak in well. Warm but not hot is the sweet spot.
Whipping the cream right is another trick. I usually chill my mixing bowl and beaters beforehand to get a fluffier whip faster. Overwhipping makes it turn grainy, which is a rookie mistake I’ve made more than I’d like to admit!
Timing the layers is key to keeping the stars and stripes visually distinct. Letting each Jello layer chill until just set but still tacky helps the next layer stick without blending colors. Patience here pays off with a more dramatic presentation.
For an even easier option, you can skip the layering and mix two Jello flavors together for a marbled effect — still festive but less precise. This trick came in handy during a last-minute potluck, and everyone loved the flavor combo.
If you want to get adventurous, try this poke cake alongside savory sides like creamy deviled eggs (you might enjoy this creamy deviled eggs recipe) or a bright marinated olive dish for balance. Sweet and savory always hits the spot.
Variations & Adaptations
- Dietary swaps: Use gluten-free cake mix and sugar-free Jello for a diet-conscious version. Coconut whipped cream works great for dairy-free.
- Flavor twists: Swap the Jello flavors for tropical options like mango, coconut, and pineapple for a summer beach vibe.
- Seasonal spins: Around Christmas, try red and green Jello layers with peppermint whipped cream for a festive twist.
- Alternative toppings: Try cream cheese frosting or a light mascarpone spread instead of whipped cream for a richer finish.
- Cooking method adjustment: If you prefer cupcakes, poke each one and layer Jello similarly for fun, portable servings.
Personally, I once added a layer of fresh crushed strawberries between the Jello layers for an extra fruity pop. It was messy but totally worth it for that fresh texture.
Serving & Storage Suggestions
This poke cake is best served chilled, straight from the fridge for that cool, refreshing texture. Slice with a sharp knife cleaned between cuts to keep layers neat.
Pair it with light beverages like iced tea, lemonade, or a sparkling berry mocktail to complement the fruity flavors. For a full festive spread, consider adding savory bites such as baked crab dip or marinated olives to balance richness.
Store leftovers tightly covered in the refrigerator for up to 3 days. The flavors deepen over time, but the whipped cream topping is best fresh. You can freeze slices wrapped well in plastic wrap and foil for up to 2 months; thaw overnight in the fridge before serving.
Reheat is not recommended — this cake is all about cool, fruity freshness. Letting it sit at room temp for 10 minutes before serving softens the Jello layers slightly, making it easier to cut without losing shape.
Nutritional Information & Benefits
This dessert offers about 300-350 calories per serving (1/12th of the cake), with a balance of carbs and fats from the cake and cream. The Jello adds minimal calories but plenty of flavor.
Key ingredients like heavy cream provide calcium and vitamin A, while the fruit-flavored Jello (especially if made with real fruit juice) can contribute antioxidants. Using sugar-free or low-sugar Jello cuts down on added sugars.
It’s gluten-friendly if you use a gluten-free cake mix, and dairy-free options with coconut cream make it accessible for different diets. However, those with gelatin allergies or strict vegetarian diets might want to substitute with agar-agar-based gelatin alternatives.
From my wellness perspective, this cake hits that sweet spot between indulgence and lightness — not too heavy but still satisfying, so you don’t feel sluggish afterward.
Conclusion
This Flavorful Stars and Stripes Poke Cake with Jello Layers is a simple, joyful recipe that brings color and fun to any dessert table without the stress. It’s flexible, forgiving, and downright delicious — perfect for casual family gatherings or impressing guests with minimal effort.
Feel free to tweak flavors or layer order to suit your taste — the recipe’s forgiving nature means you can’t really go wrong. I love how it manages to be both nostalgic and fresh, a rare combo in desserts.
If you’ve tried this poke cake or made your own spin on it, I’d love to hear about your version. Sharing these little kitchen wins feels like adding stars to my own stripes.
Here’s to making sweet memories, one colorful slice at a time!
Frequently Asked Questions
Can I use homemade cake instead of a box mix?
Absolutely! A simple vanilla or white cake from scratch works well. Just make sure it’s sturdy enough to hold the Jello layers without falling apart.
How long should I chill the Jello layers?
About 20-30 minutes per layer is ideal. You want it set enough to hold shape but still tacky so the next layer sticks well.
Can I make this poke cake ahead of time?
Yes! It actually tastes great after resting overnight, which lets the flavors meld beautifully. Just keep it covered tightly in the fridge.
What if I don’t like Jello?
You can replace Jello with flavored gelatin alternatives or even fruit syrups, but the classic poke cake texture relies on the gelatin soaking in, so expect a different result.
Is there a way to make this cake kid-friendly?
This recipe is already kid-friendly, but you can reduce sugar or use natural fruit-flavored gelatin to make it even better for little ones.
Pin This Recipe!
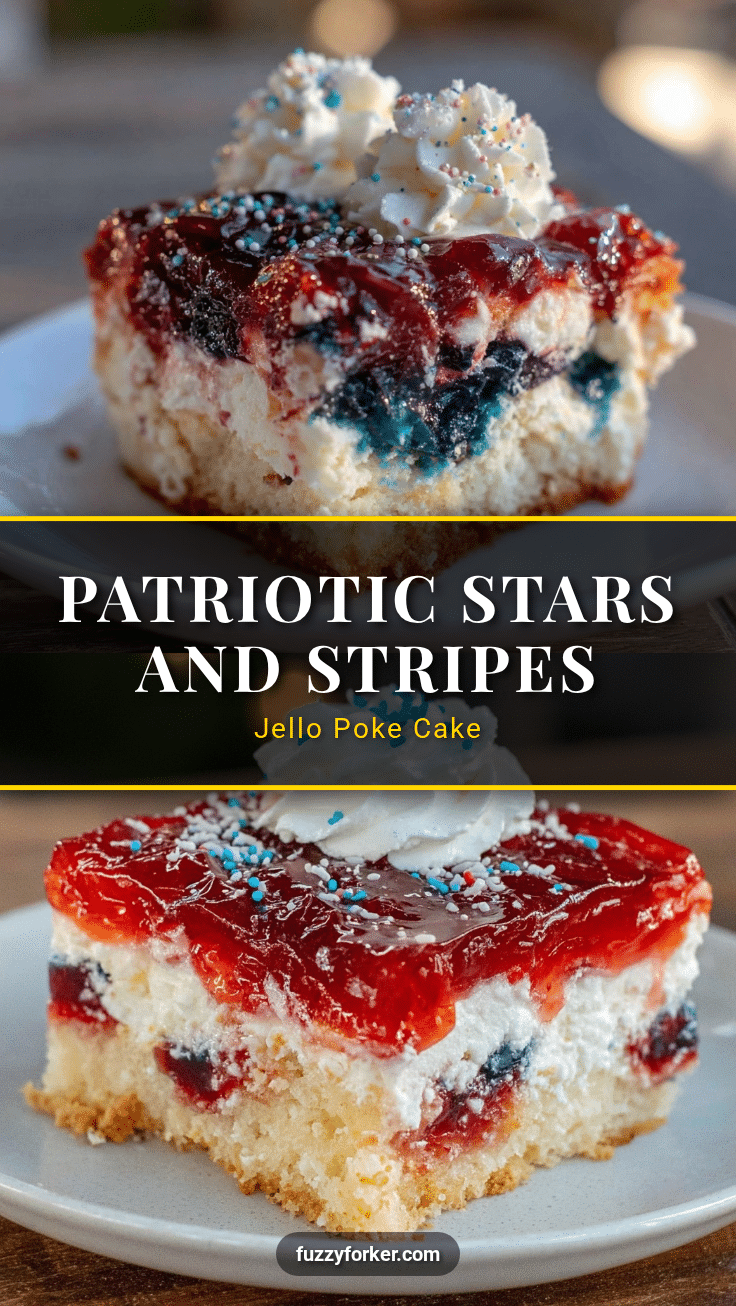
Flavorful Stars and Stripes Poke Cake Easy Patriotic Jello Dessert Recipe
A festive and easy poke cake featuring vibrant red, white, and blue Jello layers soaked into a moist vanilla cake, topped with whipped cream and perfect for patriotic celebrations.
- Prep Time: 15 minutes
- Cook Time: 35 minutes
- Total Time: 50 minutes
- Yield: 12 servings 1x
- Category: Dessert
- Cuisine: American
Ingredients
- 1 box yellow or white cake mix (about 15.25 oz / 432 g)
- Ingredients called for on the cake mix box (usually 3 large eggs, 1 cup water / 240 ml, and 1/3 cup vegetable oil / 80 ml)
- 1 package (3 oz / 85 g) strawberry-flavored Jello
- 1 package (3 oz / 85 g) blueberry or berry mix Jello
- 1 package (3 oz / 85 g) lemon or pineapple-flavored Jello
- 2 cups heavy whipping cream (480 ml), chilled
- 1/4 cup powdered sugar (30 g)
- 1 teaspoon vanilla extract (5 ml)
- Optional garnishes: fresh berries (strawberries, blueberries, raspberries), red and blue sprinkles or edible stars
Instructions
- Preheat your oven to 350°F (175°C). Grease a 9×13 inch baking pan with butter or non-stick spray.
- Prepare the cake batter according to the box instructions (usually 3 large eggs, 1 cup water, and 1/3 cup vegetable oil). Mix until smooth but do not overbeat.
- Bake the cake for 30-35 minutes or until a toothpick inserted in the center comes out clean. Let the cake spring back lightly when pressed.
- Let the cake cool in the pan for about 15 minutes until warm but not hot.
- Dissolve each Jello packet separately in 1 cup boiling water, stir until dissolved, then add 1/2 cup cold water. Let cool slightly but remain liquid.
- Using a wooden skewer or fork, poke holes about 1 inch apart all over the cake.
- Pour the first Jello flavor evenly over one-third of the cake, allowing the liquid to seep into the holes.
- Chill the cake in the refrigerator for about 30 minutes to let the first layer set slightly.
- Repeat the process with the second and third Jello flavors, chilling 20-30 minutes between layers.
- Whip the heavy cream with powdered sugar and vanilla extract until soft peaks form.
- Spread the whipped cream evenly over the top of the cake once all Jello layers are set.
- Garnish with fresh berries and edible stars or sprinkles.
- Refrigerate the cake for at least one hour before serving to let flavors meld.
Notes
Use warm but not hot cake when pouring Jello to prevent melting. Chill each Jello layer until just set but still tacky for distinct layers. Overwhipping cream can cause graininess. Glass pans show colors well; metal pans bake more evenly. Store leftovers covered in the fridge up to 3 days or freeze slices up to 2 months.
Nutrition
- Serving Size: 1 slice (1/12th of c
- Calories: 325
- Sugar: 28
- Sodium: 250
- Fat: 18
- Saturated Fat: 11
- Carbohydrates: 38
- Fiber: 0.5
- Protein: 3
Keywords: poke cake, patriotic dessert, Jello cake, Fourth of July dessert, easy poke cake, layered Jello cake, summer dessert


