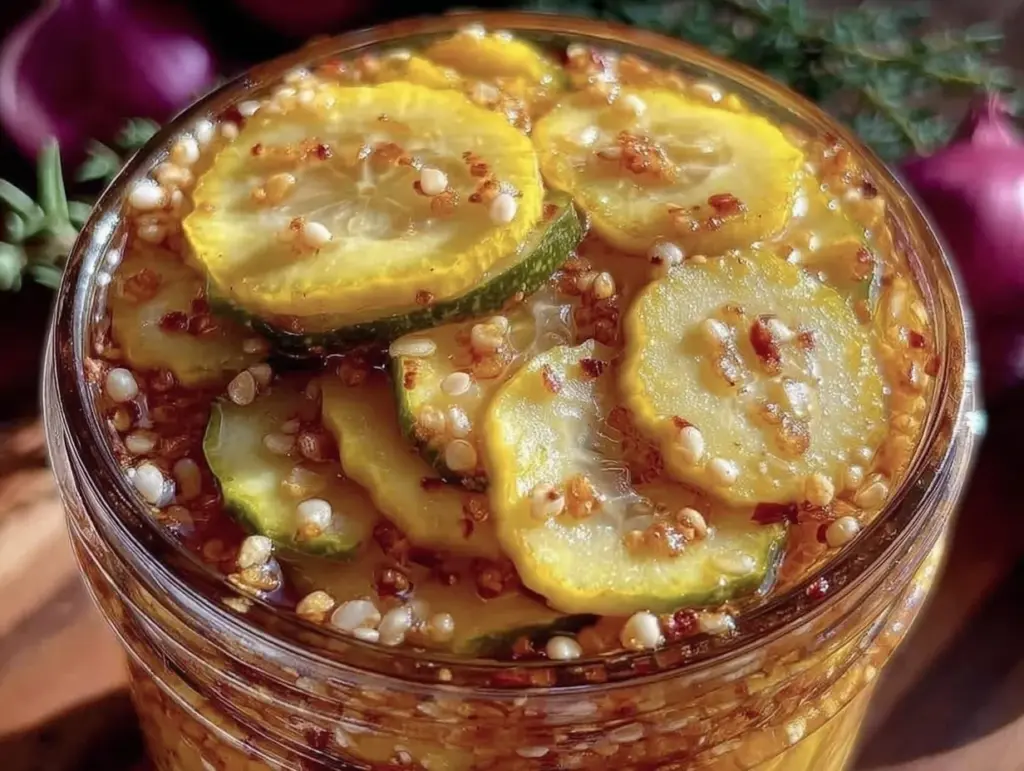
Why do I always crave something crunchy and sweet-sour late afternoon? Right now, I want those perfectly tangy, sweet-salty bread and butter pickles I made last summer. I have all the cucumbers, sugar, and spices on hand—except the patience, because honestly, waiting for pickles to soak is a test of willpower. The crisp snap when you bite into one, the way the sweet brine lingers just enough to make you reach for another—they’re kind of addictive. I can almost smell the vinegar and mustard seeds mingling in the jar, and that little hint of celery seed that makes these pickles unforgettable. It’s funny how something so simple can become a staple in your fridge, a quick snack or a perfect sidekick to a sandwich or burger. This recipe stuck with me because it’s the kind of easy refrigerator pickle that doesn’t demand canning skills or a full day of kitchen babysitting. Just chop, mix, and chill—and in a few days, you have crunchy bread and butter pickles that feel homemade but not fussy. And the best part? They’re perfect for when I’m craving crunchy snacks without the guilt of chips or crackers. That quiet satisfaction of a crisp, flavorful bite really makes these pickles a keeper.
Why You’ll Love This Recipe
Honestly, I’ve tried a dozen bread and butter pickle recipes, and this one beats them all for a few reasons:
- Quick & Easy: Ready to eat in as little as 24 hours, these pickles come together fast—ideal for last-minute snack cravings or a spontaneous barbecue.
- Simple Ingredients: No need to hunt down obscure spices or fancy vinegars. This recipe uses pantry staples you probably already have.
- Perfect for Any Occasion: Whether it’s casual picnics, family dinners, or adding that extra crunch to a burger night, these pickles fit right in.
- Crowd-Pleaser: Kids, adults, even picky eaters love the balance of sweet and tangy with a satisfying crunch.
- Unbelievably Delicious: The secret blend of mustard and celery seeds gives the pickles that signature flavor punch, while the sugar and vinegar ratio is just right—not too sweet, not too sour.
This isn’t just another basic pickle recipe. I’ve fine-tuned the seasoning and soaking times for a crisp texture that stays crunchy even after a week in the fridge. It’s the kind of recipe that makes you close your eyes on the first bite and think, “Yep, this is exactly what I wanted.” Plus, it’s a breeze compared to traditional canning—no boiling water baths or sterilizing jars. Just a little chopping, mixing up a quick brine, and letting the fridge do the work. If you want to impress guests without stress, or just keep a jar handy for quick snacking, this recipe has your back.
What Ingredients You Will Need
This recipe uses simple, wholesome ingredients to deliver bold flavor and satisfying crunch without fuss or fancy equipment. Most are pantry staples, and the fresh cucumbers are easy to find at any grocery store or farmer’s market.
- Cucumbers: 6 medium Kirby cucumbers, sliced into 1/4-inch rounds (Kirby cucumbers are ideal for their firm flesh and crunch; English cucumbers can work but may be softer)
- Onion: 1 medium yellow onion, thinly sliced (adds a subtle sweetness and texture contrast)
- Granulated Sugar: 1 1/2 cups (adjustable if you prefer sweeter or less sweet pickles)
- Distilled White Vinegar: 2 cups (provides the classic tang and preserves the crunch)
- Water: 1 cup (dilutes vinegar slightly for balanced acidity)
- Mustard Seeds: 2 tablespoons (I like using yellow mustard seeds for their mild heat and color)
- Celery Seeds: 1 teaspoon (key to authentic bread and butter pickle flavor)
- Ground Turmeric: 1/2 teaspoon (for that beautiful golden color and subtle earthiness)
- Salt: 1 tablespoon pickling or kosher salt (helps with flavor and crispness)
- Optional: A pinch of crushed red pepper flakes for a touch of heat (if you want a spicy kick)
If you want to experiment, swapping granulated sugar for honey or maple syrup gives a different sweetness profile, but the texture might change slightly. For a gluten-free option, all ingredients here are naturally gluten-free, so no worries. Also, if you prefer vegan-friendly, this recipe is naturally vegan as is. I recommend using organic cucumbers when possible for the freshest, crunchiest results.
Equipment Needed
- Large Mixing Bowl: For tossing cucumbers and onions with salt and spices. Glass or stainless steel is best to avoid reactions with vinegar.
- Sharp Knife and Cutting Board: Essential for slicing cucumbers and onions thinly and evenly to ensure consistent pickling.
- Measuring Cups and Spoons: For precise sugar, vinegar, and spice measurements—accuracy matters for flavor balance.
- Large Saucepan: To heat the vinegar, sugar, and spices to create the brine. A heavy-bottomed pan helps avoid scorching sugar.
- Glass Jars or Airtight Containers: Wide-mouth jars work best for easy packing and serving. Mason jars or similar containers with tight lids keep the pickles fresh.
- Optional: A mandoline slicer speeds up slicing and ensures uniform thickness, but a knife works fine if you’re careful.
Personally, I use a heavy-duty stainless steel saucepan and strong glass jars that don’t stain or absorb odors. To keep your equipment in good shape, avoid metal spoons or mixing tools when working with vinegar for long periods—wood or silicone are friendlier. If you’re on a budget, any clean glass jar with a lid will do, and a steady hand with a knife beats any fancy slicer.
Preparation Method
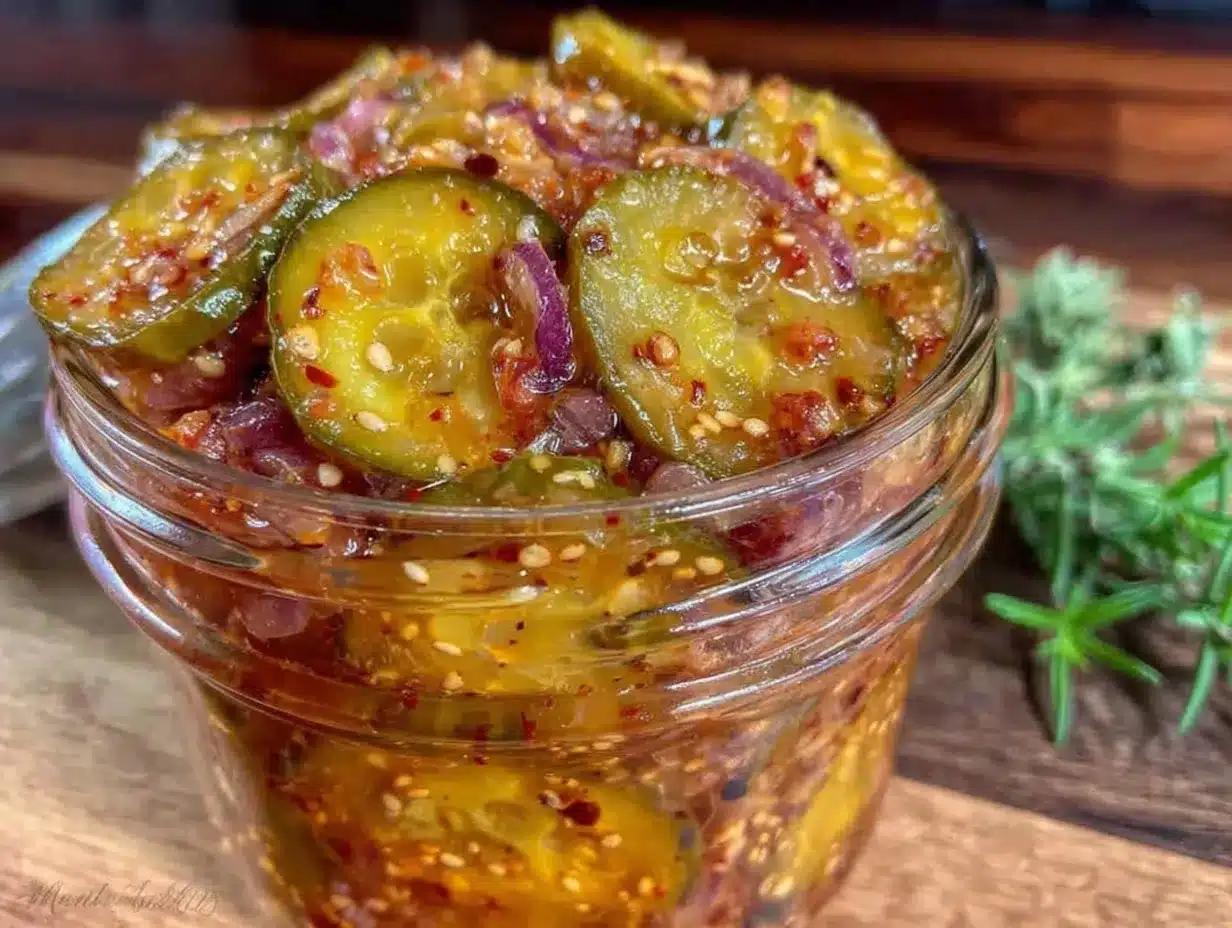
- Prep the Cucumbers and Onions (10 minutes): Wash and slice 6 medium Kirby cucumbers into about 1/4-inch rounds. Thinly slice 1 medium yellow onion. Toss them in a large mixing bowl with 1 tablespoon kosher salt. Let this sit for about 1 hour to draw out excess water—this step keeps your pickles crunchy.
- Rinse and Drain (5 minutes): After an hour, drain the cucumbers and onions in a colander and rinse under cold water to wash away excess salt. Pat dry gently with a clean towel or paper towels to remove surface moisture.
- Make the Brine (10 minutes): In a large saucepan, combine 2 cups distilled white vinegar, 1 cup water, 1 1/2 cups granulated sugar, 2 tablespoons yellow mustard seeds, 1 teaspoon celery seeds, 1/2 teaspoon ground turmeric, and an optional pinch of crushed red pepper flakes. Bring to a boil over medium-high heat, stirring occasionally to dissolve sugar. Once boiling, simmer for 2-3 minutes to let spices bloom.
- Combine and Pack (5 minutes): Carefully pour the hot brine over the drained cucumbers and onions. Stir gently to combine and evenly distribute spices. Using a slotted spoon, pack the cucumbers and onions into clean glass jars or an airtight container, then pour remaining brine over to cover completely.
- Cool and Refrigerate (at least 24 hours): Let the jars cool to room temperature before sealing with lids. Refrigerate for at least 24 hours before tasting. For best flavor, wait 2-3 days. The longer they sit, the more the flavors meld, but they keep their crunch nicely for up to 2 weeks.
Quick tip: If you find the pickles too sweet or sour, adjust sugar or vinegar next time in small increments. Also, don’t skip the salting and rinsing step—it’s what keeps the cucumbers crisp and prevents sogginess. The distinct golden color from turmeric is a visual cue that your pickles are coming together right. When you open the jar, the aroma of mustard seeds and celery is a good sign the flavors are on point.
Cooking Tips & Techniques
Getting crunchy pickles is often about timing and technique more than fancy ingredients.
- Salt First, Rinse Later: Salting cucumbers before brining pulls out excess moisture and firms them up, so never skip this step or you’ll end up with limp pickles.
- Uniform Slicing: Even thickness means even pickling. If slices are too thick, they won’t soak up brine well; too thin and they get mushy fast.
- Hot Brine Pour-Over: Pouring hot brine over cucumbers helps the spices release their flavors and jump-starts the pickling process.
- Use Fresh Spices: Old mustard or celery seeds lose their punch, so fresh spices make a big difference in flavor.
- Refrigeration Only: These are refrigerator pickles, so no canning needed. Keep them chilled and consume within two weeks for best quality.
- Patience Pays Off: The first day is tempting to dive in, but waiting 2-3 days lets flavors develop fully.
I once rushed this recipe and skipped rinsing the salt off—big mistake. The pickles were overly salty and soggy. Lesson learned: salt and rinse, always. Also, multitasking while waiting helps—this recipe pairs perfectly with prepping a quick appetizer like the creamy deviled eggs I like to bring to gatherings.
Variations & Adaptations
One of the great things about this bread and butter pickle recipe is how easy it adapts to your taste or dietary needs.
- Spicy Bread and Butter Pickles: Add 1 teaspoon crushed red pepper flakes or a chopped jalapeño to the brine for a little heat.
- Low-Sugar Version: Cut sugar to 1 cup and add a splash of apple juice or maple syrup for natural sweetness.
- Gluten-Free and Vegan: Naturally gluten-free and vegan as is, but swap sugar for coconut sugar or agave if preferred.
- Different Vegetables: Try the same brine with sliced carrots, green tomatoes, or even thinly sliced cauliflower for variety.
- Quick Pickles: Slice cucumbers thinner and reduce marinating time to 12 hours for a faster snack option.
Personally, I’ve made a batch swapping yellow onions for sweet red onions once, which gave a deeper color and a milder bite—great for those who find yellow onions too sharp. You can also switch out mustard seeds for a teaspoon of prepared mustard to change the flavor profile slightly.
Serving & Storage Suggestions
These Easy Crunchy Refrigerator Bread and Butter Pickles are best served chilled straight from the fridge. Their crisp texture and balanced sweetness make them an excellent side to sandwiches, burgers, or even alongside a platter of cheeses and olives like the Italian marinated olives.
For serving, pop them on a small dish as a snack or garnish. They’re also fantastic chopped and stirred into creamy dips like the creamy dill pickle dip, adding crunch and flavor.
To store, keep pickles in airtight glass jars or containers in the refrigerator. They’ll last about two weeks before losing their crunch and flavor intensity. Avoid leaving them out at room temperature for long periods. When reheating leftovers, these pickles are best enjoyed cold or at room temp rather than heated, as warmth can soften their crispness.
Over time, the pickles develop a deeper, more mellow flavor as the spices blend. If you prefer a sharper bite, enjoy them sooner rather than later.
Nutritional Information & Benefits
Per serving (about 3 slices), these pickles have roughly:
| Calories | 25 |
|---|---|
| Carbohydrates | 6g |
| Sugar | 5g |
| Fiber | 0.5g |
| Protein | 0.3g |
| Fat | 0g |
These pickles are low in calories and fat but pack flavor and hydration thanks to their cucumber base. Vinegar supports digestion, and mustard and celery seeds add antioxidants. The recipe is naturally gluten-free and vegan, making it accessible for many dietary needs. Just watch the sugar content if you’re managing blood sugar levels.
From a wellness perspective, keeping crunchy, fresh snacks like these pickles around helps me avoid less healthy snacking temptations. They’re also a flavorful way to add variety to meals without extra calories.
Conclusion
Easy Crunchy Refrigerator Bread and Butter Pickles are a simple, no-fuss way to bring homemade flavor and satisfying crunch to your kitchen. They’ve earned a permanent spot in my fridge because they’re quick to prepare, reliably tasty, and versatile for snacks or meals. I love how you can tweak the sweetness or spice level to your liking, making them truly your own. Whether you’re new to pickling or just want a fast recipe without the canning hassle, these pickles deliver every time. I hope you enjoy them as much as I do—feel free to share how you customize your batch or what dishes you pair them with. Nothing beats a crunchy bite that wakes up your taste buds and keeps you reaching back into the jar.
Frequently Asked Questions
How long do refrigerator bread and butter pickles last?
Stored properly in airtight containers in the fridge, these pickles stay fresh and crunchy for up to two weeks.
Can I use regular cucumbers instead of Kirby cucumbers?
Yes, but Kirby cucumbers are preferred for their firm texture. English cucumbers can be softer and sometimes less crunchy.
Do I need to sterilize jars for refrigerator pickles?
Nope! Since these are kept refrigerated and not canned, regular clean jars or containers are fine.
Can I make this recipe sugar-free?
You can reduce sugar or substitute with natural sweeteners like stevia, but it may affect texture and flavor balance.
What’s the difference between bread and butter pickles and other pickles?
Bread and butter pickles are sweeter and milder, with a distinctive blend of mustard and celery seeds that sets them apart from dill or sour pickles.
Pin This Recipe!

Easy Crunchy Refrigerator Bread and Butter Pickles Recipe for Perfect Homemade Snacks
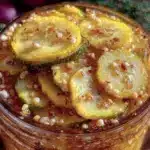
A quick and easy recipe for crunchy, sweet-sour bread and butter pickles that require no canning and are ready in as little as 24 hours. Perfect for snacks, sandwiches, and burgers with a balanced tangy and sweet flavor.
- Prep Time: 15 minutes
- Cook Time: 15 minutes
- Total Time: 1 hour 30 minutes
- Yield: About 6 servings 1x
- Category: Snack
- Cuisine: American
Ingredients
- 6 medium Kirby cucumbers, sliced into 1/4-inch rounds
- 1 medium yellow onion, thinly sliced
- 1 1/2 cups granulated sugar
- 2 cups distilled white vinegar
- 1 cup water
- 2 tablespoons yellow mustard seeds
- 1 teaspoon celery seeds
- 1/2 teaspoon ground turmeric
- 1 tablespoon pickling or kosher salt
- Optional: pinch of crushed red pepper flakes
Instructions
- Wash and slice 6 medium Kirby cucumbers into about 1/4-inch rounds. Thinly slice 1 medium yellow onion. Toss them in a large mixing bowl with 1 tablespoon kosher salt. Let sit for about 1 hour to draw out excess water.
- Drain the cucumbers and onions in a colander and rinse under cold water to wash away excess salt. Pat dry gently with a clean towel or paper towels.
- In a large saucepan, combine 2 cups distilled white vinegar, 1 cup water, 1 1/2 cups granulated sugar, 2 tablespoons yellow mustard seeds, 1 teaspoon celery seeds, 1/2 teaspoon ground turmeric, and an optional pinch of crushed red pepper flakes. Bring to a boil over medium-high heat, stirring occasionally to dissolve sugar. Simmer for 2-3 minutes.
- Pour the hot brine over the drained cucumbers and onions. Stir gently to combine and evenly distribute spices. Pack the cucumbers and onions into clean glass jars or airtight containers, then pour remaining brine over to cover completely.
- Let the jars cool to room temperature before sealing with lids. Refrigerate for at least 24 hours before tasting. For best flavor, wait 2-3 days. Keep refrigerated and consume within two weeks.
Notes
Salting cucumbers before brining pulls out excess moisture and keeps pickles crunchy. Rinse salt off before adding brine to avoid sogginess. Use fresh mustard and celery seeds for best flavor. Refrigerate only; no canning needed. Wait 2-3 days for best flavor. Adjust sugar or vinegar to taste if pickles are too sweet or sour.
Nutrition
- Serving Size: About 3 slices
- Calories: 25
- Sugar: 5
- Carbohydrates: 6
- Fiber: 0.5
- Protein: 0.3
Keywords: bread and butter pickles, refrigerator pickles, crunchy pickles, easy pickles, sweet and sour pickles, homemade pickles, quick pickles