
It was a Wednesday evening, and I was running on empty after a full day of work and shuttling kids to soccer practice. The pantry was looking slim, and honestly, I was this close to ordering takeout again. But then my youngest asked for chicken tenders—simple, crunchy, golden chicken tenders. I wasn’t about to give up on homemade dinner just yet, so I improvised with what I had. The result? Crispy homemade chicken tenders for an easy crunchy weeknight dinner that had everyone licking their fingers and asking for seconds.
I’ve tested this recipe more than 15 times to nail the perfect crisp without the greasy mess, and after years of tweaking, I finally cracked it. These crispy homemade chicken tenders for weeknight dinner are quick, budget-friendly, and use pantry staples you probably already have. The best part? You don’t need a deep fryer or fancy ingredients. Just a skillet, some simple steps, and a dinner that makes the whole family happy.
Trust me, after a few tries, this easy crunchy weeknight dinner has become a staple in my house. Whether you’re feeding picky eaters or just craving that nostalgic crunch, this recipe has you covered.
Why You’ll Love This Recipe
This recipe has completely changed how I handle weeknight dinners. With five hungry mouths to feed, I need quick, reliable meals that don’t sacrifice flavor or texture. These crispy homemade chicken tenders are exactly that.
- Crunchy Perfection Every Time — I’ve tried every coating method out there, and this one gives the crispiest crust that holds up even after cooling down a bit. No soggy tenders here.
- Fast Prep for Busy Weeknights — From start to finish, you’re looking at about 30 minutes. Just the right amount of time to prep, cook, and clean up before bedtime stories.
- Pantry Staples — You probably have all the ingredients right now. Flour, eggs, breadcrumbs, and basic spices. No last-minute shopping trips needed.
- Kid-Approved and Adult-Approved — My kids love the crispy coating, and my husband appreciates the juicy, tender chicken inside. It’s a win for everyone.
- Perfect for Family Dinner or Casual Entertaining — Whether it’s a simple weeknight family meal or a casual gathering with friends, these tenders fit right in.
This easy crunchy weeknight dinner has become my go-to for hectic evenings when takeout feels too easy but cooking feels too overwhelming. It’s the perfect bridge between convenience and homemade goodness.
Ingredients
Here’s the best part: you probably have most of this already. I’m a stickler for good-quality breadcrumbs—they make all the difference in the crunch department.
- Chicken tenders (1.5 pounds / 700g) — Fresh is best, but frozen and thawed works too. I like to pat them dry for a crispier crust.
- All-purpose flour (1 cup / 130g) — This is the base for the breading. You can swap half for cornstarch for extra crunch.
- Eggs (2 large) — They act as glue for the breadcrumbs. I always beat them with a splash of water to thin it out.
- Panko breadcrumbs (1.5 cups / 150g) — These Japanese-style breadcrumbs give that unbeatable crunch. I use plain, but seasoned works too if you want a shortcut.
- Garlic powder (1 teaspoon) — Adds a subtle savory note. Fresh garlic would burn in the coating.
- Onion powder (1 teaspoon) — Rounds out the flavor.
- Smoked paprika (1 teaspoon) — Gives a hint of smoky warmth. You can use regular paprika if you don’t have smoked.
- Salt and pepper (to taste) — Don’t skip salting the flour and breadcrumbs separately for balanced seasoning.
- Vegetable oil (for frying, about 1 inch deep) — Neutral oil like canola or sunflower works best for frying at home.
Equipment Needed
You don’t need anything fancy for this. Here’s what I actually use.
- Large skillet — A 10- or 12-inch heavy-bottom skillet works best. I prefer stainless steel for even heat but non-stick is fine too. Avoid anything too small, or the oil temperature drops too quickly.
- Tongs — Essential for flipping the tenders without smashing the coating.
- Shallow bowls or plates — For the flour, egg wash, and breadcrumbs. I like to use three separate dishes to keep things organized.
- Cooling rack — Optional but highly recommended. Rest your tenders here after frying to keep them crispy instead of soggy on paper towels.
- Instant-read thermometer — Optional but useful to check oil temperature (350°F / 175°C) and ensure chicken is cooked through.
How to Make Crispy Homemade Chicken Tenders for Weeknight Dinner

Alright, let’s get into it. I’ll walk you through exactly how I make these crispy homemade chicken tenders, including the small tricks that actually make a difference.
- Prep the Breading Station (5 minutes)
Set out three shallow dishes. In the first, whisk together the flour, garlic powder, onion powder, smoked paprika, salt, and pepper. In the second, beat the eggs with a splash of water. In the third, spread out the panko breadcrumbs. This setup keeps everything organized and prevents clumping when breading. - Pat Dry and Season Chicken (3 minutes)
Pat your chicken tenders dry with paper towels to remove excess moisture (this is key for crispiness). Lightly season them with salt and pepper on both sides. Dry chicken means the coating sticks better and fries up crunchier. - Coat the Chicken (10 minutes)
One by one, dredge each tender first in the seasoned flour, shaking off excess. Next, dip into the egg wash, letting the excess drip off. Finally, press firmly into the panko breadcrumbs to coat well. Pressing the breadcrumbs ensures the crust stays on during frying. Place coated tenders on a plate ready for frying. - Heat the Oil (5 minutes)
Pour oil into your skillet to about 1 inch deep and heat over medium-high until it reaches 350°F (175°C) or a breadcrumb dropped in sizzles immediately and floats. Maintaining the right oil temperature is crucial—too hot and the tenders burn on the outside, too cool and they soak up oil and get greasy. - Fry the Tenders (10 minutes)
Carefully place tenders in the hot oil without overcrowding the pan. Fry in batches if needed. Cook 3–4 minutes per side until golden brown and cooked through (internal temperature of 165°F / 74°C). The crust should be deep golden and crisp, and the chicken juicy inside. - Drain and Rest (2 minutes)
Use tongs to transfer tenders to a cooling rack set over a baking sheet. Resting here keeps them crispy instead of soggy. Resist the urge to pile them on paper towels—that traps steam and softens the crust. - Serve Immediately
Serve your crispy homemade chicken tenders hot with your favorite dipping sauces. The contrast of crunchy exterior and juicy interior is pure comfort food magic.
Total time: about 30 minutes. Roughly 15 minutes active, the rest is frying and resting.
Expert Tips & Tricks
Here’s everything I’ve figured out from making this recipe dozens of times. These tips will save you from the mistakes I already made.
Keep the Chicken Dry
Patting chicken dry before breading is the number one trick to keep the crust crispy. I burned this lesson in after soggy tenders ruined a dinner once.
Don’t Skip the Flour Seasoning
Seasoning the flour separately from the breadcrumbs layers the flavor and keeps the tenders tasting balanced. I like to salt both to avoid bland bites.
Use Panko for Maximum Crunch
Regular breadcrumbs don’t give the same light, crispy texture. Panko breadcrumbs make all the difference in this recipe.
Maintain Oil Temperature
Too hot, and the coating burns before the chicken cooks; too cool, and the tenders soak up oil and get greasy. I keep a thermometer handy or do the breadcrumb test to keep it right around 350°F.
Rest on a Cooling Rack
Paper towels are tempting, but tenders steam and get soggy. A cooling rack keeps air circulating and preserves crunch.
Mistake: Coating Falls Off
Fix: Press the breadcrumbs firmly onto the chicken and avoid shaking off too much flour or egg. Also, don’t move tenders too soon when frying—let the crust set first.
Mistake: Greasy Tenders
Fix: Oil too cool. Increase heat slightly and fry in smaller batches to keep oil temperature steady.
Variations & Substitutions
Once you’ve got the base version down, here’s how I mix it up. I’ve actually tried all of these.
Spicy Buffalo Tenders
Add cayenne powder or hot sauce to the egg wash and serve with blue cheese dressing. My kids love this twist on game day.
Parmesan Herb Tenders
Mix ½ cup finely grated Parmesan and 1 teaspoon dried Italian herbs into the panko. It’s fancy enough for casual entertaining but still easy.
Baked Version
For a lighter option, bake tenders at 425°F (220°C) on a parchment-lined sheet for 15–20 minutes, flipping halfway. Not quite as crunchy but still delicious.
Gluten-Free
Use gluten-free all-purpose flour and gluten-free panko breadcrumbs. Works well—my gluten-sensitive friend swears by this version.
Dairy-Free
This recipe is naturally dairy-free, so no swaps needed.
These crispy homemade chicken tenders fit perfectly into a busy weeknight family meal or casual get-together. For a fun side, try pairing them with my creamy classic hummus or a simple green salad.
Serving & Storage
I usually serve these tenders straight from the cooling rack to the table—rustic and crispy. They pair beautifully with classic ketchup, honey mustard, or a tangy ranch dip.
Here are my favorite sides to round out the meal:
- Garlic bread (obviously—never skip this crispy, buttery side)
- Simple green salad with balsamic vinaigrette for freshness
- Roasted broccoli or carrots for a bit of color and nutrition
Storage:
- Fridge: Store in an airtight container for up to 4 days. The crust thickens and firms up but stays tasty.
- Reheating: Best reheated in a skillet over low heat with a splash of oil or butter to crisp back up—takes about 5 minutes. Microwave works in a pinch but softens the crunch.
- Freezing: Not recommended. The breading tends to get soggy after thawing.
Nutrition Information
I’m not a nutritionist, but here’s the breakdown if you’re keeping track. These values are approximate per serving (based on 6 servings).
| Calories | Protein | Carbs | Fiber | Sugar | Fat | Saturated Fat | Sodium |
|---|---|---|---|---|---|---|---|
| 320 | 28g | 18g | 1g | 1g | 14g | 3g | 450mg |
Look—this is comfort food made with frying oil and breadcrumbs. It’s not a diet recipe, and I’m not going to pretend it is. But it’s way better than takeout, costs less, and I know exactly what’s in it. When I want something lighter, I bake the tenders and serve with lots of veggies. Most nights though? I make the real thing and enjoy it.
Final Thoughts
Remember that Wednesday when I almost gave in to takeout? These crispy homemade chicken tenders saved the day and became a permanent part of our weeknight dinner lineup. They’re forgiving enough to customize—more garlic powder if you like, swap out spices, or add your favorite dipping sauces. The base is easy and reliable.
If you make this recipe, drop a comment and tell me how it went. And if something goes wrong, tell me that too—I genuinely want to help troubleshoot. That’s what the comments are for.
Happy cooking—I hope your kitchen smells amazing and your family loves this as much as mine does.
Frequently Asked Questions
Q: Can I make these crispy homemade chicken tenders for a crowd?
A: Absolutely! This recipe scales up well. Just fry in batches to keep the oil temperature stable. I’ve made these for family gatherings with great success. If you want to prep ahead, bread the tenders and refrigerate them for up to 2 hours before frying.
Q: Why did my chicken tenders turn out soggy instead of crunchy?
A: Most likely, the oil temperature was too low or the chicken wasn’t patted dry before breading. I’ve had this happen when I rushed the prep. Make sure your oil is hot enough (350°F / 175°C) and dry the chicken thoroughly. Also, resting the tenders on a cooling rack instead of paper towels helps keep the crust crisp.
Q: Can I make these chicken tenders without eggs?
A: Yes, you can substitute the egg wash with buttermilk or a mixture of milk and mustard. I’ve done this when my fridge was out of eggs. The coating sticks a bit differently but still turns out tasty and crunchy.
Q: Can I make these chicken tenders ahead for a weeknight family meal?
A: You can bread them in advance and store them in the fridge for a few hours. Fry just before serving for best texture. Fully cooked tenders don’t reheat well from frozen, so it’s better to cook fresh if possible.
Q: Is this recipe gluten-free or dairy-free?
A: It’s naturally dairy-free, which is great. For gluten-free, swap the all-purpose flour and breadcrumbs with gluten-free versions. I’ve tested this with gluten-free panko and it works well for my gluten-sensitive friends.
Q: Can I double or halve this recipe easily?
A: Yes! This recipe scales up or down with no problem. Just be sure to fry in batches if doubling to keep the oil temperature steady. Halving is perfect for smaller households or lunch prep.
Q: What’s the best dipping sauce to serve with these tenders?
A: I’m partial to classic honey mustard or ranch, but for a twist, try a homemade garlic aioli or even a smoky BBQ sauce. For something fresh, my creamy deviled eggs make a great side that pairs surprisingly well.
Pin This Recipe!
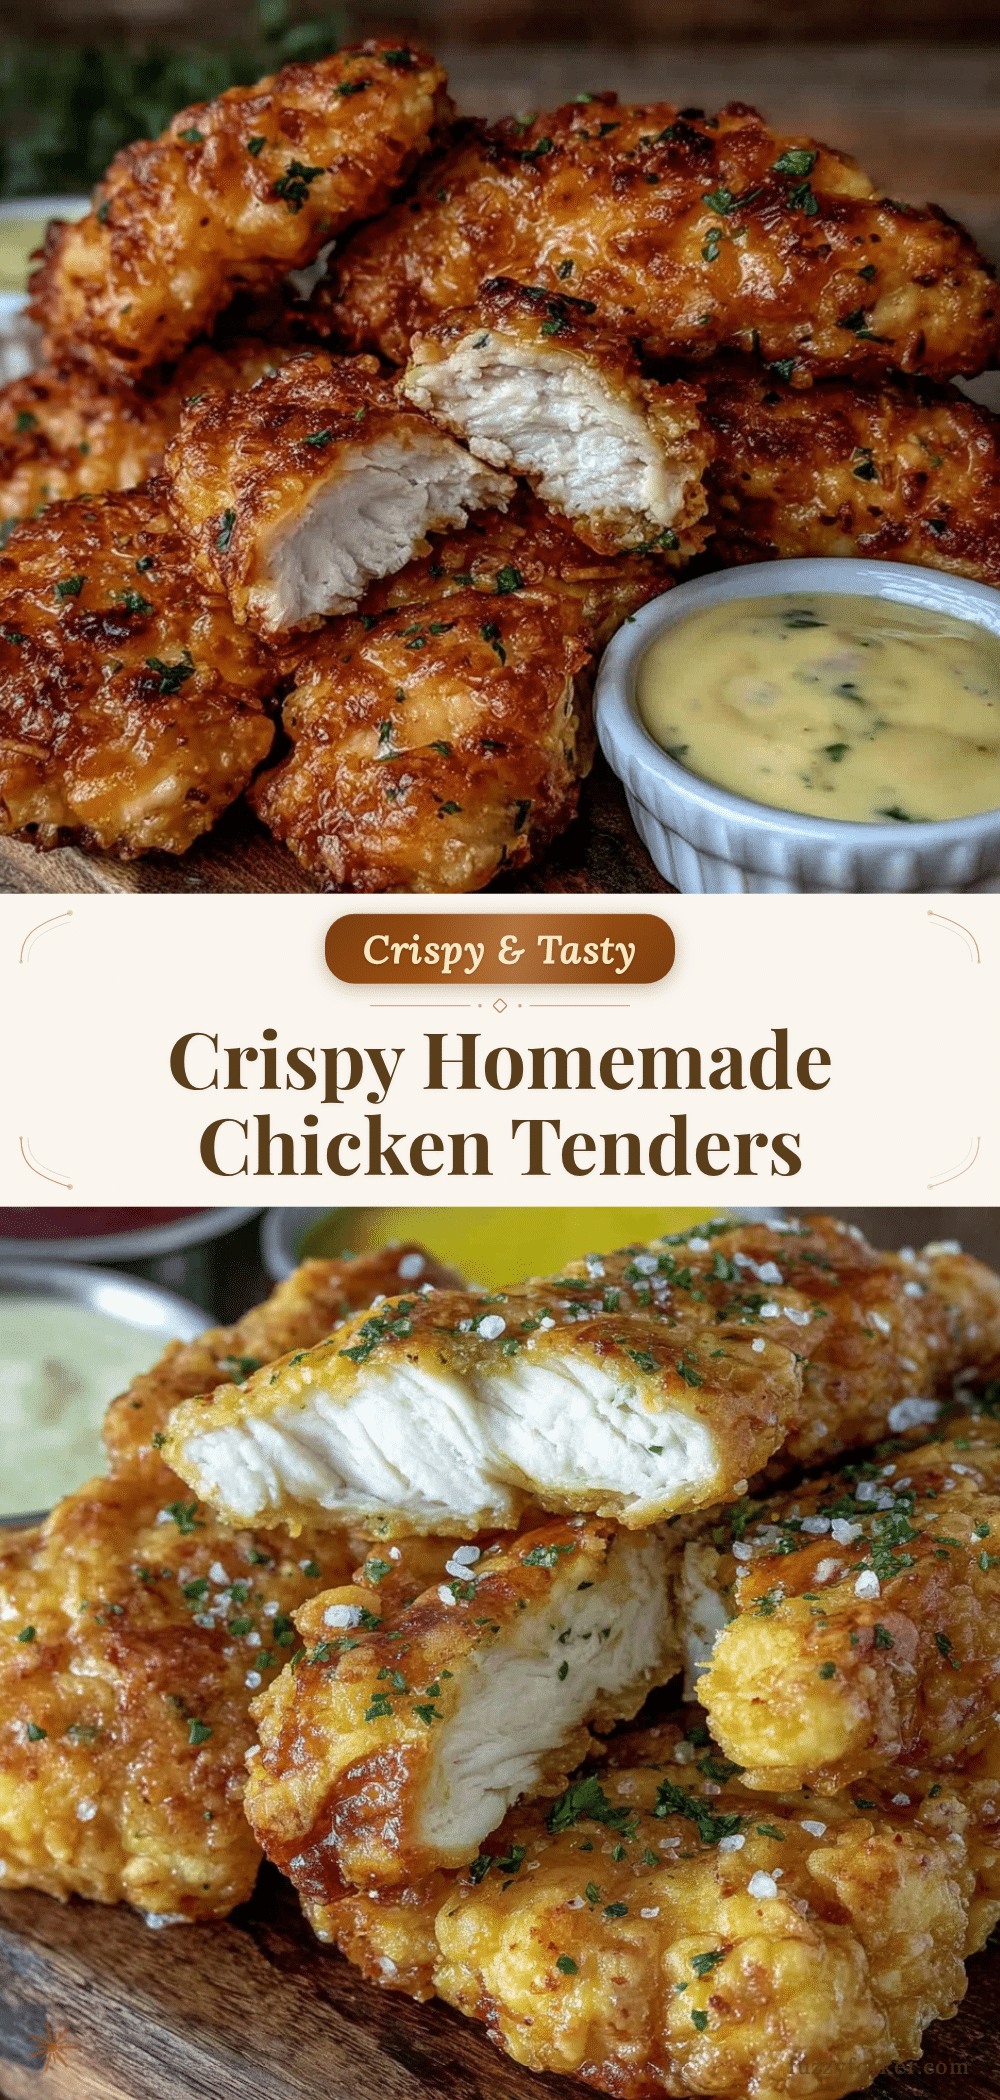
Crispy Homemade Chicken Tenders

Quick, budget-friendly, and crunchy chicken tenders made with pantry staples and cooked in a skillet for a perfect weeknight dinner.
- Prep Time: 15 minutes
- Cook Time: 15 minutes
- Total Time: 30 minutes
- Yield: 6 servings 1x
- Category: Main Course
- Cuisine: American
Ingredients
- 1.5 pounds (700g) chicken tenders, fresh or thawed
- 1 cup (130g) all-purpose flour
- 2 large eggs
- 1.5 cups (150g) panko breadcrumbs
- 1 teaspoon garlic powder
- 1 teaspoon onion powder
- 1 teaspoon smoked paprika
- Salt and pepper to taste
- Vegetable oil (about 1 inch deep) for frying
Instructions
- Set out three shallow dishes: mix flour, garlic powder, onion powder, smoked paprika, salt, and pepper in the first; beat eggs with a splash of water in the second; spread panko breadcrumbs in the third.
- Pat chicken tenders dry with paper towels and season lightly with salt and pepper on both sides.
- Dredge each tender in the seasoned flour, shake off excess, dip into the egg wash letting excess drip off, then press firmly into the panko breadcrumbs to coat well. Place coated tenders on a plate.
- Pour oil into a large skillet to about 1 inch deep and heat over medium-high until it reaches 350°F (175°C) or a breadcrumb sizzles and floats immediately.
- Carefully place tenders in hot oil without overcrowding; fry in batches if needed. Cook 3–4 minutes per side until golden brown and cooked through (internal temperature 165°F / 74°C).
- Transfer tenders to a cooling rack set over a baking sheet to rest for 2 minutes to keep crispy.
- Serve immediately with your favorite dipping sauces.
Notes
Pat chicken dry before breading for crispiness. Season flour and breadcrumbs separately for balanced flavor. Maintain oil temperature around 350°F to avoid greasy or burnt tenders. Rest tenders on a cooling rack instead of paper towels to keep crust crispy. Press breadcrumbs firmly onto chicken to prevent coating from falling off.
Nutrition
- Serving Size: 1 serving (approxima
- Calories: 320
- Sugar: 1
- Sodium: 450
- Fat: 14
- Saturated Fat: 3
- Carbohydrates: 18
- Fiber: 1
- Protein: 28
Keywords: chicken tenders, crispy chicken, homemade chicken tenders, easy dinner, crunchy chicken, skillet fried chicken, weeknight dinner


