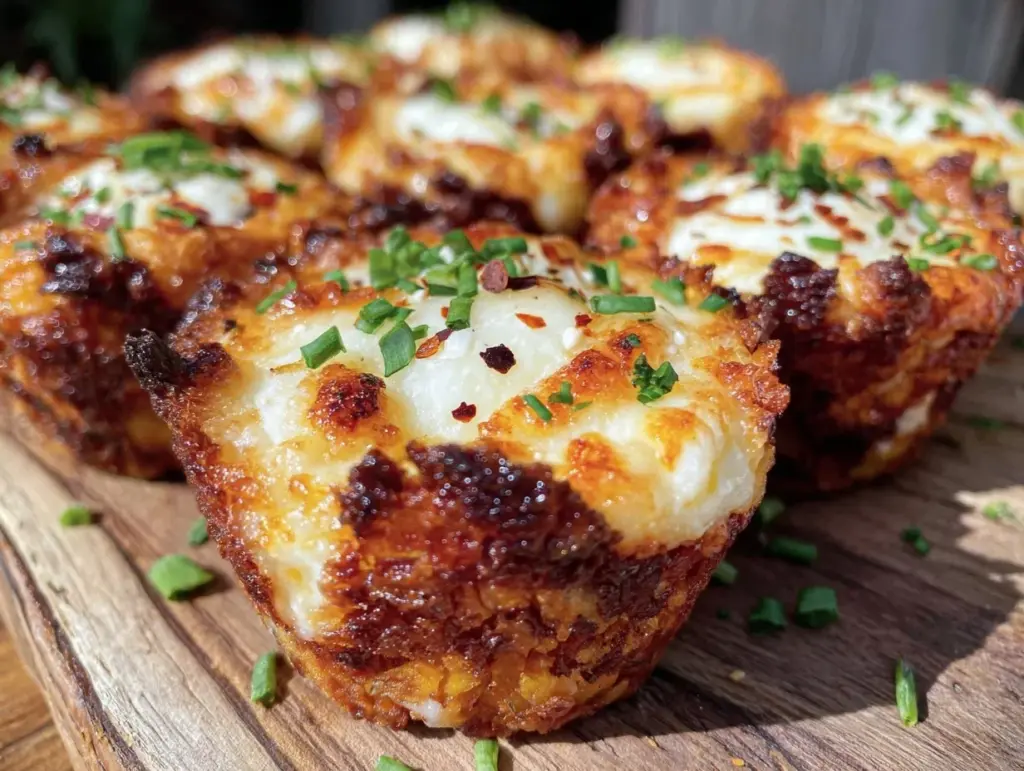
My phone buzzed—last-minute text from my kid’s friend’s mom: “Can you pack an extra snack? We totally forgot!” The fridge was a sad scene: wilted greens, half a lemon, and a lonely can of chickpeas staring back at me. No time for a store run, and honestly, I wasn’t about to send them off with just a banana. So, I rummaged through the pantry and whipped up these crispy chickpea and cheese snack cups for lunchboxes.
It was a bit of a mad dash, mixing what was on hand, but somehow, the crunch of the roasted chickpeas paired with melty cheese tucked into a little crispy shell created a snack that disappeared way too fast. The kitchen smelled like toasted garlic and warm cheese, and I caught myself sneaking bites between packing. You know that relief when a last-minute fix turns out better than expected? That. These snack cups were born from chaos, but they stuck around because they’re easy, satisfying, and weirdly addictive.
What really nailed it for me was how portable and mess-free they are—perfect for lunchboxes, picnics, or just a quick afternoon nibble. Plus, they’re sturdy enough to hold their shape but soft enough to bite into without a fight. I’m sharing this recipe because sometimes the best dishes come from what you’ve got, not what you planned. And honestly, it’s nice to have a quick go-to snack that feels homemade and thoughtful without the usual fuss.
Why You’ll Love This Recipe
After testing these crispy chickpea and cheese snack cups for lunchboxes multiple times (and trust me, I did!), I’ve nailed down why they’re such a keeper:
- Quick & Easy: You can have these ready in about 25 minutes—ideal when time’s tight and hunger’s loud.
- Simple Ingredients: No exotic items needed. Chickpeas, cheese, and a handful of pantry staples are all it takes.
- Perfect for Lunchboxes: They’re neat, portable, and don’t crumble into a mess, making them lunchbox heroes.
- Crowd-Pleaser: Kids, adults, picky eaters—everyone loves the crispy texture with cheesy goodness inside.
- Unbelievably Delicious: The mix of crispy chickpeas with gooey cheese is a flavor and texture combo that just works.
What sets this recipe apart from others? It’s the little things: roasting the chickpeas until they’re perfectly crispy without drying them out, folding in just the right amount of seasoning, and baking the cups so the cheese melts to a luscious softness but the edges stay crunchy. I’ve tried versions with different cheeses (more on that later), but the balance here makes every bite close your eyes kind of satisfying.
Honestly, this isn’t just another snack recipe—it’s a solution for those days when you need something wholesome, tasty, and fuss-free. It’s a bit like the creamy classic hummus you know and love, but with a twist that’s crunchy and portable. For busy parents or snack lovers, this recipe becomes a quiet little victory in your day.
What Ingredients You Will Need
This recipe uses simple, wholesome ingredients to deliver bold flavor and satisfying texture without the fuss. Most of these are pantry staples, and if you’re missing something, I’ve included easy swaps.
- Chickpeas: One 15-ounce (425 g) can, drained and rinsed. I prefer canned chickpeas for convenience, but you can roast dried ones if you have time.
- Cheese: About 1 cup (100 g) shredded sharp cheddar cheese works beautifully. It melts well and adds a nice tang. You can substitute with mozzarella for a milder taste or pepper jack for a spicy kick.
- Egg: One large egg, beaten, to bind everything together.
- Flour: ½ cup (60 g) all-purpose flour to give the cups structure. Gluten-free flour works fine here if needed.
- Olive Oil: 2 tablespoons (30 ml) to roast the chickpeas and add richness.
- Garlic Powder: 1 teaspoon for that warm, savory note.
- Paprika: ½ teaspoon smoked paprika gives a subtle smoky depth.
- Salt and Pepper: To taste — I usually start with ½ teaspoon salt and a few grinds of black pepper.
- Fresh Parsley: A small handful, chopped, for garnish and a fresh pop (optional but recommended).
For the best results, I recommend using a good quality sharp cheddar like Cabot or Tillamook for the cheese. Also, if you happen to have a stash of your own homemade creamy classic hummus around, that pairs wonderfully with these cups as a dip on the side.
Equipment Needed
- Muffin tin: A standard 12-cup muffin tin is essential to shape the snack cups. If you don’t have one, silicone muffin cups or even small ramekins can work.
- Mixing bowls: At least one medium bowl to mix the chickpeas, cheese, and egg together.
- Fork or potato masher: To roughly mash the chickpeas so they bind nicely without turning into paste.
- Baking sheet: For roasting the chickpeas before mixing.
- Spoon or small scoop: To portion the mixture evenly into the muffin cups.
Personally, I find silicone muffin pans easier for cleanup, but a well-greased metal tin works just fine. If you’re budget-conscious, you can get a decent muffin tin for under $15 at most stores. Also, don’t skip on the roasting step—roasting the chickpeas on a baking sheet first makes a huge difference in texture.
Preparation Method
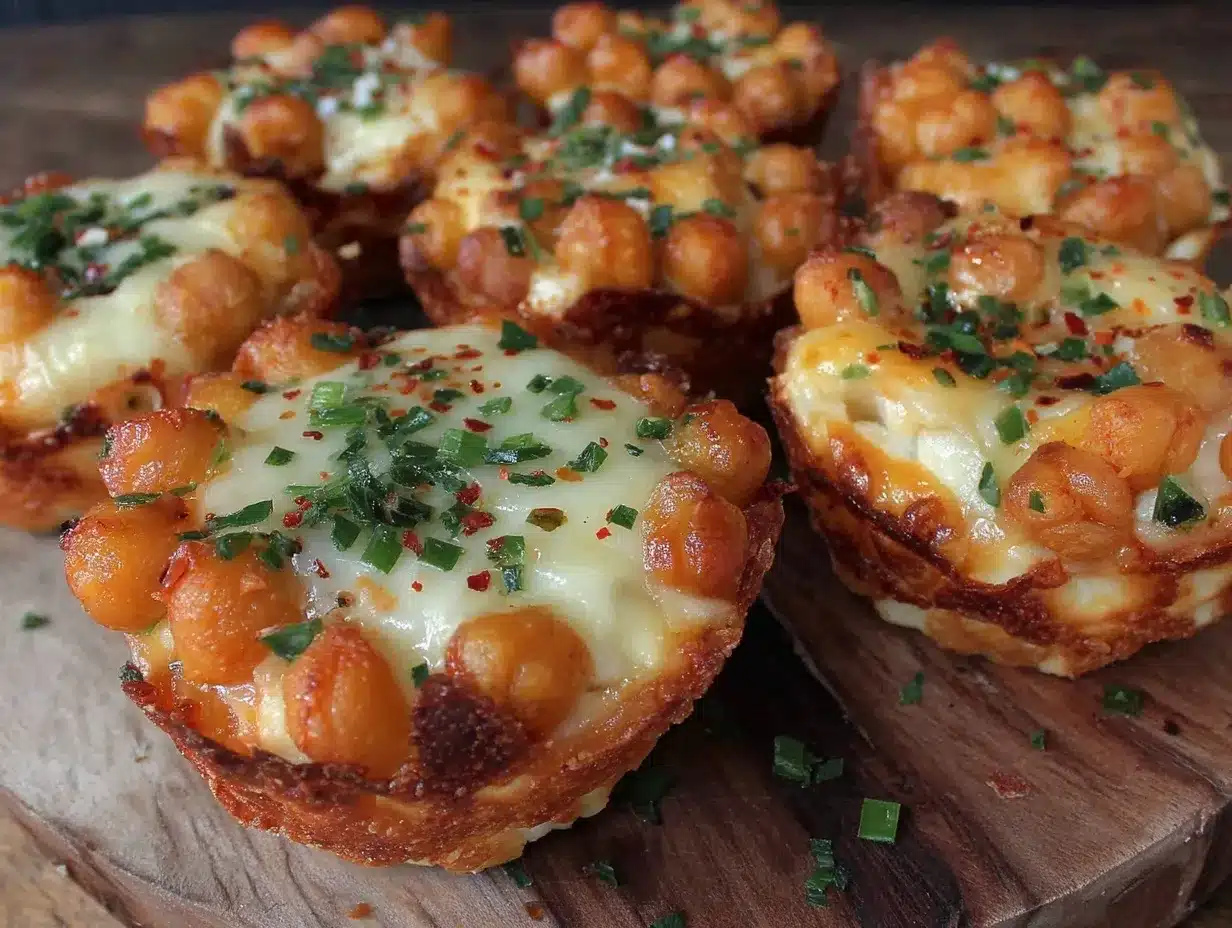
- Preheat your oven to 375°F (190°C). Line a baking sheet with parchment paper.
- Drain and rinse the chickpeas. Spread them out on the baking sheet, drizzle with 1 tablespoon (15 ml) olive oil, and sprinkle with half the garlic powder, paprika, salt, and pepper. Toss to coat evenly.
- Roast chickpeas for 15 minutes, stirring halfway through, until golden and crispy but not burnt. This step is critical for that signature crunch.
- Remove chickpeas from the oven and let cool slightly. Meanwhile, grease your muffin tin with the remaining olive oil or use non-stick spray.
- In a mixing bowl, mash the roasted chickpeas lightly with a fork or potato masher — you want some texture, not a paste.
- Add shredded cheese, beaten egg, flour, and remaining seasonings. Mix gently to combine into a sticky but workable dough.
- Divide the mixture evenly among the muffin cups, pressing down gently to form small cups with slightly raised edges.
- Bake in the preheated oven for 12-15 minutes, until the edges are crisp and the cheese is melted and golden.
- Remove from oven and let cool in the pan for 5 minutes before carefully lifting the cups out with a butter knife or small spatula.
- Garnish with chopped parsley if using, and pack into lunchboxes or serve warm.
Watch the baking closely toward the end—the cheese can go from golden to burnt pretty quickly. If your oven runs hot, start checking at 10 minutes. These cups hold together best when cooled slightly but are delicious warm too.
Cooking Tips & Techniques
Here’s where some experience really helps with this recipe. I’ve learned a few tricks to get these snack cups just right:
- Don’t skip roasting: Raw or canned chickpeas straight into the mix don’t crisp up well. Roasting dries them out just enough to create that crunch without losing moisture.
- Mash gently: Over-mashing chickpeas makes the mixture gluey. You want chunks to keep texture but enough mash so the egg and cheese bind everything.
- Use sharp cheddar: It melts nicely but also browns attractively. Mild cheeses tend to be too soft and don’t crisp up.
- Grease the muffin tin well: These cups stick if your tin isn’t properly oiled, especially if you’re using a metal pan.
- Season boldly: Chickpeas can be bland alone, so don’t be shy with garlic powder, paprika, and salt. You can even add a pinch of cayenne if you like heat.
- Timing is everything: Baking too long dries the cups out; too short and they’re floppy. Stick close to the 12-15 minute window and let them cool a bit before removing.
When I first tried this, I overbaked the cups and ended up with tough edges—lesson learned! Now I set a timer and keep an eye on that golden color. It’s a simple but effective trick that goes a long way toward consistent success.
Variations & Adaptations
This recipe is flexible, and I love experimenting with different flavors and dietary tweaks:
- Spicy Kick: Add ½ teaspoon chili powder or some crushed red pepper flakes to the seasoning mix for a smoky heat.
- Gluten-Free: Substitute the all-purpose flour with almond flour or oat flour. The texture changes slightly but still holds well.
- Vegan Version: Replace the egg with a flax egg (1 tablespoon ground flaxseed + 3 tablespoons water, set 5 mins) and use vegan cheese shreds. Roasted chickpeas stay the same.
- Herb Infusion: Toss in fresh chopped thyme or rosemary with the chickpeas before roasting for a fragrant twist.
- Cheese Swap: Try pepper jack for a bit of spice or a blend of parmesan and mozzarella for extra gooeyness and flavor depth.
One of my favorite adaptations was adding a bit of sun-dried tomato paste to the mix for a savory, tangy pop. It turned these snack cups into a delightful Mediterranean treat. For a softer version, you could also try baking them in mini tart pans to keep the shape but create a different texture experience.
Serving & Storage Suggestions
These crispy chickpea and cheese snack cups are best served warm or at room temperature. They hold up well in lunchboxes and don’t get soggy quickly.
- Serving: Pair with a small container of your favorite dip—homemade hummus (like the classic hummus recipe I swear by) or a tangy yogurt-based dip complements the crispy texture nicely.
- Storage: Store leftovers in an airtight container in the refrigerator for up to 3 days.
- Reheating: Reheat in a toaster oven or conventional oven for 5-7 minutes to bring back the crispness. Microwaving works but will soften the edges.
- Flavors develop: Leftovers mellow a bit overnight, making the flavors even more balanced and savory.
If you’re packing these in a lunchbox, place them in a small container lined with parchment paper so they don’t stick or lose their shape. They travel well and make a satisfying, mess-free bite during the school day or a picnic.
Nutritional Information & Benefits
Each snack cup is roughly 120 calories, depending on the size and cheese used. They offer a good balance of protein and fiber, thanks to the chickpeas and cheese.
- Protein: Chickpeas provide plant-based protein, while cheese adds a dose of dairy protein, keeping you full longer.
- Fiber: Chickpeas contribute dietary fiber, great for digestion and sustained energy.
- Calcium: Cheese is a good source of calcium, supporting bone health.
- Low Sugar: This recipe is naturally low in sugar, making it a wholesome snack option.
- Dietary Considerations: Easily adapted for gluten-free and vegan diets as mentioned.
From a wellness standpoint, these cups are a satisfying snack that balances indulgence with nutrition—a far cry from typical processed snacks. They’re a little treat that you can actually feel good about packing in lunchboxes or grabbing on the go.
Conclusion
These crispy chickpea and cheese snack cups for lunchboxes have become a staple in my kitchen—not just because they solve last-minute snack crises but because they’re genuinely delicious and easy to make. I love how they combine simple ingredients into a crunchy, cheesy bite that feels special without a ton of effort.
Feel free to tweak the seasonings or cheese to suit your family’s taste, or try some of the variations I mentioned to keep things interesting. They’re forgiving and versatile, which makes them perfect for anyone juggling busy schedules and hungry kids.
Give them a try, and if you do, I’d love to hear how you customize your cups or what dips you pair them with. Sharing your twists is half the fun!
Here’s to hassle-free snacks that bring a little joy to lunchboxes everywhere.
FAQs
Can I make these chickpea and cheese snack cups ahead of time?
Yes! You can prepare and bake them a day in advance. Store in an airtight container in the fridge and reheat before serving for best texture.
What cheese works best for crispy chickpea and cheese snack cups?
Sharp cheddar is my top pick for meltability and flavor, but mozzarella or pepper jack are great alternatives depending on your taste preference.
Are these snack cups suitable for gluten-free diets?
Absolutely! Just swap the all-purpose flour for a gluten-free flour blend or almond flour, and they’ll turn out just fine.
How do I keep the snack cups from sticking to the muffin tin?
Grease the tin thoroughly with olive oil or use non-stick spray. Silicone muffin pans are also a great non-stick alternative.
Can I add other vegetables or ingredients to the mix?
You can! Finely chopped spinach, grated zucchini (squeezed dry), or sun-dried tomatoes can be stirred in for extra flavor and nutrition.
Pin This Recipe!
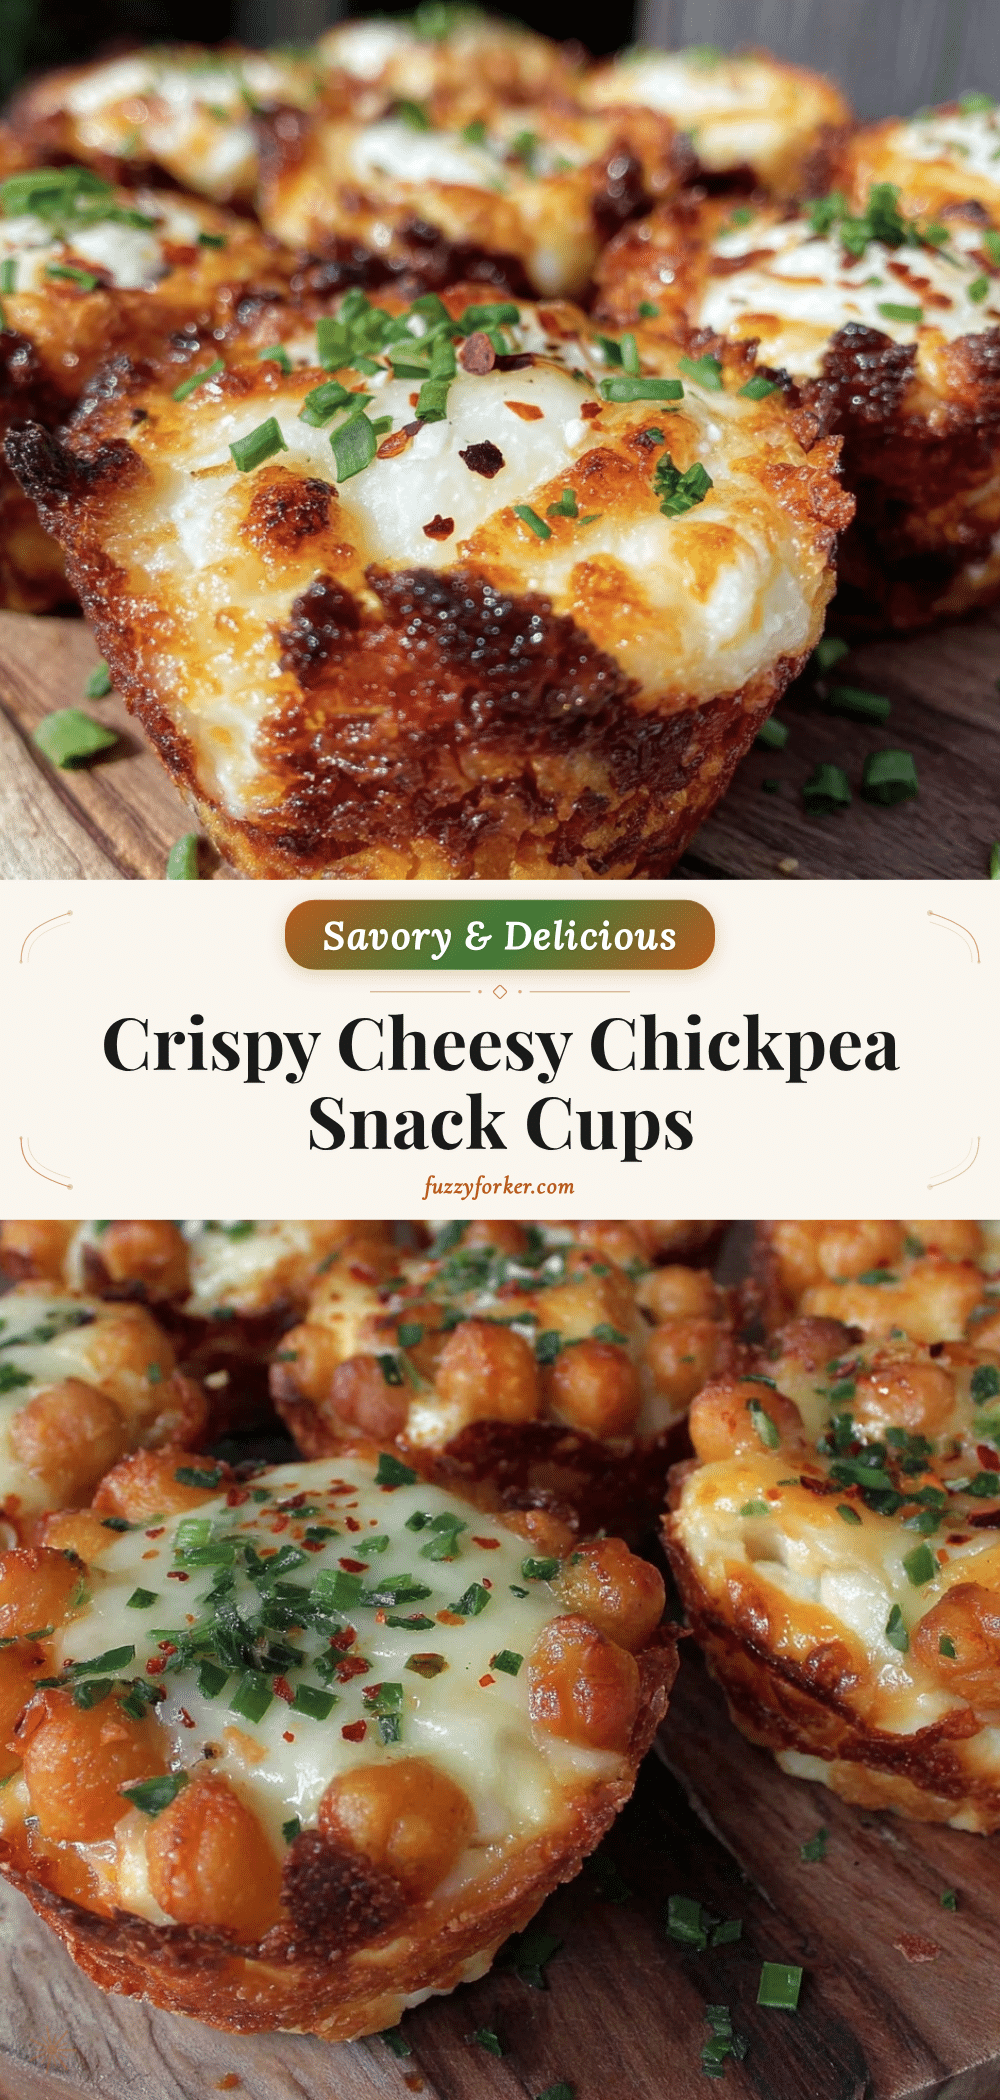
Crispy Chickpea and Cheese Snack Cups

These crispy chickpea and cheese snack cups are an easy, portable, and mess-free snack perfect for lunchboxes, picnics, or quick bites. They combine roasted chickpeas with melty cheese in a crispy shell for a satisfying and addictive treat.
- Prep Time: 10 minutes
- Cook Time: 25 minutes
- Total Time: 35 minutes
- Yield: 12 snack cups 1x
- Category: Snack
- Cuisine: American
Ingredients
- 1 can (15 ounces) chickpeas, drained and rinsed
- 1 cup (100 g) shredded sharp cheddar cheese
- 1 large egg, beaten
- ½ cup (60 g) all-purpose flour (or gluten-free flour)
- 2 tablespoons (30 ml) olive oil, divided
- 1 teaspoon garlic powder, divided
- ½ teaspoon smoked paprika, divided
- ½ teaspoon salt, divided
- Black pepper, to taste, divided
- Small handful fresh parsley, chopped (optional)
Instructions
- Preheat your oven to 375°F (190°C). Line a baking sheet with parchment paper.
- Drain and rinse the chickpeas. Spread them out on the baking sheet, drizzle with 1 tablespoon olive oil, and sprinkle with half the garlic powder, paprika, salt, and pepper. Toss to coat evenly.
- Roast chickpeas for 15 minutes, stirring halfway through, until golden and crispy but not burnt.
- Remove chickpeas from the oven and let cool slightly. Meanwhile, grease your muffin tin with the remaining olive oil or use non-stick spray.
- In a mixing bowl, mash the roasted chickpeas lightly with a fork or potato masher to keep some texture.
- Add shredded cheese, beaten egg, flour, and remaining seasonings. Mix gently to combine into a sticky but workable dough.
- Divide the mixture evenly among the muffin cups, pressing down gently to form small cups with slightly raised edges.
- Bake in the preheated oven for 12-15 minutes, until the edges are crisp and the cheese is melted and golden.
- Remove from oven and let cool in the pan for 5 minutes before carefully lifting the cups out with a butter knife or small spatula.
- Garnish with chopped parsley if using, and pack into lunchboxes or serve warm.
Notes
Do not skip roasting the chickpeas as it is critical for the crispy texture. Mash chickpeas gently to keep some texture and avoid a gluey mixture. Use sharp cheddar for best melt and browning. Grease muffin tin well to prevent sticking. Watch baking time closely to avoid burning the cheese. Can be made vegan by substituting egg with flax egg and using vegan cheese. Gluten-free flour can be used instead of all-purpose flour.
Nutrition
- Serving Size: 1 snack cup
- Calories: 120
- Sugar: 1
- Sodium: 200
- Fat: 7
- Saturated Fat: 3.5
- Carbohydrates: 10
- Fiber: 3
- Protein: 6
Keywords: chickpeas, cheese, snack cups, lunchbox snack, crispy chickpeas, easy snack, roasted chickpeas, cheddar cheese, gluten-free option, vegan option