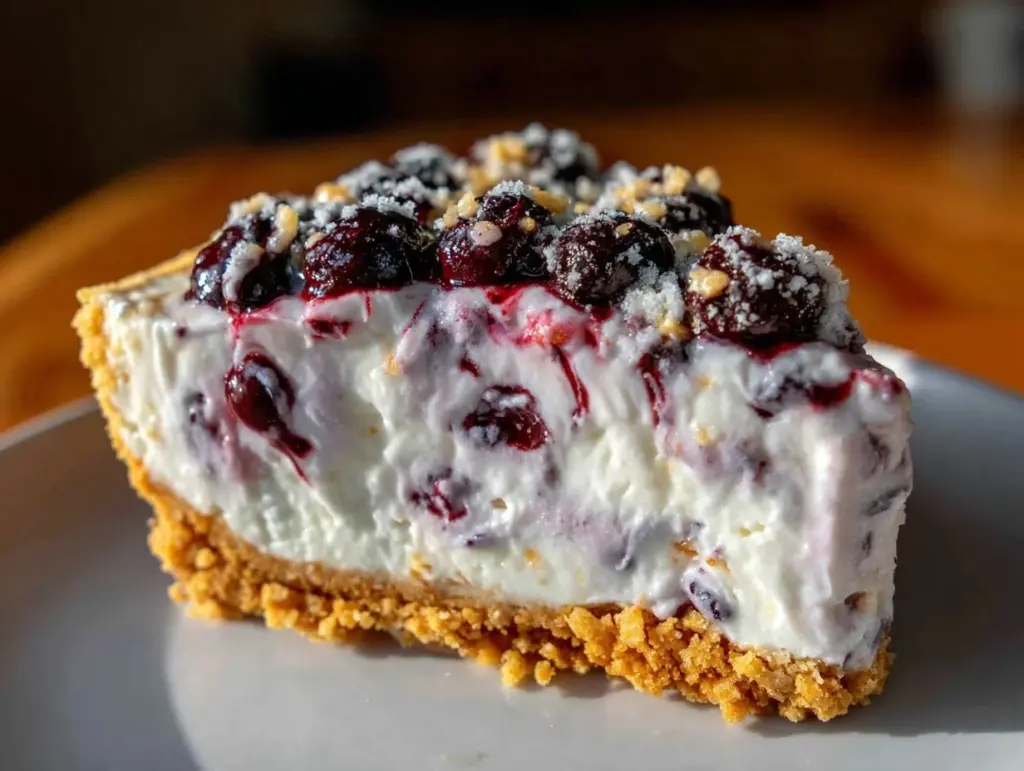
My partner took a bite of this creamy no-bake huckleberry cheesecake with vanilla wafer crust and just went quiet for a good thirty seconds — that kind of quiet where you know something’s really hit the spot. I was sitting there, watching the way their eyes lit up with each spoonful, the subtle smile that crept in as the tangy huckleberry mingled with the smooth cream cheese filling. Honestly, it wasn’t something I planned to master that day, but seeing that reaction made all the impromptu mixing and chilling totally worth it. This cheesecake isn’t just a dessert; it’s a little moment of calm and joy after a hectic week. The way the vanilla wafer crust holds its own against the luscious filling — slightly crumbly, just sweet enough — it’s a combo that stuck around in my mind long after the last bite.
What surprised me most was how effortlessly it came together, no oven required. Watching the huckleberry sauce swirl into the creaminess reminded me of those summer afternoons spent foraging for wild berries, except now this recipe brings that fresh, wild sweetness right into my kitchen, even in the dead of winter. The subtle vanilla notes in the crust marry perfectly with the tangy cheesecake, making it feel like a little celebration in every bite. It’s the kind of recipe that sneaks up on you — simple yet layered, refreshing but indulgent, and perfect for sharing with anyone who appreciates a good homemade dessert without the fuss.
Quietly, I realized this no-bake huckleberry cheesecake with vanilla wafer crust wasn’t just another dessert in my repertoire; it became my go-to when I wanted to impress without the stress. It’s one of those recipes that feels like a thoughtful gesture without needing a special occasion — and that’s exactly why it stuck around.
Why You’ll Love This Recipe
This creamy no-bake huckleberry cheesecake with vanilla wafer crust has been put through its paces in my kitchen more times than I can count, and every time it delivers that perfect balance of creamy, tangy, and sweet. It’s a recipe that’s as approachable as it is delicious, and here’s why it might just become a staple in your dessert lineup:
- Quick & Easy: Comes together in under 30 minutes, making it perfect for busy weeknights or those last-minute dessert emergencies.
- Simple Ingredients: No fancy or hard-to-find items — you likely have vanilla wafers and cream cheese sitting in your pantry and fridge already.
- Perfect for Summer or Winter: The fresh huckleberry flavor brings a bright pop that’s great in warm months, but the creamy richness feels just right in colder seasons.
- Crowd-Pleaser: Every time I’ve brought this out, it’s been met with compliments and requests for seconds — from kids and adults alike.
- Unbelievably Delicious: The silky texture mixed with the subtly spiced vanilla wafer crust and the vibrant berry topping creates a dessert that’s both comforting and refreshing.
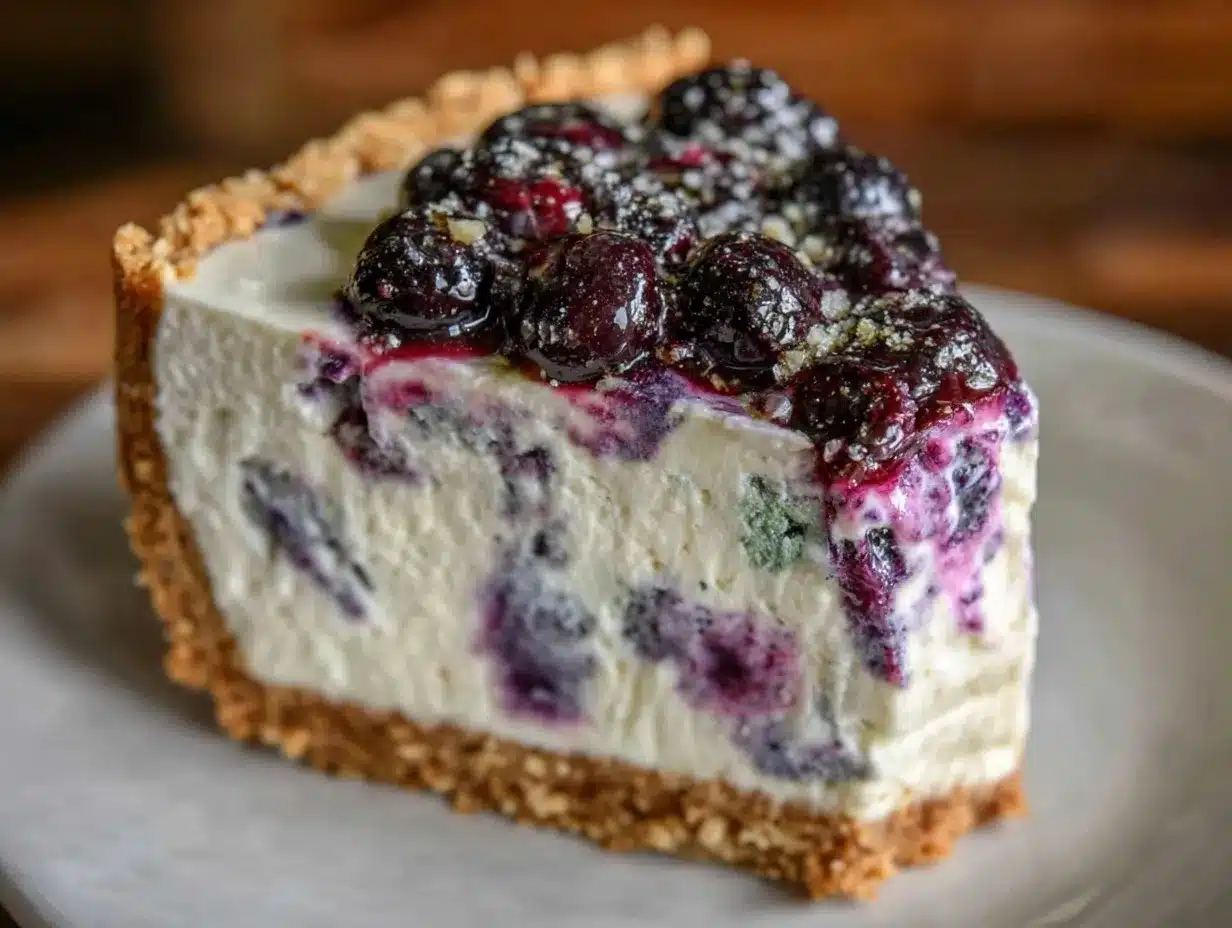
What sets this cheesecake apart is the way the crust holds together without baking. Crushing vanilla wafers by hand and blending them with just the right amount of melted butter gives a slightly crunchy base that doesn’t get soggy (a mistake I made a few times before). Plus, the huckleberry component isn’t just a topping thrown on at the end — it’s swirled right into the creamy filling, so each bite has that lovely berry tang that feels fresh, not overly sweet.
Honestly, this recipe isn’t just about dessert; it’s about creating a small joy that’s easy to make and hard to forget — a reason I keep this cheesecake in my back pocket for unexpected guests or quiet evenings when I just want a little something special.
What Ingredients You Will Need
This recipe uses simple, wholesome ingredients to deliver bold flavor and a satisfying texture without the fuss. Most are pantry staples or easy to find, and the huckleberries can be fresh, frozen, or even swapped for similar berries if needed.
- Vanilla Wafer Crust:
- Vanilla wafers – about 2 cups (around 150g), crushed (I like to crush by hand for texture)
- Unsalted butter – 6 tablespoons (85g), melted (adds richness and helps the crust hold)
- Granulated sugar – 2 tablespoons (optional, depending on your wafer sweetness)
- A pinch of ground cinnamon (optional, adds warmth to the crust)
- Cheesecake Filling:
- Cream cheese – 16 ounces (450g), softened to room temperature (I usually use Philadelphia for consistency)
- Powdered sugar – 3/4 cup (90g), sifted (for smooth sweetness)
- Heavy cream – 1 cup (240ml), chilled (whipped for lightness)
- Pure vanilla extract – 1 teaspoon (brings out the cheesecake flavor)
- Fresh lemon juice – 1 tablespoon (balances the richness with brightness)
- Huckleberry Swirl:
- Huckleberries – 1 cup (150g), fresh or frozen (thawed if frozen)
- Granulated sugar – 2 tablespoons (adjust to taste)
- Water – 2 tablespoons (to help make a sauce)
- Fresh lemon zest – 1 teaspoon (adds a vibrant zing)
If you can’t find huckleberries, fresh blueberries or blackberries make a fine substitute — though I have to say the slightly tart huckleberries give this cheesecake an edge that’s hard to beat. For a dairy-free option, swap cream cheese with a plant-based cream cheese and use coconut cream instead of heavy cream.
Equipment Needed
- Mixing bowls – a medium and a large one to separate crust and filling preparations
- Electric mixer or stand mixer – essential for whipping the cream and smoothing the cream cheese filling; a hand mixer works fine too
- Food processor or resealable plastic bag and rolling pin – to crush vanilla wafers (I often just use a sturdy zip-top bag and a rolling pin; easy and no extra cleanup)
- Spoon or spatula – for folding whipped cream into the filling gently
- 9-inch springform pan or a similar sized dish – makes removal easier but a regular pie plate works if you line it well
- Small saucepan – to cook down the huckleberries for the swirl
- Measuring cups and spoons – for accuracy (especially important for sugar and lemon juice)
Personally, I find a stand mixer makes whipping the filling a breeze, but I’ve had success with a hand mixer too — just be patient with the cream cheese to avoid lumps. If you don’t have a springform pan, a simple glass pie dish lined with parchment paper can do the trick, though the presentation is a bit trickier.
Preparation Method
- Prepare the crust: Place the vanilla wafers in a resealable plastic bag and crush them finely but not into powder (about 2 cups worth). Melt 6 tablespoons (85g) of unsalted butter and mix it with the crushed wafers and 2 tablespoons sugar (if using) plus a pinch of cinnamon. Press this mixture firmly into the bottom of a 9-inch springform pan, making an even layer. Refrigerate while you prepare the filling. (This chilling helps the crust set and hold its shape.) Approximately 10 minutes.
- Make the huckleberry swirl: In a small saucepan, combine 1 cup (150g) of huckleberries, 2 tablespoons sugar, 2 tablespoons water, and 1 teaspoon lemon zest. Cook over medium heat, stirring occasionally, until the berries break down and the sauce thickens slightly, about 8-10 minutes. Let it cool to room temperature. (If you want a smoother sauce, give it a quick blend or mash.)
- Prepare the cheesecake filling: In a large bowl, beat 16 ounces (450g) of softened cream cheese with 3/4 cup (90g) powdered sugar until smooth and creamy, about 2-3 minutes. Add 1 tablespoon lemon juice and 1 teaspoon vanilla extract, mixing just to combine.
- Whip the cream: In a separate chilled bowl, whip 1 cup (240ml) heavy cream until soft peaks form — it should be fluffy but not grainy or over-beaten.
- Combine filling and swirl: Gently fold the whipped cream into the cream cheese mixture in three additions, being careful not to deflate the airiness. Once combined, spoon half the filling over the prepared crust. Drop spoonfuls of the huckleberry sauce over the filling, then swirl lightly with a knife or skewer. Repeat with the remaining filling and huckleberry sauce, swirling again for a marbled effect.
- Chill: Cover the pan with plastic wrap and refrigerate for at least 4 hours, preferably overnight, until the cheesecake is fully set and firm to the touch.
- Serve: Remove the sides of the springform pan carefully. Slice with a warm knife (run under hot water, then wiped dry) for clean cuts. Garnish with extra fresh huckleberries or a sprinkle of lemon zest if desired.
Quick tip: If the crust feels too crumbly when pressing, add a touch more melted butter — it should hold together without being greasy. Also, don’t rush the chilling step; the cheesecake needs time to set properly for that perfect, creamy texture.
Cooking Tips & Techniques
One thing I learned the hard way — patience is key with this no-bake cheesecake. Rushing the chilling phase can lead to a filling that’s too soft to slice nicely. I usually leave it overnight, which makes a big difference in texture.
When whipping the cream, keep your bowl and beaters cold for best results — I sometimes pop them in the freezer for 10 minutes before starting. This helps the cream whip up faster and stay stable longer.
Swirling the huckleberry sauce into the filling is a delicate step. Use a gentle hand and a thin skewer or knife. Too much swirling can blend the sauce completely, losing that pretty marbled effect. It’s okay if some berries remain whole — it adds a lovely texture surprise.
For the crust, crushing the vanilla wafers by hand gives a better texture than pulverizing them in a food processor. The slight chunkiness adds a nice bite and prevents the crust from becoming too dense.
Lastly, a warm knife is your secret weapon for slicing clean cheesecake pieces. Dip the knife in hot water, wipe it dry, and slice slowly — repeat between cuts for the smoothest presentation.
Variations & Adaptations
This no-bake cheesecake is flexible, which makes it fun to tweak based on what you have or your dietary needs.
- Berry Swap: If huckleberries are hard to find, fresh or frozen blueberries, blackberries, or raspberries work beautifully. Each berry brings its own flavor twist.
- Gluten-Free Crust: Swap vanilla wafers for gluten-free cookies or almond flour mixed with butter for a nutty crust alternative.
- Dairy-Free Version: Use a plant-based cream cheese (like cashew or almond-based) and coconut whipping cream. Keep in mind the flavor will shift slightly but still taste delicious.
- Citrus Twist: Add a teaspoon of orange zest to the filling or crust for a bright citrus note that pairs nicely with the berries.
- Mini Cheesecakes: Make individual portions using a muffin tin lined with cupcake liners — great for parties or portion control.
Once, I tried folding in some finely chopped toasted pecans into the crust — it added a lovely crunch that made the cheesecake feel extra special and a little more rustic. If you want a bit of texture contrast, that’s a simple step to try.
Serving & Storage Suggestions
This cheesecake is best served chilled, straight from the fridge. The creamy filling softens just enough at room temperature after a few minutes to melt in your mouth. For a pretty presentation, garnish with fresh huckleberries or a light dusting of powdered sugar and a small sprig of mint.
It pairs well with a cup of strong coffee or a lightly sweet dessert wine if you want to make an occasion of it. For a casual gathering, it’s a nice finish after something savory like creamy baked crab dip or creamy deviled eggs — the contrast of flavors is delightful.
Store leftovers covered in the refrigerator for up to 4 days. Because it’s no-bake, the texture stays creamy without drying out. You can also freeze the cheesecake for up to a month — just thaw in the fridge overnight before serving. The flavors actually deepen a bit after resting, so leftovers taste even better the next day.
Nutritional Information & Benefits
Per serving (based on 8 slices), this creamy no-bake huckleberry cheesecake with vanilla wafer crust contains roughly:
| Calories | 350-400 kcal |
|---|---|
| Fat | 25g (mostly from cream cheese and butter) |
| Carbohydrates | 30g (includes sugars from berries and wafers) |
| Protein | 5g |
Huckleberries are packed with antioxidants, vitamin C, and dietary fiber, which adds a nutritional boost to this indulgent dessert. Cream cheese and heavy cream provide calcium and fat-soluble vitamins, though this recipe is definitely a treat to enjoy in moderation.
This cheesecake is naturally gluten-containing due to the vanilla wafers, but gluten-free swaps make it easy to accommodate dietary restrictions. The recipe is also low in added preservatives or artificial ingredients, making it a cleaner dessert choice compared to store-bought options.
Conclusion
This creamy no-bake huckleberry cheesecake with vanilla wafer crust is one of those recipes that’s easy to make yet feels special every time. It’s a sweet spot between fuss-free and fancy, delivering a rich, tangy, and fresh dessert that’s sure to get those quiet, contented moments at your table. Whether you stick with the classic or try a variation, I hope it becomes a recipe you reach for when you want a little homemade magic without heating up the oven.
Give it a try, tweak it to your liking, and most importantly, savor each bite. If you’re in the mood for other creamy delights, you might appreciate the ease of my creamy no-churn vanilla bean ice cream or the fresh flavors in the creamy classic hummus recipe. Drop a comment and let me know how your cheesecake turns out — I love hearing your twists and tips!
FAQs About Creamy No-Bake Huckleberry Cheesecake
Can I use frozen huckleberries for the swirl?
Yes, frozen huckleberries work well. Just thaw them completely and drain any excess liquid before cooking them down into the sauce.
How long does the cheesecake need to chill?
At least 4 hours is necessary, but overnight chilling delivers the best texture and flavor.
Can I make this cheesecake without a springform pan?
Absolutely. Use a pie plate lined with parchment paper to help with removal, but the presentation might be less neat.
Is there a way to make the crust crunchier?
Adding a bit more melted butter or pressing the crust firmly into the pan helps. Also, chilling the crust before adding the filling keeps it from getting soggy.
How do I store leftover cheesecake?
Keep it covered in the refrigerator for up to 4 days or freeze for up to a month. Thaw in the fridge before serving.
Pin This Recipe!
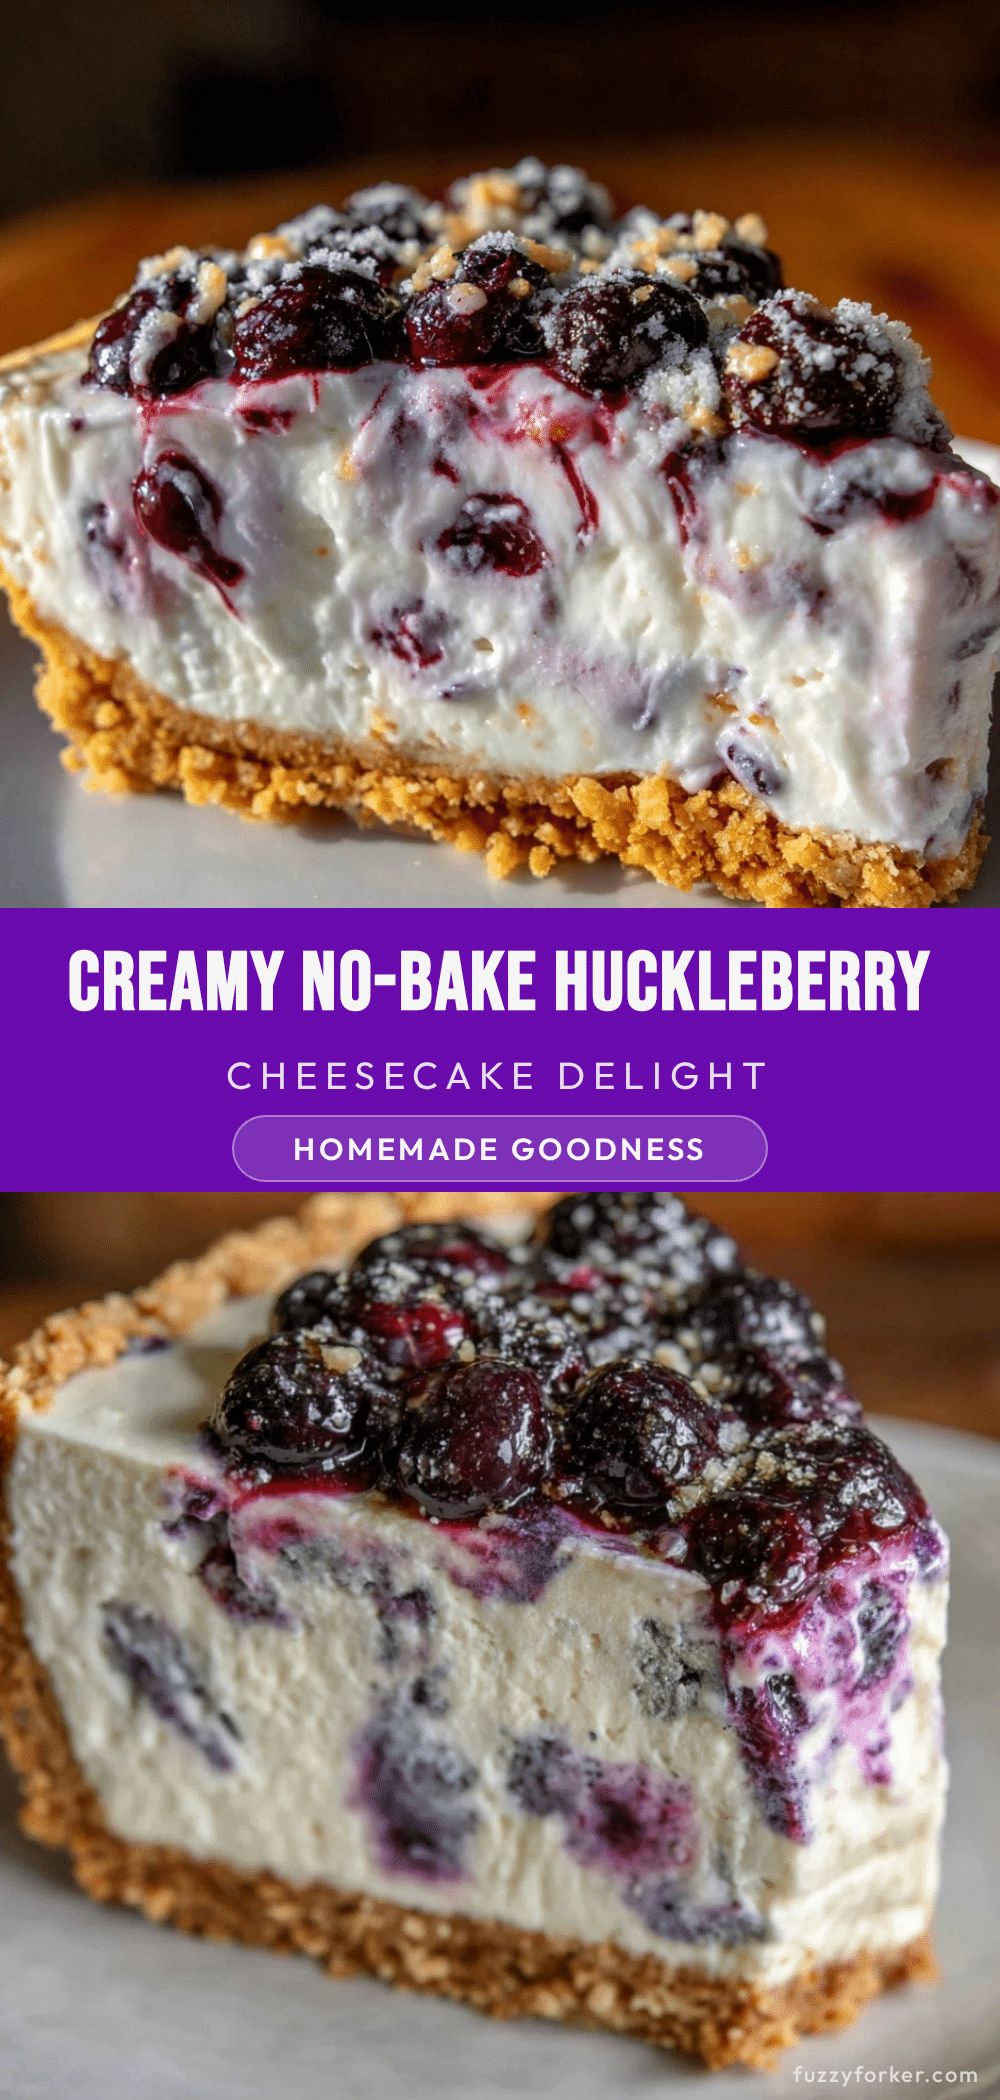
Creamy No-Bake Huckleberry Cheesecake

A creamy no-bake cheesecake with a vanilla wafer crust and a tangy huckleberry swirl, perfect for an easy homemade dessert that impresses without the stress.
- Prep Time: 20 minutes
- Cook Time: 10 minutes
- Total Time: 4 hours 30 minutes
- Yield: 8 servings
- Category: Dessert
- Cuisine: American
Ingredients
- Vanilla wafers – about 2 cups (around 150g), crushed
- Unsalted butter – 6 tablespoons (85g), melted
- Granulated sugar – 2 tablespoons (optional)
- A pinch of ground cinnamon (optional)
- Cream cheese – 16 ounces (450g), softened to room temperature
- Powdered sugar – 3/4 cup (90g), sifted
- Heavy cream – 1 cup (240ml), chilled
- Pure vanilla extract – 1 teaspoon
- Fresh lemon juice – 1 tablespoon
- Huckleberries – 1 cup (150g), fresh or frozen (thawed if frozen)
- Granulated sugar – 2 tablespoons (for huckleberry sauce)
- Water – 2 tablespoons
- Fresh lemon zest – 1 teaspoon
Instructions
- Prepare the crust: Place the vanilla wafers in a resealable plastic bag and crush them finely but not into powder (about 2 cups worth). Melt 6 tablespoons (85g) of unsalted butter and mix it with the crushed wafers and 2 tablespoons sugar (if using) plus a pinch of cinnamon. Press this mixture firmly into the bottom of a 9-inch springform pan, making an even layer. Refrigerate while you prepare the filling (about 10 minutes).
- Make the huckleberry swirl: In a small saucepan, combine 1 cup (150g) of huckleberries, 2 tablespoons sugar, 2 tablespoons water, and 1 teaspoon lemon zest. Cook over medium heat, stirring occasionally, until the berries break down and the sauce thickens slightly, about 8-10 minutes. Let it cool to room temperature. For a smoother sauce, blend or mash if desired.
- Prepare the cheesecake filling: In a large bowl, beat 16 ounces (450g) of softened cream cheese with 3/4 cup (90g) powdered sugar until smooth and creamy, about 2-3 minutes. Add 1 tablespoon lemon juice and 1 teaspoon vanilla extract, mixing just to combine.
- Whip the cream: In a separate chilled bowl, whip 1 cup (240ml) heavy cream until soft peaks form.
- Combine filling and swirl: Gently fold the whipped cream into the cream cheese mixture in three additions, being careful not to deflate the airiness. Spoon half the filling over the prepared crust. Drop spoonfuls of the huckleberry sauce over the filling, then swirl lightly with a knife or skewer. Repeat with the remaining filling and huckleberry sauce, swirling again for a marbled effect.
- Chill: Cover the pan with plastic wrap and refrigerate for at least 4 hours, preferably overnight, until the cheesecake is fully set and firm to the touch.
- Serve: Remove the sides of the springform pan carefully. Slice with a warm knife (run under hot water, then wiped dry) for clean cuts. Garnish with extra fresh huckleberries or a sprinkle of lemon zest if desired.
Notes
Chill the crust before adding filling to prevent sogginess. Use a warm knife for clean slicing. Whip cream in a chilled bowl for best results. Swirl huckleberry sauce gently to maintain marbled effect. Overnight chilling improves texture and flavor.
Nutrition
- Serving Size: 1 slice (1/8 of chee
- Calories: 375
- Sugar: 20
- Sodium: 250
- Fat: 25
- Saturated Fat: 15
- Carbohydrates: 30
- Fiber: 2
- Protein: 5
Keywords: no-bake cheesecake, huckleberry cheesecake, vanilla wafer crust, easy dessert, homemade cheesecake, no oven dessert, creamy cheesecake


