“The power went out halfway through baking,” I confessed to my friend last Friday night, laughing as I recalled the chaos. Honestly, I was halfway through making these decadent red velvet molten lava cakes for two when the lights flickered off. No oven timer, no light, just me and my guesswork. Somehow, despite the blackout and my less-than-ideal timing, the cakes came out gooey and perfect—maybe even better than usual.
It’s funny because I wasn’t planning to make dessert that evening. I had just picked up a couple of red velvet cupcakes from the bakery down the street for my date night, but when my partner suggested something homemade, I got curious. The recipe itself was scribbled on a napkin from a tiny café, handed to me by the barista who swore it was “the easiest way to impress someone.”
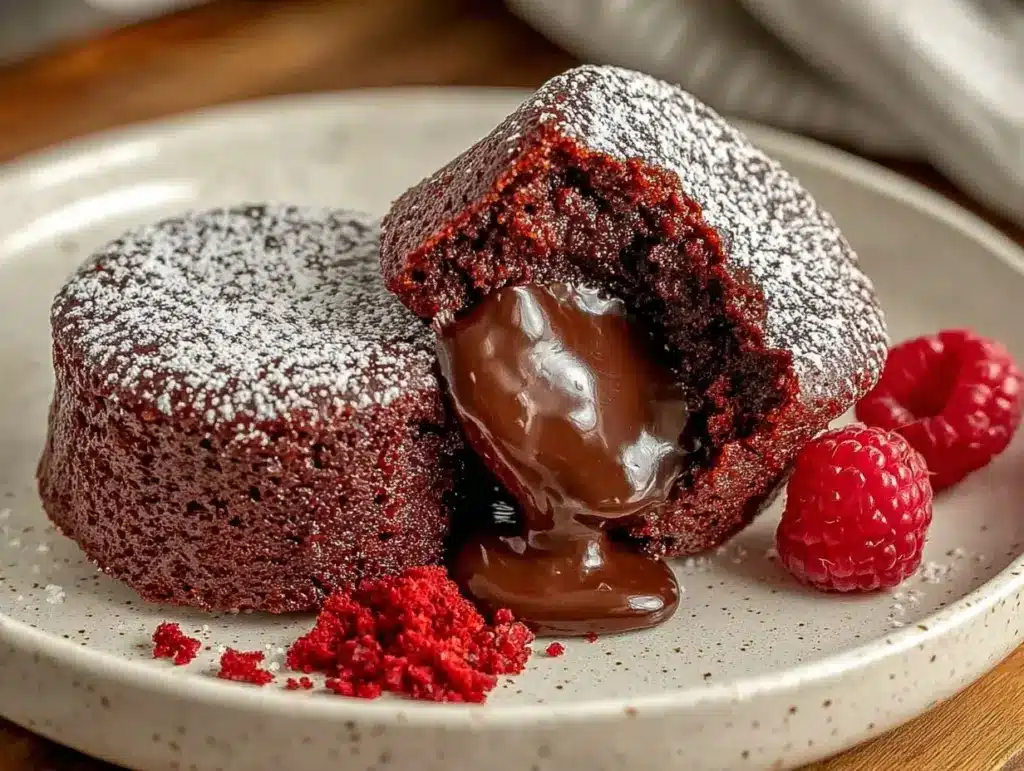
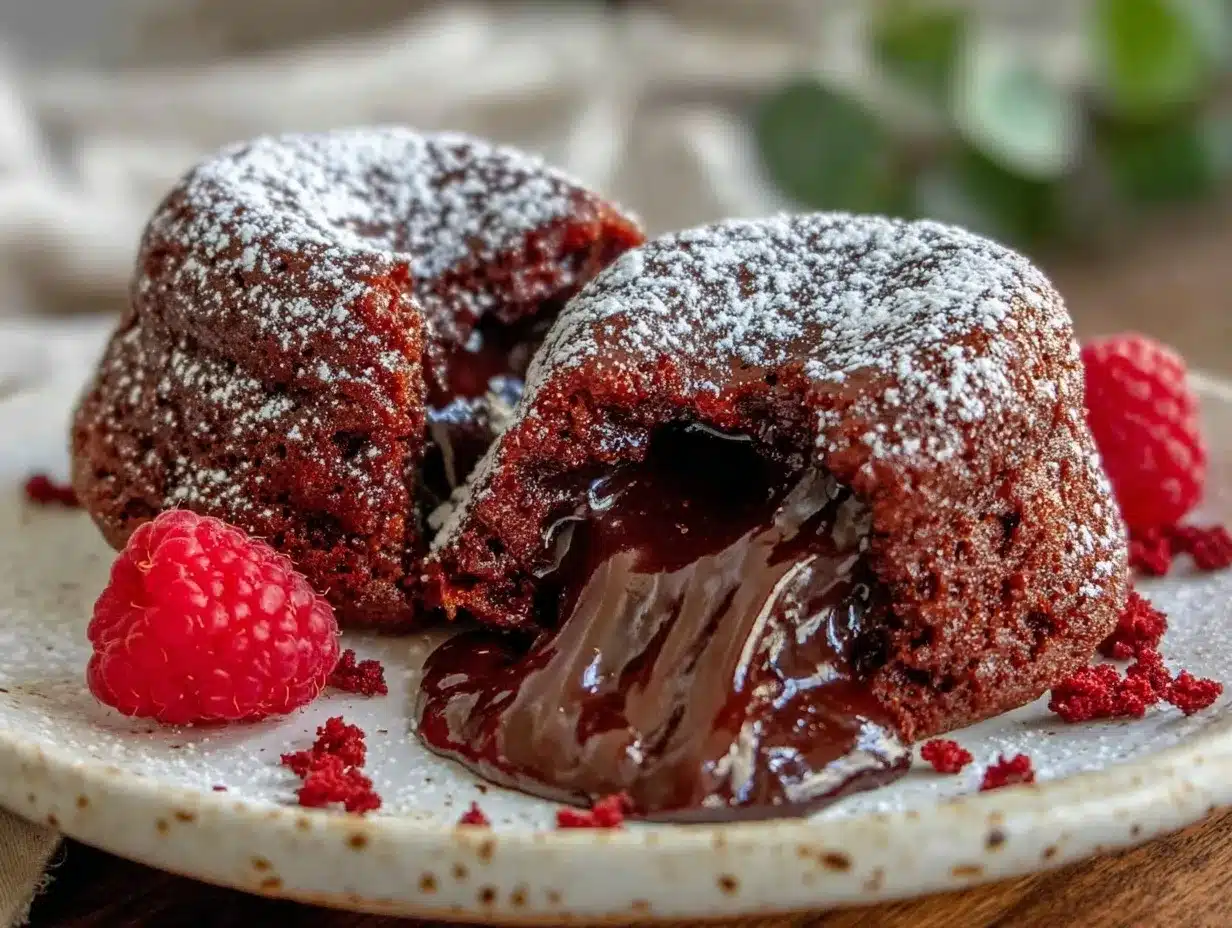
Let me tell you, these red velvet molten lava cakes are the kind of treat that sneaks up on you. The rich, velvety cake with that molten chocolate core? It’s like a warm hug on a plate. Maybe you’ve been there—looking for a simple, indulgent dessert that feels luxurious without hours of prep. This recipe fits that bill perfectly, and I keep coming back to it, blackout mishaps and all.
Why You’ll Love This Recipe
Honestly, this red velvet molten lava cake recipe is special because it strikes the perfect balance between being incredibly indulgent and surprisingly easy to make. After plenty of kitchen trials (and a few near disasters), I’ve fine-tuned everything so you can get these beauties on the table fast.
- Quick & Easy: Ready in under 30 minutes, perfect for spontaneous date nights or last-minute dessert cravings.
- Simple Ingredients: Most are pantry staples; no need to hunt down exotic stuff.
- Perfect for Two: Tailored portion size so you’re not stuck with leftovers or overindulging alone.
- Crowd-Pleaser: The rich red velvet flavor with that molten chocolate center always gets raves.
- Unbelievably Delicious: The texture contrast—moist cake outside, molten chocolate inside—is next-level comfort food.
What sets this recipe apart? It’s the little details—like a touch of cream cheese in the batter for that authentic red velvet tang, and the way the chocolate center melts just right without turning bitter. Also, I use a combination of cocoa powder and melted chocolate, which balances flavor and texture beautifully. Trust me, this isn’t just another lava cake; it’s the one you’ll want to make again and again.
What Ingredients You Will Need
This recipe uses simple, wholesome ingredients to deliver bold flavor and that signature molten texture without any fuss. Most of these you’ll find in your pantry or fridge, and a couple are easy to swap if needed.
- For the Cake Batter:
- Unsalted butter, 4 tablespoons (57g), melted and slightly cooled
- Granulated sugar, 1/3 cup (67g)
- Large egg, room temperature
- All-purpose flour, 1/4 cup (32g)
- Unsweetened cocoa powder, 2 tablespoons (15g), sifted (I like Ghirardelli for flavor)
- Buttermilk, 3 tablespoons (45ml), or plain yogurt as a substitute
- Red food coloring, 1 tablespoon (adjust for desired color intensity)
- Vanilla extract, 1/2 teaspoon
- White vinegar, 1/4 teaspoon (helps with that classic red velvet tang)
- Salt, a pinch
- For the Molten Center:
- Semisweet chocolate, 2 ounces (56g), chopped finely (I recommend Lindt or Valrhona)
- Heavy cream, 1 tablespoon (15ml) to mix with chocolate for smoothness
- Optional Topping:
- Powdered sugar, for dusting
- Fresh raspberries or strawberries
- Whipped cream or vanilla ice cream
Pro tip: Using room temperature eggs helps the batter emulsify better, giving a smoother texture. If you’re gluten-free, almond flour can replace all-purpose flour, but the texture will be slightly different. For dairy-free, swap butter and cream with coconut oil and coconut cream respectively. Just keep in mind the flavor twist this brings.
Equipment Needed
- Two 6-ounce (180ml) ramekins or oven-safe custard dishes – these help form the perfect cake shape and molten center.
- Mixing bowls – one medium-sized for wet ingredients, one small for dry.
- Whisk and spatula – for smooth batter mixing.
- Measuring cups and spoons – precise measurements matter in baking.
- Small saucepan or microwave-safe bowl – to melt butter and chocolate.
- Oven mitts and cooling rack – safety first, and letting cakes cool briefly avoids overcooking.
If you don’t have ramekins, small oven-safe glass bowls work, too. Just grease them well with butter or non-stick spray. I once tried silicone muffin cups, but they didn’t hold the shape as well and the molten center leaked a bit. So I stick to ramekins now—they’re worth the investment, and cleaning is easy with a soak.
Preparation Method
- Preheat your oven to 425°F (220°C). Butter the ramekins generously, then dust lightly with cocoa powder to prevent sticking. Set aside.
- Prepare the molten chocolate center: In a small bowl, combine the chopped semisweet chocolate and heavy cream. Microwave in 15-second bursts, stirring between, until smooth and glossy. Set aside to cool slightly.
- Mix the dry ingredients: In a separate bowl, sift together the flour, cocoa powder, and salt. This helps avoid lumps in the batter.
- Whisk the wet ingredients: In a medium bowl, whisk the melted butter and sugar until combined (no need to cream). Add the egg and vanilla extract; whisk vigorously until smooth and pale.
- Combine wet and dry: Slowly add the flour mixture to the wet mixture, folding gently with a spatula. Add the buttermilk, red food coloring, and vinegar. Mix just until smooth—don’t overmix or the cake will be dense.
- Fill the ramekins: Spoon half of the batter evenly into the ramekins. Then, add a dollop (about 1 tablespoon) of the molten chocolate center in the middle of each. Cover with the remaining batter, spreading gently to seal.
- Bake for 12-14 minutes. The edges should be set and pulling away slightly, but the center must still jiggle when you gently shake the ramekin. That’s the molten magic!
- Cool for 5 minutes. Run a knife around the edges to loosen the cakes. Then invert onto plates carefully.
- Serve immediately. Dust with powdered sugar, add berries or a scoop of ice cream if you like. The molten center is best enjoyed warm.
If your cakes come out too firm in the middle, your oven might run hot—try reducing baking time by a minute. If the center is too runny, add another minute next time. Cooking lava cakes is part art, part science, and honestly, a bit of luck. I once forgot to grease the ramekins and ended up with a bit of a mess, so don’t skip that step!
Cooking Tips & Techniques
Baking molten lava cakes can seem tricky, but a few insider tips make all the difference. First, the key is timing. The batter must be cooked enough to hold shape but still preserve that luscious molten core. I use the “jiggle test”—if the center still wiggles slightly, it’s perfect.
Another tip: use good quality chocolate. I’ve found that cheaper chocolate can become grainy or bitter when melted. Also, mix the chocolate center with a bit of cream to keep it silky smooth and easier to spread inside the batter.
Don’t overmix your batter. Overworking gluten in the flour can make the cake tough. Folding gently and stopping once ingredients are combined keeps it tender.
Lastly, prep your ramekins ahead—greasing and dusting with cocoa powder prevents sticking and helps you flip the cakes out cleanly. If you’re running short on time, you can prepare the batter up to the filling step, refrigerate it, then bake fresh when ready.
A personal mishap: I once baked these with cold eggs straight from the fridge, and the batter curdled a bit. Lesson learned—bring eggs to room temperature for a smoother mix.
Variations & Adaptations
You can change things up with this recipe to suit your mood or dietary needs. Here are some ideas I’ve tried or recommend:
- Vegan Version: Swap butter for coconut oil, use flax eggs (1 tablespoon ground flaxseed + 3 tablespoons water per egg), and use dairy-free chocolate and plant-based milk for the buttermilk substitute.
- Spiced Red Velvet: Add a pinch of cinnamon and a tiny dash of cayenne powder to the batter for a subtle warmth that pairs beautifully with the chocolate center.
- Berry Surprise: Drop a few fresh raspberries or a spoonful of raspberry jam in the center along with the chocolate for a fruity twist.
- Mini Molten Cakes: Use a mini muffin tin to make bite-sized versions, adjusting baking time to about 8-10 minutes.
- Gluten-Free: Use a gluten-free flour blend in place of all-purpose flour. I like Bob’s Red Mill gluten-free mix for consistent results.
One time I swapped cream cheese frosting dollops for the molten center—delicious but less gooey. It’s fun to experiment, but the classic molten chocolate core remains my favorite.
Serving & Storage Suggestions
These red velvet molten lava cakes are best served warm, just after baking, to enjoy the molten center at its peak. I like to dust them lightly with powdered sugar and add fresh berries or a scoop of vanilla ice cream to balance the richness.
If you want to serve later, refrigerate the cakes covered tightly. To reheat, microwave on medium for 20-30 seconds or warm in a 300°F (150°C) oven for 5-7 minutes. Keep in mind the molten center won’t be quite as warm or gooey as fresh-baked, but still delicious.
Leftovers are rare in my house, but these cakes can be frozen before baking. Cover the filled ramekins tightly with plastic wrap and foil, then bake from frozen adding a couple of extra minutes.
Flavors develop subtly if you let the cakes sit a few minutes before serving, allowing the red velvet tang and chocolate richness to meld. Just don’t wait too long or the molten core will firm up.
Nutritional Information & Benefits
Each serving of these red velvet molten lava cakes (one ramekin) contains approximately:
| Nutrient | Amount |
|---|---|
| Calories | 320 kcal |
| Fat | 20g |
| Saturated Fat | 12g |
| Carbohydrates | 32g |
| Sugar | 22g |
| Protein | 4g |
Key ingredients like cocoa powder and dark chocolate offer antioxidants, while the modest portion size helps keep indulgence balanced. Using buttermilk adds a slight tang and tenderness without extra calories. For those watching carbs, swapping sugar with a natural sweetener like erythritol can reduce sugar content.
Note: This recipe contains gluten, dairy, and eggs, so it’s not suitable for all allergies. However, with the adaptations mentioned, it can be made vegan or gluten-free.
From my experience, this dessert is a treat that still feels somewhat balanced, making it a better choice than many heavy, overly sweet alternatives.
Conclusion
If you’re craving a dessert that’s rich, comforting, and just the right size for two, these decadent red velvet molten lava cakes fit the bill. The combination of moist red velvet cake and molten chocolate center is honestly irresistible. I love how quick and straightforward this recipe is—no fancy equipment or ingredients, just good old-fashioned indulgence you can whip up any night of the week.
Feel free to tweak it to your taste, whether that’s adding a hint of spice, going vegan, or turning it into mini cakes. I hope you find as much joy making and eating these as I do (even on blackout nights!).
Give it a try, then share how yours turned out—I’d love to hear your twists and tips. Go ahead, treat yourself and that special someone—you deserve it!
FAQs
Can I make these red velvet molten lava cakes ahead of time?
You can prepare the batter and fill the ramekins a few hours before baking. Keep them covered and refrigerated, then bake fresh when ready. For longer storage, freeze unbaked cakes wrapped tightly and bake from frozen.
How do I know when the cakes are done?
The edges should be firm and slightly pulling away from the ramekin, while the center still jiggles gently when shaken. This indicates the molten center is still gooey.
Can I use regular milk instead of buttermilk?
Yes, but for every 1 tablespoon of vinegar or lemon juice added to the milk to mimic buttermilk’s acidity, let it sit for 5 minutes before using. This helps create the tender crumb and slight tang classic to red velvet.
What if I don’t have red food coloring?
You can skip it or use natural alternatives like beet juice, but the classic red velvet color will be less intense. The flavor remains delicious regardless.
Can I double this recipe for more servings?
Absolutely. Just double the ingredients and bake in multiple ramekins. Baking time stays roughly the same per cake, but avoid overfilling ramekins to keep the molten center intact.
Pin This Recipe!
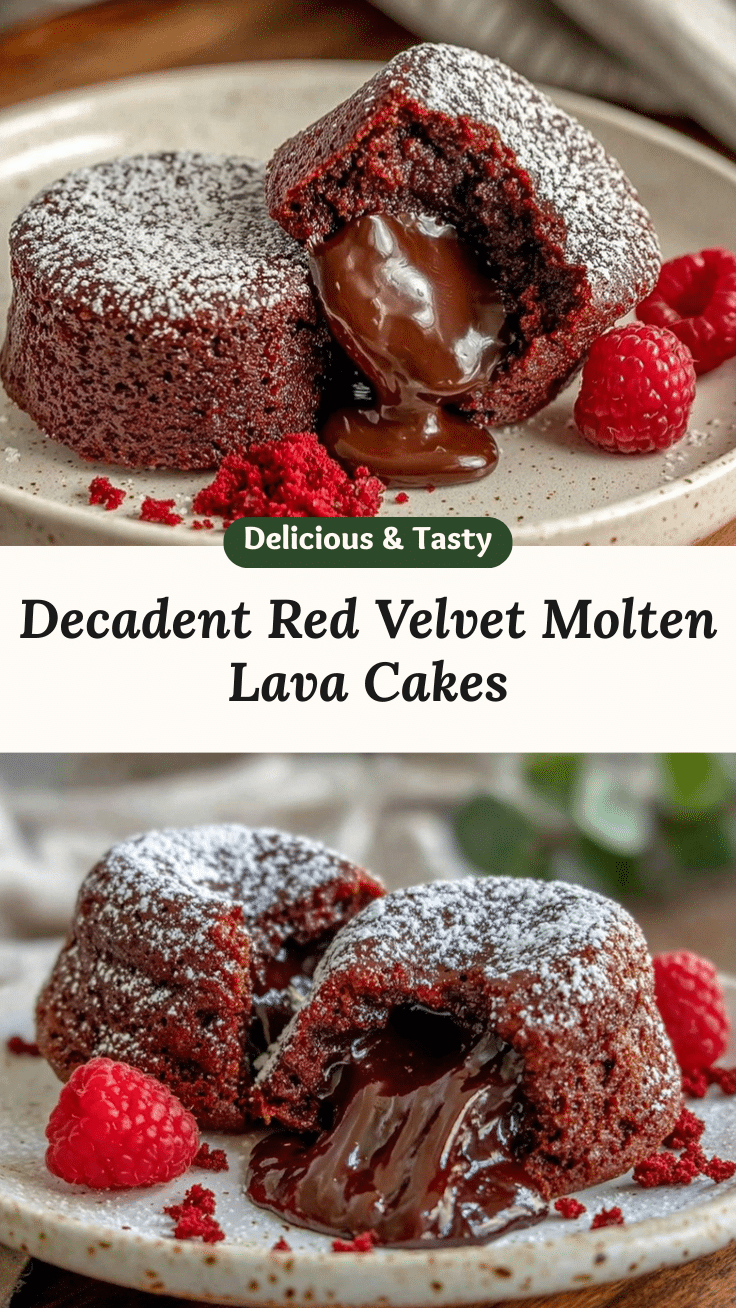
Decadent Red Velvet Molten Lava Cakes for Two
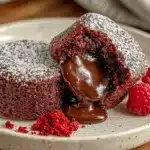
These red velvet molten lava cakes are a quick and indulgent dessert perfect for two, featuring a moist red velvet cake exterior with a rich molten chocolate center.
- Prep Time: 10 minutes
- Cook Time: 14 minutes
- Total Time: 24 minutes
- Yield: 2 servings 1x
- Category: Dessert
- Cuisine: American
Ingredients
- 4 tablespoons (57g) unsalted butter, melted and slightly cooled
- 1/3 cup (67g) granulated sugar
- 1 large egg, room temperature
- 1/4 cup (32g) all-purpose flour
- 2 tablespoons (15g) unsweetened cocoa powder, sifted
- 3 tablespoons (45ml) buttermilk or plain yogurt as a substitute
- 1 tablespoon red food coloring (adjust for desired color intensity)
- 1/2 teaspoon vanilla extract
- 1/4 teaspoon white vinegar
- Pinch of salt
- 2 ounces (56g) semisweet chocolate, chopped finely
- 1 tablespoon (15ml) heavy cream
- Optional toppings: powdered sugar for dusting, fresh raspberries or strawberries, whipped cream or vanilla ice cream
Instructions
- Preheat your oven to 425°F (220°C). Butter the ramekins generously, then dust lightly with cocoa powder to prevent sticking. Set aside.
- Prepare the molten chocolate center: In a small bowl, combine the chopped semisweet chocolate and heavy cream. Microwave in 15-second bursts, stirring between, until smooth and glossy. Set aside to cool slightly.
- Mix the dry ingredients: In a separate bowl, sift together the flour, cocoa powder, and salt.
- Whisk the wet ingredients: In a medium bowl, whisk the melted butter and sugar until combined. Add the egg and vanilla extract; whisk vigorously until smooth and pale.
- Combine wet and dry: Slowly add the flour mixture to the wet mixture, folding gently with a spatula. Add the buttermilk, red food coloring, and vinegar. Mix just until smooth—do not overmix.
- Fill the ramekins: Spoon half of the batter evenly into the ramekins. Add about 1 tablespoon of the molten chocolate center in the middle of each. Cover with the remaining batter, spreading gently to seal.
- Bake for 12-14 minutes. The edges should be set and pulling away slightly, but the center must still jiggle when you gently shake the ramekin.
- Cool for 5 minutes. Run a knife around the edges to loosen the cakes, then invert onto plates carefully.
- Serve immediately. Dust with powdered sugar and add berries or a scoop of ice cream if desired.
Notes
Use room temperature eggs for smoother batter. Grease and dust ramekins with cocoa powder to prevent sticking. Adjust baking time if cakes are too firm or too runny in the center. For gluten-free, substitute all-purpose flour with almond flour or gluten-free flour blend. For dairy-free, swap butter and cream with coconut oil and coconut cream. Use good quality chocolate for best flavor. Do not overmix batter to keep cake tender.
Nutrition
- Serving Size: 1 ramekin (one cake)
- Calories: 320
- Sugar: 22
- Fat: 20
- Saturated Fat: 12
- Carbohydrates: 32
- Protein: 4
Keywords: red velvet, molten lava cake, dessert for two, quick dessert, chocolate lava cake, easy red velvet cake, homemade dessert