“You know, the first time I tried making these graduation cap cookie sandwiches, it was a total mess—literally. The cookies stuck to the baking sheet, the frosting was too runny, and I was halfway through a phone call with my sister who kept asking if I was sure this was a good idea. But somehow, despite all that chaos in my tiny kitchen, the end result was a sweet little success that stole the spotlight at my niece’s graduation party last June. I wasn’t expecting to become known as ‘the cookie person’ in our family, but here we are!”
Honestly, the charm of these Perfect Graduation Cap Cookie Sandwiches isn’t just in their cute shape or celebration-ready look. It’s in how fun they are to make and share—no fancy tools needed, just a bit of patience and a playful spirit. Maybe you’ve been there, scrambling to whip up something memorable for a last-minute celebration, or just wanting a dessert that kids and adults actually rave about. These cookie sandwiches fit that bill perfectly. They look impressive without being complicated, and the balance of soft cookie and creamy filling is just spot on.
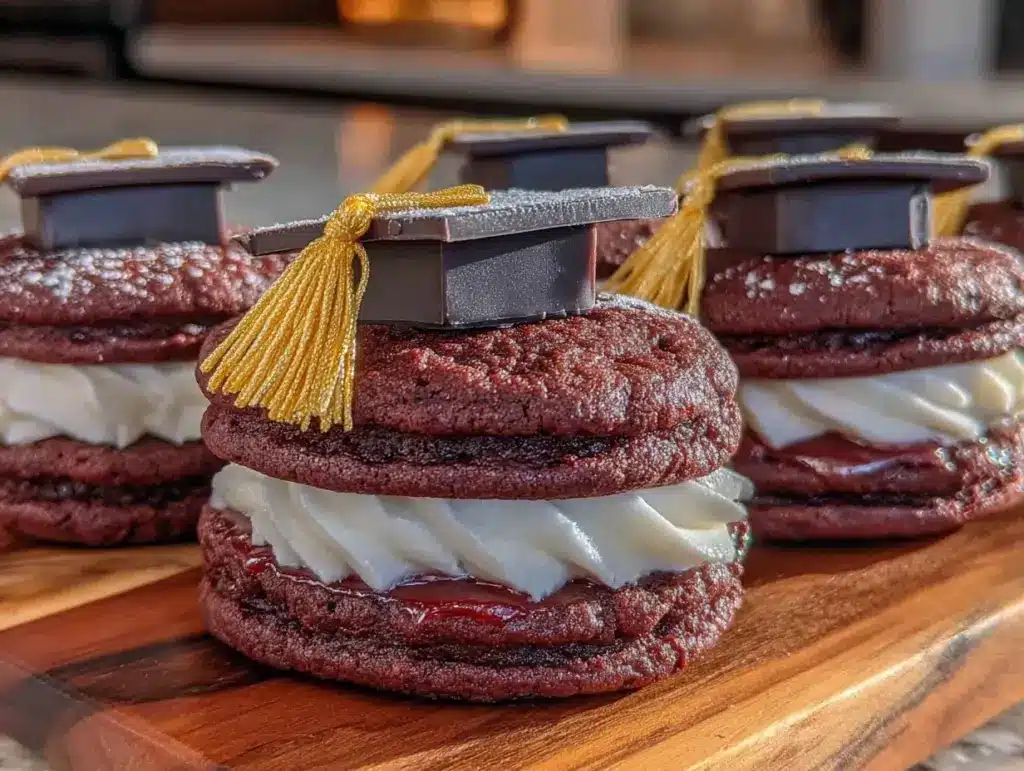
I still remember the way the frosting looked as it peeked out from between the two cookies, like a little mortarboard’s tassel ready to swing. And yes, there was frosting everywhere on my counter (oops), but that’s part of the fun, right? These treats stuck with me because they brought everyone together—from the five-year-olds to the grandparents—and made the day extra festive. So, if you’re hunting for a recipe that’s both playful and reliably delicious for your next graduation celebration, I think you’re going to love what’s coming up next.
Why You’ll Love This Recipe
After several kitchen experiments and testing out dozens of frosting tweaks, I can confidently say this recipe hits the sweet spot between ease and wow-factor. Here’s why these Perfect Graduation Cap Cookie Sandwiches have become a go-to for celebrations:
- Quick & Easy: From mixing to decorating, you’ll have these done in under 90 minutes—perfect for busy days when time isn’t on your side.
- Simple Ingredients: No need to hunt down odd baking supplies—most are pantry staples like flour, sugar, and butter.
- Perfect for Celebrations: These cookies are tailor-made for graduation parties, but honestly, they’re a hit at birthday parties, school events, or anytime you want a festive treat.
- Crowd-Pleaser: Kids love the fun shape and creamy filling, while adults appreciate the buttery, tender cookies.
- Unbelievably Delicious: The cookies are soft but sturdy enough to hold the frosting, which has just the right sweetness and creaminess.
What sets this recipe apart is the special technique I use to get a perfectly smooth, slightly chewy cookie that won’t crumble or lose its shape during sandwiching. Plus, the frosting is a creamy blend with just a hint of vanilla that complements the cookie without overpowering it. I’ve swapped out traditional royal icing for this fluffy filling because it’s easier to work with and tastes better, honestly.
It’s like comfort food dressed up for the party—familiar, satisfying, but with a little sparkle. Whether you’re new to baking or a seasoned home cook, these cookie sandwiches are designed to make you look good and feel relaxed. And from my experience, they’re the kind of treat that gets everyone closing their eyes for a moment after the first bite. Give it a try—you might find yourself making them long after the caps and gowns come off.
What Ingredients You Will Need
This recipe uses simple, wholesome ingredients to deliver bold flavor and satisfying texture without the fuss. Most of these you probably have in your pantry or fridge right now.
- For the Cookies:
- All-purpose flour – 2 ½ cups (315 g), sifted for lightness
- Baking powder – 1 teaspoon (4 g), for a gentle rise
- Salt – ½ teaspoon (3 g), balances sweetness
- Unsalted butter – 1 cup (227 g), softened (I like using Land O’ Lakes for consistent creaminess)
- Granulated sugar – 1 cup (200 g), adds crispness and sweetness
- Large egg – 1, room temperature
- Pure vanilla extract – 2 teaspoons (10 ml), for that warm, comforting flavor
- For the Filling:
- Unsalted butter – ½ cup (113 g), softened (make sure it’s soft but not melted for best texture)
- Powdered sugar – 2 cups (240 g), sifted to avoid lumps
- Vanilla extract – 1 teaspoon (5 ml), enhances the creamy sweetness
- Milk – 1 to 2 tablespoons (15–30 ml), to adjust consistency (use whole milk for richness, or almond milk if dairy-free)
- Optional: A pinch of salt to balance the sweetness
- For Decoration:
- Black fondant or black royal icing – to create the mortarboard caps
- Yellow or gold edible glitter or sprinkles – for the tassels
- Food-safe paintbrush – for applying glue (like water or edible glue) to attach decorations
Tip: If you want to make gluten-free versions, I recommend Bob’s Red Mill Gluten-Free Flour blend—it works surprisingly well in this cookie dough. For a dairy-free frosting, swap the butter for vegan margarine and use your favorite plant-based milk.
Equipment Needed
- Mixing bowls – one large for dough, one medium for frosting
- Electric mixer or stand mixer – makes creaming butter and sugar easier (a hand mixer works too!)
- Baking sheets – at least two, lined with parchment paper or silicone baking mats
- Rolling pin – essential for rolling out cookie dough evenly
- Graduation cap cookie cutter – ideally 3-4 inches wide (if you don’t have one, a square cutter and a small circle or rectangle for the top can be combined)
- Cooling racks – to let cookies cool fully before assembling
- Offset spatula or butter knife – for spreading frosting smoothly
- Small paintbrush – for applying edible glue or water to attach fondant decorations
If you’re on a budget, improvising with a drinking glass and knife for cutting shapes works fine, though the edges won’t be as sharp. Silicone baking mats are a worthy investment—they prevent sticking and help cookies bake evenly. After a few batches, I found that keeping my rolling pin and cookie cutters chilled slightly before use made handling the dough easier on warm days.
Preparation Method
- Preheat your oven to 350°F (175°C). Line two baking sheets with parchment paper or silicone mats.
- Mix dry ingredients: In a medium bowl, whisk together 2 ½ cups (315 g) all-purpose flour, 1 teaspoon (4 g) baking powder, and ½ teaspoon (3 g) salt. Set aside.
- Cream butter and sugar: In a large bowl, beat 1 cup (227 g) softened unsalted butter and 1 cup (200 g) granulated sugar with an electric mixer on medium speed until light and fluffy—about 3-4 minutes. This step is key for tender cookies.
- Add egg and vanilla: Beat in 1 large egg and 2 teaspoons (10 ml) vanilla extract until fully incorporated. The mixture might look a bit curdled, but that’s okay.
- Combine wet and dry: Gradually add the flour mixture to the butter mixture on low speed, mixing just until combined. Overmixing can make the cookies tough.
- Chill the dough: Shape the dough into a disk, wrap in plastic wrap, and refrigerate for at least 30 minutes. This helps with rolling and cutting clean shapes.
- Roll out dough: On a lightly floured surface, roll the dough to about ¼-inch (6 mm) thickness. Use the graduation cap cookie cutter to cut out shapes. Transfer cookies to baking sheets, spacing about 1 inch (2.5 cm) apart.
- Bake: Bake for 10-12 minutes until edges are just starting to turn golden. Watch closely—overbaking dries them out. Let cookies cool on the sheet for 5 minutes before transferring to a wire rack to cool completely.
- Prepare the frosting: Beat ½ cup (113 g) softened unsalted butter in a medium bowl until smooth. Gradually add 2 cups (240 g) powdered sugar, mixing on low speed. Add 1 teaspoon (5 ml) vanilla extract and 1-2 tablespoons (15-30 ml) milk until frosting is fluffy and spreadable.
- Assemble sandwiches: Spread a generous spoonful of frosting on the flat side of one cookie. Gently press a second cookie on top, flat sides inward, to create a sandwich. Repeat for all cookies.
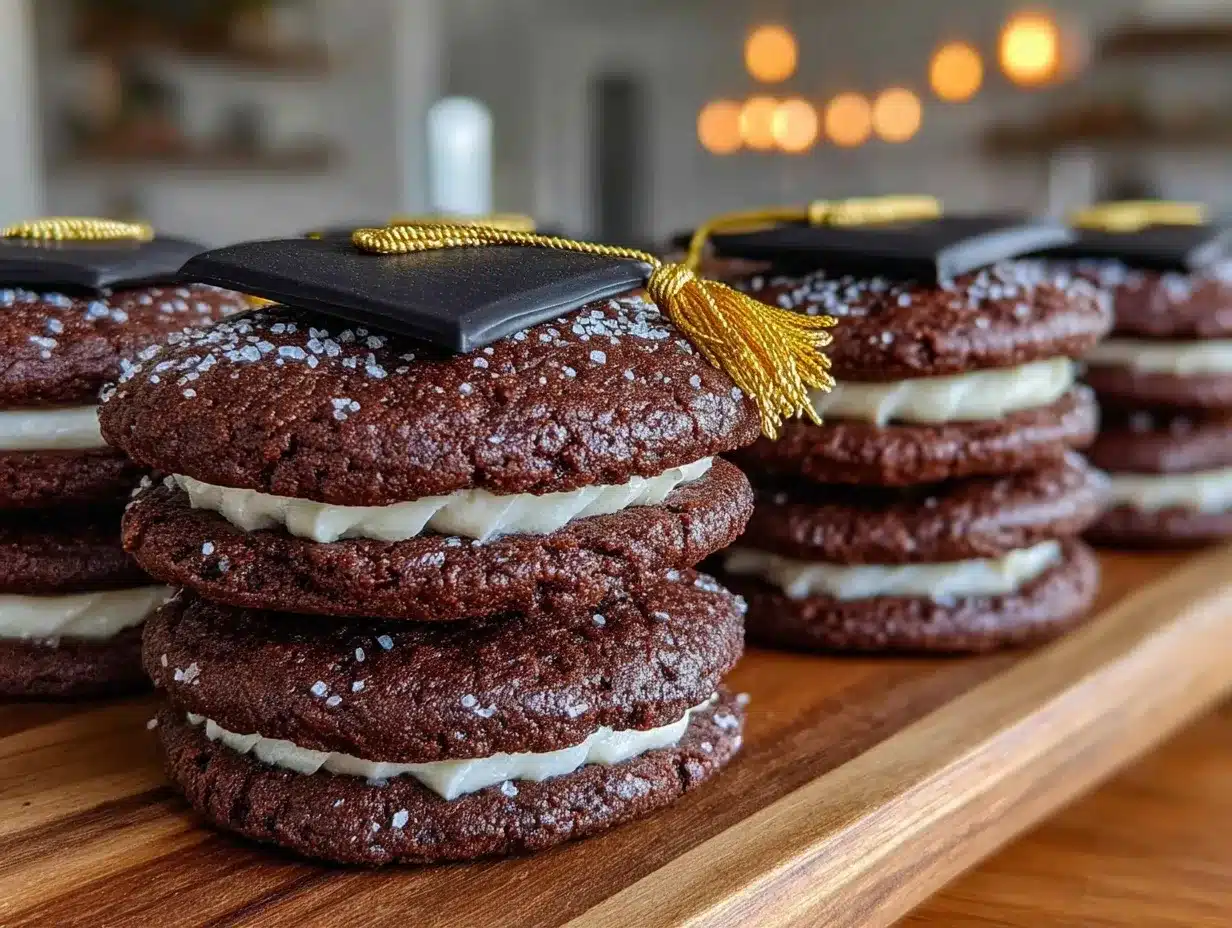
- Decorate: Roll out black fondant and cut small square caps to fit the tops of your cookie sandwiches. Attach with a dab of frosting or edible glue. Add a tiny strip or tassel with yellow/gold edible glitter or sprinkles. Allow decorations to set before serving.
Pro tip: If your dough gets too sticky while rolling, pop it back in the fridge for 10 minutes. Also, don’t rush cooling; assembling while warm can cause frosting to melt and decorations to slide.
Cooking Tips & Techniques
One trick I learned the hard way is to chill your dough well before rolling. Without that, the cookies spread too much and lose their shape—especially important when you want that crisp graduation cap look. Also, keep your rolling surface lightly floured but avoid adding too much flour, which can dry out the dough.
When creaming butter and sugar, patience is your friend. It takes a few minutes to get that fluffy texture, which makes all the difference in the cookie’s lightness. Don’t skimp on this step.
For the frosting, start with less milk and add more gradually. Too runny frosting makes assembly messy and decorations slide off. I always keep extra powdered sugar on hand to thicken things back up if needed. Also, use an offset spatula to spread frosting neatly—it’s way easier than a regular knife.
When baking, ovens vary, so check your cookies a couple of minutes before the timer rings. They should be just firm at the edges but still soft in the center. Overbaking leads to dry sandwiches, which nobody wants.
Lastly, multitasking helps. While cookies bake, whip up your frosting so you can assemble as soon as they’re cool. It saves time and keeps everything fresh.
Variations & Adaptations
- Flavor variations: Add 1 teaspoon of lemon zest to the cookie dough for a bright twist or mix ½ teaspoon ground cinnamon for a warm spice note.
- Filling alternatives: Swap vanilla frosting for chocolate ganache or cream cheese frosting for a tangy contrast. Both work beautifully in sandwich form.
- Dietary adaptations: Use gluten-free flour blends to make the cookies gluten-free. For dairy-free versions, substitute vegan butter and plant-based milk in both cookies and frosting.
- Shape ideas: If you don’t have a graduation cap cutter, try using a square cookie cutter and decorating with icing to mimic the cap and tassel. It’s a fun creative project, especially with kids.
- Seasonal touches: For spring graduations, add edible flower decorations or pastel-colored frosting. In winter, try a sprinkle of edible silver glitter for a festive sparkle.
I once replaced the vanilla frosting with a salted caramel buttercream at a friend’s graduation party. It was an unexpected hit—especially with the adults. Feel free to experiment and make this recipe your own!
Serving & Storage Suggestions
Serve these cookie sandwiches at room temperature to enjoy their soft, creamy texture. They pair wonderfully with a cup of iced tea, coffee, or even a sparkling lemonade for a festive touch. For presentation, arrange them on a tiered platter or a simple wooden board decorated with fresh flowers or graduation-themed confetti.
Store leftover sandwiches in an airtight container at room temperature for up to 2 days. If your house tends to be warm, keeping them in the fridge is fine but bring them back to room temperature before serving to soften the frosting. They also freeze well—place them in a single layer on a baking sheet, freeze until firm, then transfer to a freezer-safe container for up to one month. Thaw overnight in the fridge.
Flavors tend to meld and improve slightly after a few hours, so if you can prepare them a day ahead, you’re in for an even tastier treat.
Nutritional Information & Benefits
Each cookie sandwich contains approximately 180-220 calories, depending on the size and amount of frosting used. They offer a comforting dose of carbohydrates and fats, perfect for an energy boost during celebrations.
Key ingredients like butter and eggs provide some essential fat-soluble vitamins, while vanilla adds antioxidants. Using real ingredients and controlling sugar quantities means you avoid overly processed additives common in store-bought treats.
For gluten-free or dairy-free adaptations, these cookie sandwiches can fit into many dietary needs. Just be mindful of cross-contamination if preparing for those with allergies.
Personally, I think the joy these cookies bring to a celebration is just as important as any nutritional consideration. Treating yourself and loved ones to a homemade delight makes moments even sweeter.
Conclusion
The Perfect Graduation Cap Cookie Sandwiches are more than just a dessert—they’re a little celebration on a plate. They’re approachable to make, fun to decorate, and delicious enough to bring smiles all around. Whether you’re baking for a graduation party or just want to try something playful in the kitchen, this recipe offers a reliable way to impress without stress.
Feel free to play with the flavors and decorations to suit your style. I love how these cookies bring a bit of whimsy and warmth to any gathering, and honestly, they’ve become a tradition I look forward to each spring.
If you give this recipe a try, I’d love to hear how it turns out! Drop a comment below with your favorite variations or any little kitchen stories you had along the way. Sharing these moments makes the recipe even sweeter.
Happy baking—and congratulations to all the graduates out there!
FAQs
Can I make these cookie sandwiches ahead of time?
Absolutely! You can bake the cookies and prepare the frosting a day ahead, then assemble the sandwiches just before serving for the freshest taste. Assembled sandwiches can also be refrigerated overnight.
What if I don’t have a graduation cap cookie cutter?
No worries! Use a square or diamond-shaped cutter and decorate with icing or fondant to create the cap and tassel look. It’s a fun chance to get creative!
How do I prevent the frosting from melting or sliding off?
Make sure your cookies are completely cool before assembling, and use frosting that’s firm but spreadable. Chill the assembled cookies briefly if your kitchen is warm to help set the frosting.
Can I freeze these cookie sandwiches?
Yes! Freeze them in a single layer until firm, then store in an airtight container in the freezer for up to a month. Thaw in the fridge overnight before serving.
What’s the best way to get soft but sturdy cookies?
Chilling the dough before baking is key, as is not overbaking. Aim for a light golden edge while keeping the centers soft. The creaming method for butter and sugar also helps create that perfect texture.
Pin This Recipe!
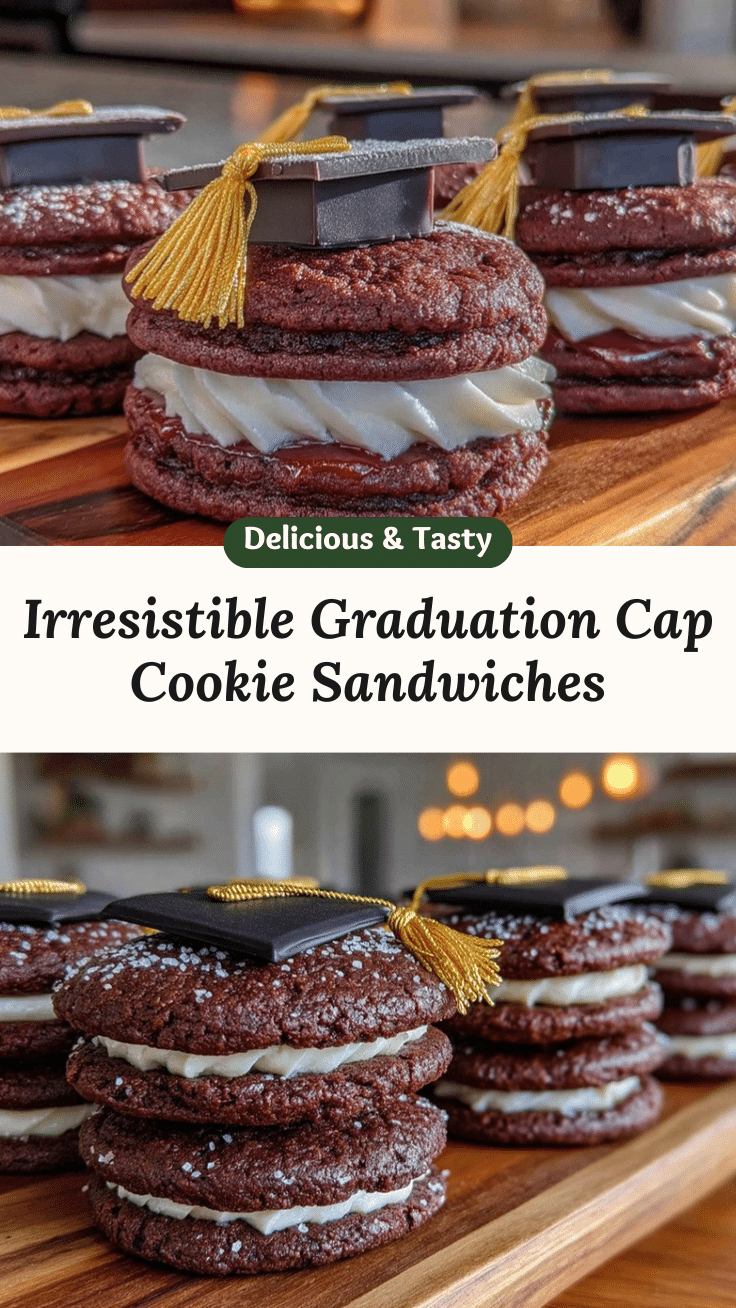
Perfect Graduation Cap Cookie Sandwiches

These cookie sandwiches are soft, creamy, and shaped like graduation caps, perfect for celebrations. They combine tender cookies with a fluffy vanilla frosting filling and festive decorations.
- Prep Time: 40 minutes
- Cook Time: 12 minutes
- Total Time: 52 minutes
- Yield: 24 cookie sandwiches 1x
- Category: Dessert
- Cuisine: American
Ingredients
- 2 ½ cups (315 g) all-purpose flour, sifted
- 1 teaspoon (4 g) baking powder
- ½ teaspoon (3 g) salt
- 1 cup (227 g) unsalted butter, softened
- 1 cup (200 g) granulated sugar
- 1 large egg, room temperature
- 2 teaspoons (10 ml) pure vanilla extract
- ½ cup (113 g) unsalted butter, softened (for filling)
- 2 cups (240 g) powdered sugar, sifted
- 1 teaspoon (5 ml) vanilla extract (for filling)
- 1 to 2 tablespoons (15–30 ml) milk (whole or almond milk)
- Optional: pinch of salt (for filling)
- Black fondant or black royal icing (for decoration)
- Yellow or gold edible glitter or sprinkles (for tassels)
- Food-safe paintbrush (for applying edible glue or water)
Instructions
- Preheat oven to 350°F (175°C). Line two baking sheets with parchment paper or silicone mats.
- In a medium bowl, whisk together flour, baking powder, and salt. Set aside.
- In a large bowl, beat softened butter and granulated sugar with an electric mixer on medium speed until light and fluffy, about 3-4 minutes.
- Beat in the egg and vanilla extract until fully incorporated.
- Gradually add the flour mixture to the butter mixture on low speed, mixing just until combined.
- Shape dough into a disk, wrap in plastic wrap, and refrigerate for at least 30 minutes.
- Roll dough on a lightly floured surface to about ¼-inch (6 mm) thickness. Cut out shapes using a graduation cap cookie cutter.
- Place cookies on baking sheets about 1 inch apart.
- Bake for 10-12 minutes until edges are just starting to turn golden. Let cool on the sheet for 5 minutes, then transfer to a wire rack to cool completely.
- For the frosting, beat softened butter until smooth. Gradually add powdered sugar, mixing on low speed.
- Add vanilla extract and milk until frosting is fluffy and spreadable.
- Spread frosting on the flat side of one cookie and gently press a second cookie on top to form a sandwich. Repeat for all cookies.
- Roll out black fondant and cut small squares to fit cookie tops. Attach with a dab of frosting or edible glue.
- Add tassels using yellow/gold edible glitter or sprinkles. Allow decorations to set before serving.
Notes
Chill dough well before rolling to prevent spreading. Use an offset spatula for easier frosting application. If dough gets sticky, refrigerate for 10 minutes. Avoid overbaking to keep cookies soft but sturdy. Assemble sandwiches only when cookies are completely cool to prevent frosting from melting. Decorations can be attached with edible glue or frosting. For gluten-free, use Bob’s Red Mill Gluten-Free Flour blend. For dairy-free, substitute vegan butter and plant-based milk.
Nutrition
- Serving Size: 1 cookie sandwich
- Calories: 200
- Sugar: 18
- Sodium: 90
- Fat: 11
- Saturated Fat: 7
- Carbohydrates: 26
- Fiber: 0.5
- Protein: 2
Keywords: graduation cookies, cookie sandwiches, celebration dessert, vanilla frosting, graduation party treats