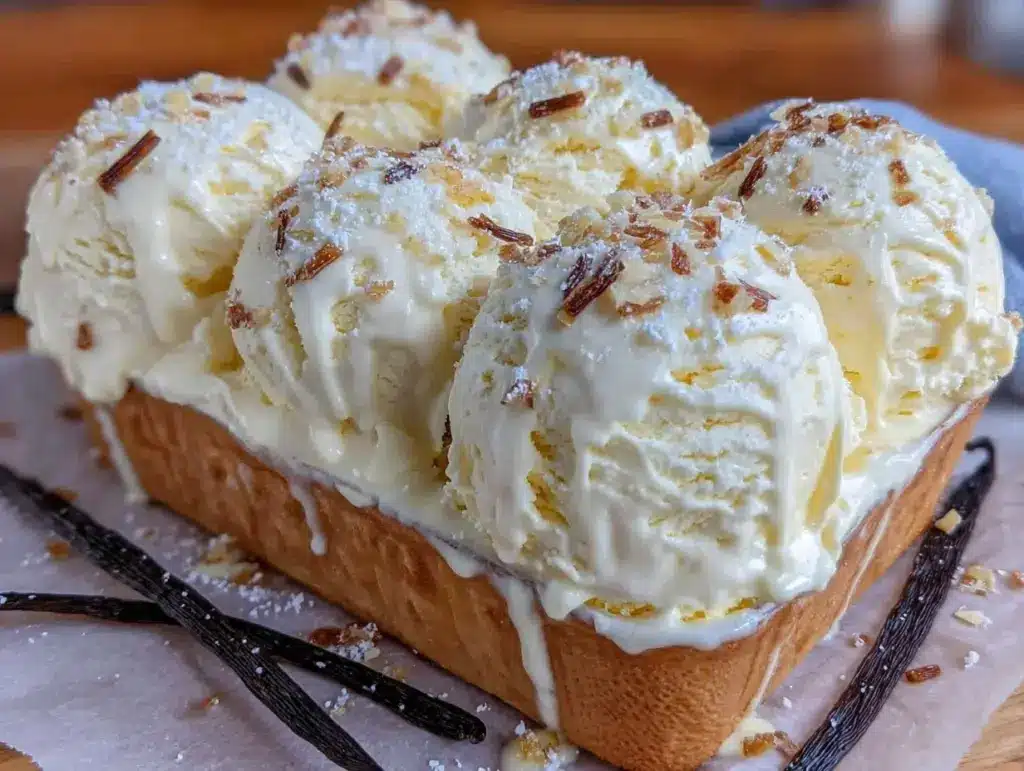
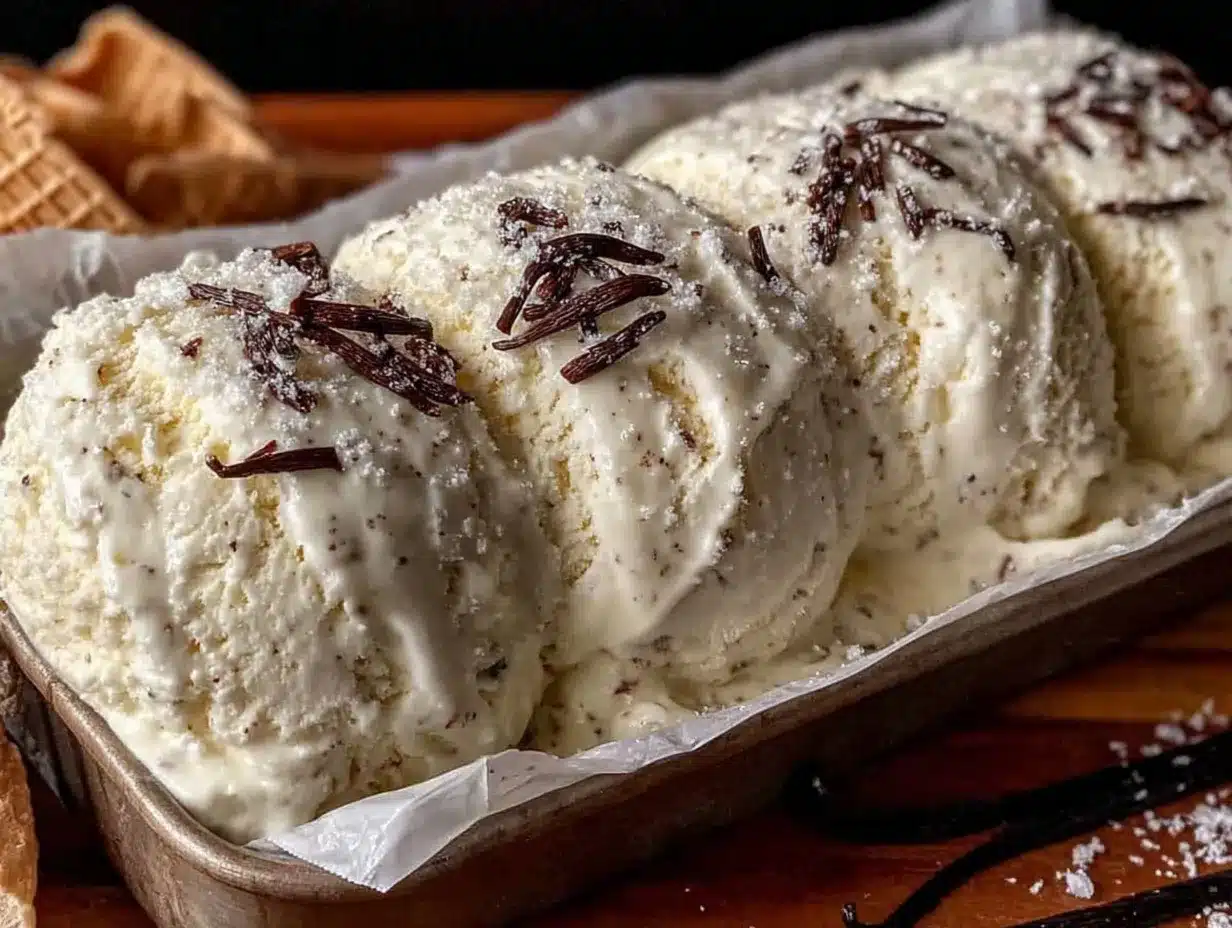
Picture this: you’re sitting on your porch, heat swirling in the air, and you take your first spoonful of homemade creamy no-churn vanilla bean ice cream. The cold, velvety sweetness melts instantly, swirling with real vanilla specks and the kind of pure, nostalgic comfort that only real ice cream delivers. Honestly, the scent alone – that sweet, creamy vanilla perfume, with just a hint of chill in the air – is enough to make you smile (and maybe do a little happy dance in your kitchen).
The first time I whipped up this easy vanilla bean ice cream, I was skeptical. Could something this simple really taste so luxurious? One bite was all it took – I was instantly hooked. It was the kind of moment where you pause, take a deep breath, and just smile because you know you’re onto something truly special. I’d been craving the rich, old-fashioned vanilla ice cream my grandma used to churn on summer weekends (back when I was knee-high to a grasshopper), but I didn’t want to wrestle with rock salt or an ice cream maker.
Let’s face it, I wish I’d stumbled on this recipe years ago. My family couldn’t stop sneaking spoonfuls from the freezer before it was fully set (and I can’t really blame them – who could?). It’s become the treat everyone asks for at every barbecue, birthday, and potluck. It’s dangerously easy, made with just five ingredients you probably already have, and it delivers that creamy, scoopable bliss every time. If you’re looking for a sweet treat for your kids, a way to brighten up your Pinterest dessert board, or just a way to make summer a little more delicious, this creamy no-churn vanilla bean ice cream is your answer.
Of course, I’ve tested this recipe more times than I can count (all in the name of research, of course). It’s now a staple for family gatherings and gifting – and honestly, it feels like a warm hug in a cone, even on the hottest days. Bookmark this one, because you’re going to want it in your rotation all year long.
Why You’ll Love This Creamy No-Churn Vanilla Bean Ice Cream
As a food blogger who’s churned more ice cream than I care to admit (and eaten even more!), I can honestly say this creamy no-churn vanilla bean ice cream is a true game-changer. Here’s why you’ll be making it again and again:
- Quick & Easy: No ice cream maker, no waiting for eggs to temper, no complicated steps. You whip it up in under 10 minutes, pop it in the freezer, and let the magic happen. Perfect for last-minute cravings or unexpected guests.
- Simple Ingredients: No need for a grocery run – just five pantry staples. You probably have everything you need right now in your kitchen.
- Perfect for Any Occasion: Whether it’s a sunny afternoon treat, a special birthday sundae, or the crown jewel of your holiday table, this ice cream fits right in.
- Crowd-Pleaser: Kids, grandparents, picky eaters – everyone loves this. It’s sweet, creamy, and never icy or bland.
- Unbelievably Delicious: The real vanilla bean flecks make it feel fancy, but the texture is what steals the show: thick, rich, and scoopable straight from the freezer. No icy chunks, just pure creamy goodness.
So what sets my creamy no-churn vanilla bean ice cream apart from the rest? It’s all about technique – folding the whipped cream just right so you get maximum airiness without a single ice crystal, infusing the sweetened condensed milk with real vanilla bean for flavor that lingers, and a touch more salt than you’d expect to bring out the sweetness (trust me, that’s the secret). I’ve tested dozens of ratios and methods (my kitchen has seen it all), and this is the version that delivers every single time.
This isn’t just ice cream – it’s the kind of dessert that makes you close your eyes after the first bite and savor every spoonful. It’s comfort food with a modern twist: easier, a little lighter, but with all the soul-soothing satisfaction of the ice cream parlor classics. If you want to impress guests without breaking a sweat or just spoil yourself with a scoop of sunshine, this is the recipe you need. One batch, and you’ll see why it’s my most-requested summer treat!
What Ingredients You Will Need
This creamy no-churn vanilla bean ice cream is a masterclass in how a few simple ingredients can create magic. You don’t need fancy stuff here – just the basics, chosen well, make all the difference. Here’s what you’ll need (and why):
- Heavy Whipping Cream (2 cups / 480 ml): The backbone of your ice cream – gives that lush, scoopable body. Go for the freshest cream you can find; it really matters. I love using Organic Valley or your favorite local creamery brand when I can.
- Sweetened Condensed Milk (1 can / 14 oz / 400 g): Adds sweetness and keeps things ultra-creamy, even without churning. No, it’s not the same as evaporated milk (don’t swap them!).
- Pure Vanilla Bean (1 whole bean): The showstopper! Split the bean and scrape out the seeds for those iconic black flecks and a flavor that’s warm, floral, and bold. If you can’t find a whole bean, substitute with 2 teaspoons of pure vanilla bean paste (not extract, unless you’re in a pinch).
- Pure Vanilla Extract (1 teaspoon / 5 ml): Rounds out the vanilla flavor and gives depth. I use Nielsen-Massey – but any quality extract works. If you’re using bean paste, you can reduce this slightly.
- Sea Salt (1/4 teaspoon / 1.5 g): Seems like a tiny amount, but it’s so important. Salt sharpens the sweetness and makes the vanilla sing. Don’t skip it!
Ingredient Notes & Tips:
- If you’re dairy-free, swap the heavy cream for full-fat coconut cream and use a dairy-free condensed milk (the flavor will be a little different, but still dreamy!).
- For a lower-sugar version, use a can of sweetened condensed coconut milk and reduce the vanilla slightly – the coconut adds a fun twist.
- Want to add mix-ins? Fold in up to 1 cup (150 g) of mini chocolate chips, crushed cookies, or berries after step 4 in the method below.
- If you only have vanilla extract, use 2 teaspoons total – but know you’ll miss out on those lovely little vanilla specks.
This list is as simple as it gets, but each ingredient pulls its weight. Honestly, you could whip up a batch right now and have homemade ice cream ready to scoop by dinner. No fancy tools, no weird stabilizers, just pure, creamy bliss.
Equipment Needed
Making this creamy no-churn vanilla bean ice cream is refreshingly low-tech – no ice cream maker needed! Here’s what you’ll want to have on hand:
- Large Mixing Bowl: Sturdy enough for whipping cream. If you have a metal bowl, chill it for a few minutes for best results.
- Hand Mixer or Stand Mixer: Whips the cream in minutes (a whisk and some elbow grease will work, but it’ll take longer – trust me, I’ve done it during a power outage!).
- Rubber Spatula: For gentle folding (you don’t want to deflate all that lovely whipped cream).
- Loaf Pan or Freezer-Safe Container (about 9×5 inches / 23×13 cm): Metal pans freeze fastest, but any airtight container works.
- Plastic Wrap or Lid: To keep ice crystals at bay.
- Small Sharp Knife: For splitting and scraping the vanilla bean. A paring knife does the trick.
Equipment Notes:
- If you don’t have a loaf pan, use any shallow freezer-safe dish. Wide and shallow means faster freezing – always a good thing!
- For budget-friendly options, a basic hand mixer and a thrifted metal loaf pan work wonders (that’s how I started out!).
- Keep your mixer’s beaters and bowl cold for quicker, fluffier whipped cream. Just a few minutes in the fridge makes all the difference.
Honestly, the less you fuss with fancy gear, the better this recipe turns out. Sometimes, simple really is best!
How to Make Creamy No-Churn Vanilla Bean Ice Cream
-
Chill Your Tools (optional, but recommended):
Place your mixing bowl and beaters in the fridge or freezer for 10-15 minutes. Cold equipment helps the cream whip up light and airy (especially helpful in summer!). -
Prep the Vanilla Bean:
Split the vanilla bean lengthwise with a small, sharp knife. Use the back of the knife to scrape out all those fragrant seeds. Set aside both seeds and pod (you’ll use just the seeds). -
Whip the Cream:
Pour 2 cups (480 ml) heavy whipping cream into your chilled bowl. Using your mixer on medium-high speed, beat until you see soft peaks (about 2-3 minutes). The cream should hold its shape but still look billowy. Don’t over-whip (or you’ll end up with butter – ask me how I know!). -
Mix the Vanilla Base:
In a separate bowl, combine 1 can (14 oz / 400 g) sweetened condensed milk, the scraped vanilla bean seeds, 1 teaspoon (5 ml) vanilla extract, and 1/4 teaspoon (1.5 g) sea salt. Whisk until smooth and the vanilla specks are evenly distributed. -
Fold the Mixtures Together:
Gently fold about 1 cup (240 ml) of the whipped cream into the vanilla mixture to lighten it. Then add the rest of the whipped cream, folding gently with a spatula. Use a soft “scooping” motion so you don’t knock out all the air. The mixture should be thick, creamy, and speckled with vanilla. -
Transfer and Freeze:
Scrape the ice cream base into your loaf pan or freezer container. Smooth the top with a spatula. Lay a piece of plastic wrap directly on the surface (this helps prevent ice crystals), then cover with a lid or more wrap. -
Freeze Until Firm:
Place in the coldest part of your freezer. Freeze for at least 4 hours, or until solid enough to scoop (overnight is even better for best texture). If you like a softer-serve texture, check after 3 hours. -
Scoop and Enjoy!
Let the ice cream sit at room temperature for 5-10 minutes before scooping (it makes for the dreamiest texture). Serve in cones, bowls, or straight from the pan – no judgment here!
Troubleshooting Tips:
- If your cream won’t whip, it probably wasn’t cold enough. Pop it in the freezer for 10 minutes, then try again.
- Too icy? Make sure your container is airtight and always cover the surface with wrap.
- If your ice cream is too hard to scoop, let it sit a few extra minutes – homemade ice cream is a little firmer than store-bought, but so worth it!
Honestly, this method is so forgiving. Even if you’re new to homemade ice cream, you’ll be amazed at how luscious and professional it turns out!
Pro Tips & Techniques for Perfect No-Churn Ice Cream
- Chill Everything: The colder your cream, bowl, and beaters, the better your whipped cream will hold up. I’ve tried shortcuts, and the results just aren’t as fluffy.
- Don’t Over-Whip: Soft peaks are perfect. If you go too far (cream looks grainy or starts to clump), add a splash more cream and gently whisk by hand to smooth it out.
- Fold, Don’t Stir: Use a gentle folding motion to combine the whipped cream and vanilla base. Stirring hard knocks out air, and your ice cream will freeze dense instead of dreamy.
- Scrape the Bowl: Get every last bit of vanilla bean seeds mixed in! Nothing sadder than flavor left behind.
- Keep it Airtight: Always press plastic wrap right against the surface before sealing. This keeps ice crystals at bay and locks in creaminess.
- Serve at the Right Temperature: Homemade ice cream is firmer than store-bought. Let it rest on the counter for about 10 minutes before scooping for that perfect, creamy texture.
- Timing is Everything: If you’re adding mix-ins (like chocolate chips or berries), fold them in at the very end, just before freezing. This keeps them evenly distributed.
Personal Lessons: My first batch was over-mixed and froze like a rock. Now, I always err on the side of underwhipping and gentle folding. If you rush, you’ll miss the magic!
Consistency comes down to patience and paying attention to the details. A few extra minutes spent chilling or folding make all the difference between good and mind-blowing ice cream. Trust me, you’ll be scooping up perfection in no time.
Variations & Adaptations
This creamy no-churn vanilla bean ice cream is a blank canvas for your wildest dessert dreams. Here are some of my favorite ways to mix it up:
- Chocolate Swirl: Drizzle 1/2 cup (120 ml) melted, cooled chocolate or chocolate hazelnut spread over the ice cream base, then swirl with a knife before freezing. Rich, decadent, and always a hit!
- Berry Ripple: Fold in 1 cup (150 g) of fresh raspberries, blueberries, or strawberries (chopped). For a ribbon effect, blend half the berries into a sauce and swirl through the base before freezing.
- Cookie Crunch: Stir in 1 cup (100 g) of crushed chocolate sandwich cookies, graham crackers, or shortbread for a cookies-and-cream twist.
- Dairy-Free Option: Substitute coconut cream for the heavy cream and use sweetened condensed coconut milk. The result is a tropical treat – I sometimes add toasted coconut flakes for extra flair.
- Lower Sugar: Use a sugar-free sweetened condensed milk and cut the vanilla extract by half. The texture stays creamy, and the taste is still dreamy.
- Holiday Vibes: Add a pinch of cinnamon and nutmeg, or swirl in a little caramel sauce for a fall-inspired treat.
Personal Favorite: I love folding in crushed amaretti cookies and a splash of almond extract. It turns a simple scoop into a grown-up dessert with a hint of nostalgia (and it’s always a conversation starter at parties!).
Don’t be shy – use this recipe as your base and let your imagination run wild. Whether you’re working around allergies (gluten-free cookies, dairy-free swaps) or just chasing a new flavor, there’s a version for everyone. Homemade ice cream should be fun and fuss-free, and this recipe is as versatile as they come!
Serving & Storage Suggestions
This creamy no-churn vanilla bean ice cream is a showstopper right from the pan, but a few serving tricks make it even more irresistible:
- Serving Temp: Let the container sit out for 5-10 minutes before scooping. The ice cream softens just enough for those perfect, Instagram-worthy scoops.
- Presentation: Serve in chilled bowls or classic cones. For a party, top with fresh berries, chocolate sauce, or a sprinkle of sea salt for extra pizzazz.
- Pairings: Nothing beats homemade ice cream alongside a warm brownie, a slice of pie, or even sandwiched between two cookies for the ultimate ice cream sandwich.
- Storage: Keep your ice cream in an airtight container with plastic wrap pressed to the surface. It’ll stay creamy for up to 2 weeks (if it lasts that long!).
- Freezing Tips: Store in the coldest part of your freezer so it stays smooth. If ice crystals form, just let it soften slightly and give it a gentle stir before serving.
- Flavor Development: The vanilla flavor deepens after the first day. Honestly, it gets better as it sits – if you can resist eating it all at once.
Whether you’re making sundaes for a backyard barbecue or sneaking a midnight scoop (no judgment), this ice cream is always the right choice. It’s pure summer joy, any time of year.
Nutritional Information & Benefits
Here’s a quick look at what you’re enjoying with each scoop of creamy no-churn vanilla bean ice cream (per 1/2 cup / 100 g serving, approximate):
- Calories: 230
- Fat: 14g (mostly from cream – rich, but satisfying!)
- Carbohydrates: 23g
- Protein: 4g
- Sugar: 20g
Health Benefits: Real vanilla bean is full of antioxidants, and making your own ice cream means you control what goes in – no artificial flavors, gums, or preservatives. If you’re dairy-free, the coconut version offers healthy fats and is gentle on the tummy.
Dietary Notes: This recipe is naturally gluten-free and egg-free. For a lower-carb or keto option, use sugar-free sweetened condensed milk. Allergens: Contains dairy (unless adapted). Always check your labels if you’re making substitutions.
In my house, homemade means peace of mind. You know exactly what’s in each scoop, and you get to enjoy a treat that’s as wholesome as it is delicious!
Conclusion
If you’re craving a dessert that’s simple, nostalgic, and outrageously good, this creamy no-churn vanilla bean ice cream is your answer. With just five ingredients, you get all the flavor and texture of classic ice cream – no fancy equipment required. It’s become a favorite in my family for a reason: effortless, crowd-pleasing, and endlessly customizable.
Don’t be afraid to make it your own – toss in your favorite mix-ins, try a dairy-free twist, or experiment with new flavors. That’s the beauty of homemade: you call the shots. For me, this recipe is a taste of childhood summers and a reminder that sometimes, the simplest things really are the best.
I’d love to hear how yours turns out! Leave a comment with your favorite flavor combos, share your photos on Pinterest, or let me know if you’ve got a twist I need to try. Happy scooping, and may every bowl bring you joy (and maybe a little brain freeze)!
Frequently Asked Questions About No-Churn Vanilla Bean Ice Cream
How long does no-churn vanilla bean ice cream take to freeze?
It usually takes about 4-6 hours to firm up in a standard home freezer. For a perfectly scoopable texture, I like to freeze it overnight.
Can I make this recipe without a vanilla bean?
Absolutely! If you can’t find vanilla bean, substitute with 2 teaspoons of pure vanilla extract or vanilla bean paste. The flavor will still be delicious, though you’ll miss those classic vanilla specks.
Is this ice cream gluten-free?
Yes, this creamy no-churn vanilla bean ice cream is naturally gluten-free. Just be sure to check labels on any mix-ins you add.
Can I add mix-ins like chocolate chips or fruit?
Of course! Add up to 1 cup (150 g) of your favorite mix-ins after folding together the cream and condensed milk. Swirl in fruit sauces or sauces just before freezing for pretty ribbons.
How do I keep homemade ice cream from getting icy?
To keep your ice cream creamy, always cover the surface with plastic wrap before sealing the container and store it in the coldest part of your freezer. Let it sit for a few minutes before scooping for the best texture.
Pin This Recipe!
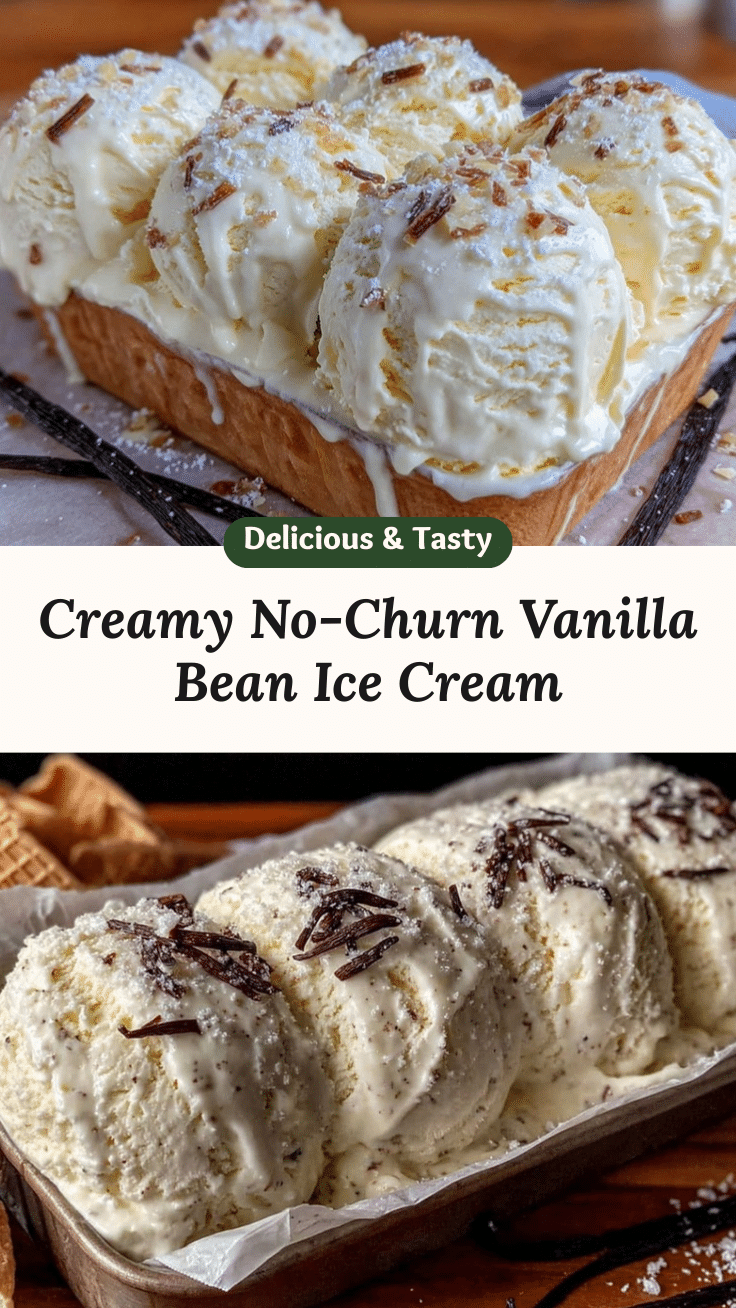
Creamy No-Churn Vanilla Bean Ice Cream

This easy, 5-ingredient no-churn vanilla bean ice cream is luxuriously creamy, packed with real vanilla specks, and requires no ice cream maker. It’s a nostalgic, crowd-pleasing dessert perfect for summer or any occasion.
- Prep Time: 10 minutes
- Cook Time: 0 minutes
- Total Time: 4 hours 10 minutes
- Yield: 8 servings 1x
- Category: Dessert
- Cuisine: American
Ingredients
- 2 cups heavy whipping cream
- 1 can (14 oz) sweetened condensed milk
- 1 whole vanilla bean (or 2 teaspoons vanilla bean paste)
- 1 teaspoon pure vanilla extract
- 1/4 teaspoon sea salt
Instructions
- Chill your mixing bowl and beaters in the fridge or freezer for 10-15 minutes (optional, but recommended).
- Split the vanilla bean lengthwise and scrape out the seeds with a small, sharp knife. Set aside the seeds.
- Pour heavy whipping cream into the chilled bowl. Using a mixer on medium-high speed, beat until soft peaks form (about 2-3 minutes).
- In a separate bowl, combine sweetened condensed milk, vanilla bean seeds, vanilla extract, and sea salt. Whisk until smooth.
- Gently fold about 1 cup of the whipped cream into the vanilla mixture to lighten it. Then add the rest of the whipped cream, folding gently with a spatula until thick and creamy.
- Scrape the ice cream base into a loaf pan or freezer-safe container. Smooth the top and lay plastic wrap directly on the surface, then cover with a lid or more wrap.
- Freeze for at least 4 hours, or until firm enough to scoop (overnight for best texture).
- Let the ice cream sit at room temperature for 5-10 minutes before scooping. Serve and enjoy!
Notes
For dairy-free, substitute coconut cream and sweetened condensed coconut milk. Add up to 1 cup of mix-ins like chocolate chips, cookies, or berries after folding. Chill equipment for fluffier whipped cream. Let ice cream sit out before scooping for best texture. Store airtight for up to 2 weeks.
Nutrition
- Serving Size: 1/2 cup (100 g)
- Calories: 230
- Sugar: 20
- Sodium: 60
- Fat: 14
- Saturated Fat: 9
- Carbohydrates: 23
- Protein: 4
Keywords: vanilla bean ice cream, no-churn ice cream, easy dessert, homemade ice cream, summer treat, gluten-free, egg-free, creamy ice cream, 5-ingredient dessert