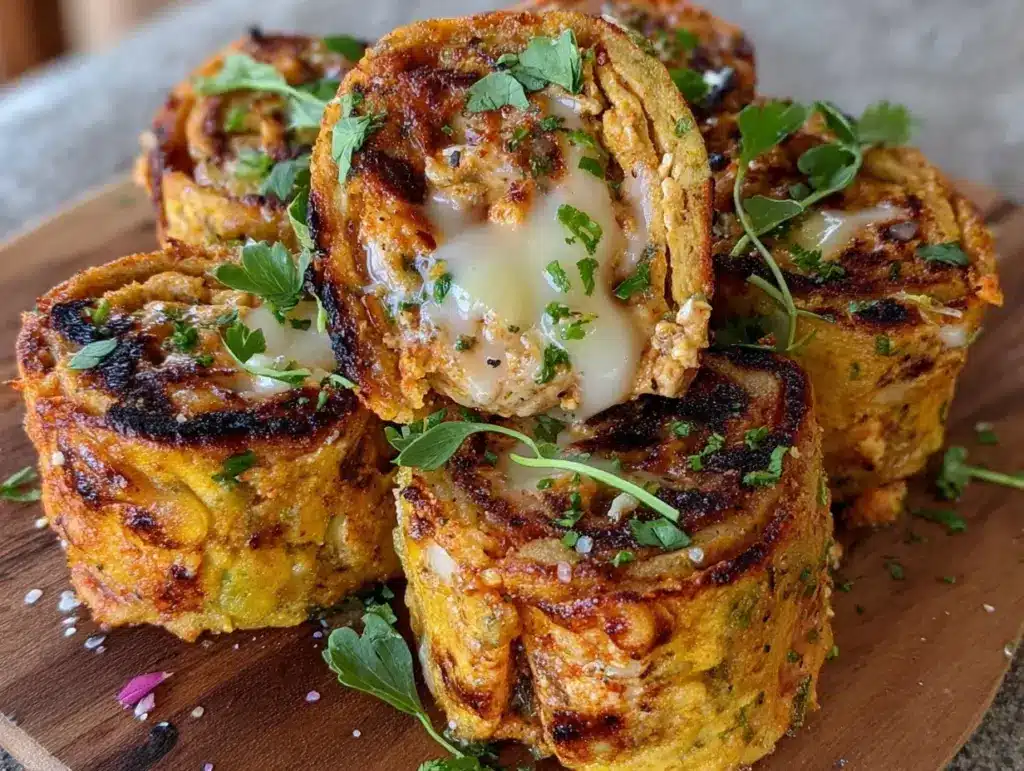
Let me tell you, the smell of warm spices mingling with roasted chickpeas is enough to stop anyone in their tracks. The first time I made this savory gluten-free chickpea shawarma with cream cheese centers, I was instantly hooked. It’s the kind of moment where you pause, take a deep breath, and just smile because you know you’re onto something truly special. Years ago, when I was knee-high to a grasshopper, my family gatherings were all about big, hearty meals, but this recipe brought a fresh, comforting twist that felt like a warm hug in every bite.
I stumbled upon this recipe on a rainy weekend, trying to recreate the magic of shawarma without the gluten and heavy meats. Honestly, it’s dangerously easy, packed with bold flavors and a creamy surprise in the center that had my family sneaking them off the cooling rack (and I can’t really blame them). Whether it’s a snack to brighten up your Pinterest cookie board or the star at your next potluck, this chickpea shawarma recipe has become a staple for family gatherings and gifting.
After testing it multiple times in the name of research, of course, I can say this recipe brings pure, nostalgic comfort with a gluten-free twist you’ll want to bookmark. You know what? It’s the kind of dish that feels like a cozy evening wrapped in spices and cream, perfect for savoring any time you need a little pick-me-up.
Why You’ll Love This Recipe
From my kitchen to yours, this savory gluten-free chickpea shawarma with cream cheese centers ticks all the boxes. It’s more than just a recipe—it’s a little culinary celebration that’s been family-approved and chef-tested for your confidence.
- Quick & Easy: Comes together in under 30 minutes, perfect for busy weeknights or last-minute cravings.
- Simple Ingredients: No fancy grocery trips needed; you likely already have everything in your kitchen.
- Perfect for Any Occasion: Great for cozy dinners, holiday gatherings, or impressing friends at potlucks.
- Crowd-Pleaser: Always gets rave reviews from kids and adults alike—seriously, people ask for seconds.
- Unbelievably Delicious: The crunchy, spiced chickpeas paired with the creamy centers create a next-level flavor and texture combo.
This recipe isn’t just another chickpea snack—it’s the best version you’ll find, thanks to a special blend of shawarma spices that bring warmth without overpowering. The cream cheese centers add a silky surprise that makes every bite feel indulgent yet balanced. Honestly, it’s comfort food reimagined—healthier, faster, but with the same soul-soothing satisfaction.
Perfect for impressing guests without stress or turning a simple meal into something memorable, this gluten-free chickpea shawarma is going to be your new go-to. Once you try it, you’ll understand why I keep making it again and again.
What Ingredients You Will Need
This recipe uses simple, wholesome ingredients to deliver bold flavor and satisfying texture without the fuss. Most of the ingredients are pantry staples, with a few fresh additions to keep things lively.
- For the Chickpea Shawarma:
- 1 can (15 oz / 425 g) chickpeas, drained and rinsed (I prefer organic brands for best texture)
- 2 tablespoons olive oil (extra virgin, cold-pressed)
- 1 teaspoon ground cumin
- 1 teaspoon smoked paprika (adds a subtle smoky depth)
- ½ teaspoon ground coriander
- ½ teaspoon turmeric powder
- ¼ teaspoon cinnamon (trust me, it’s magic here)
- ½ teaspoon garlic powder
- Salt and pepper to taste
- For the Cream Cheese Centers:
- 4 oz (115 g) cream cheese, softened (use dairy-free cream cheese if needed)
- 1 tablespoon fresh lemon juice
- 1 teaspoon finely chopped fresh parsley (for a fresh pop)
- Salt and pepper to taste
- Optional Garnishes:
- Chopped fresh cilantro or parsley
- Fresh lemon wedges for squeezing
- Pinch of red pepper flakes for heat lovers
If you’re feeling creative, you can swap smoked paprika for chipotle powder for a spicier kick or use almond flour in place of chickpea flour if you want to add a bit of crunch on the outside. In summer, fresh herbs like dill or mint can brighten things up beautifully.
Equipment Needed
- Baking sheet – preferably non-stick or lined with parchment paper for easy cleanup.
- Mixing bowls – one for the chickpeas and one for the cream cheese filling.
- Food processor or sharp knife – to soften and blend cream cheese with lemon and herbs.
- Measuring spoons and cups – for precise seasoning (trust me, it makes a difference!).
- Spatula or spoon – to mix everything together gently without smashing the chickpeas too much.
If you don’t have a food processor, no worries! I’ve made this by finely chopping the cream cheese and herbs with a knife and mixing vigorously by hand — takes a bit more elbow grease but still works great. For budget-friendly options, a sturdy baking sheet and a good mixing bowl set are all you really need.
Preparation Method

- Preheat your oven to 400°F (200°C). Line a baking sheet with parchment paper or lightly grease it to prevent sticking. This helps the chickpeas crisp up perfectly.
- Prepare the chickpeas: Drain and rinse your canned chickpeas thoroughly. Pat them dry with paper towels — moisture is the enemy of crispiness here. Set aside.
- Mix the spices: In a medium bowl, combine cumin, smoked paprika, coriander, turmeric, cinnamon, garlic powder, salt, and pepper. This spice mix is the heart of the shawarma flavor; don’t skip anything!
- Toss chickpeas with oil and spices: Add olive oil to the chickpeas, then sprinkle the spice mix over them. Gently toss everything together with a spatula until every chickpea is coated evenly. You know they’re ready when you see a nice, even reddish-golden tint.
- Form the chickpea rounds: This part’s a bit fun — scoop about 2 tablespoons (30 g) of the spiced chickpeas and press them gently into small rounds or patties on the baking sheet, roughly 2 inches (5 cm) wide. Don’t pack too tight; keep some texture.
- Make the cream cheese filling: While the chickpeas roast, mix softened cream cheese, lemon juice, parsley, salt, and pepper in a small bowl. Use a spoon or food processor until smooth and creamy.
- Bake the chickpea rounds: Place the baking sheet in the oven and bake for 15 minutes. Halfway through, carefully flip the chickpea rounds to brown on both sides. They should be golden and slightly crisp on the edges.
- Add cream cheese centers: Remove the baking sheet from the oven briefly. Using a small spoon or your fingers, make a shallow indentation in the center of each chickpea round and fill it generously with the cream cheese mixture.
- Final bake: Return the baking sheet to the oven and bake for another 5 minutes. This warms the cream cheese just enough to meld flavors without melting it away.
- Garnish and serve: Let the chickpea shawarma cool for a couple of minutes, then garnish with fresh parsley or cilantro and a squeeze of lemon. Serve warm or at room temperature for best flavor.
Pro tip: If the chickpeas aren’t crisping up as much as you’d like, give them a quick broil for 1-2 minutes at the end—but watch closely so they don’t burn. This little trick has saved many batches in my kitchen!
Cooking Tips & Techniques
Let’s face it, getting chickpeas crisp and flavorful can be tricky, but a few tips make all the difference. First, drying the chickpeas well before seasoning is critical. Any extra moisture will steam the chickpeas instead of roasting them crisp.
I learned the hard way that tossing chickpeas gently, not smashing them, keeps their lovely texture intact. Also, evenly spreading them on the baking sheet ensures each gets proper heat exposure—crowding equals soggy chickpeas.
The spice blend is the star here, so don’t skimp. Freshly ground spices taste best, but even good-quality pre-ground spices work fine. Mix them thoroughly to coat every chickpea.
Timing is key: bake just long enough to get a golden crust but not dry out the inside. The cream cheese centers add moisture and richness, balancing the chickpea’s earthiness. If you’re multitasking, prepare the cream cheese filling first to save time.
And a little secret? Letting the baked chickpeas rest for a few minutes off heat lets their flavors deepen and texture settle, making them even tastier the next day.
Variations & Adaptations
This recipe plays well with tweaks, so don’t hesitate to make it your own. Here are some of my favorite variations:
- Dairy-Free Option: Swap cream cheese for a coconut cream-based spread or cashew cream for a smooth, dairy-free center that’s just as luscious.
- Spice it Up: Add a pinch of cayenne or chipotle powder to the spice mix if you like a bit of heat. Alternatively, use za’atar to give it a Middle Eastern herbal twist.
- Seasonal Toppings: In warmer months, top with fresh diced tomatoes and cucumbers for a refreshing crunch. In fall, roasted red peppers or caramelized onions make lovely complements.
- Cooking Methods: If you prefer, you can pan-fry the chickpea rounds in a non-stick skillet over medium heat for 3-4 minutes per side instead of baking. Just keep an eye to avoid burning.
- Adding Greens: Mix finely chopped spinach or kale into the chickpea mixture before forming rounds for a nutrient boost and vibrant color.
One variation I adore is adding a drizzle of tahini sauce on top just before serving. It brings a nutty creaminess that pairs beautifully with the shawarma spices. Try it—you’ll thank me later!
Serving & Storage Suggestions
This savory gluten-free chickpea shawarma shines best served warm or at room temperature. Arrange the rounds on a platter, drizzle with extra lemon juice or tahini, and sprinkle with fresh herbs for a pretty presentation. They pair wonderfully with a crisp salad or roasted veggies for a light yet satisfying meal.
For storage, keep leftovers in an airtight container in the refrigerator for up to 3 days. Reheat gently in a skillet or oven to bring back the crispness—microwaving tends to soften them too much.
If you want to freeze them, place the unfilled chickpea rounds on a baking sheet to freeze individually, then transfer to a freezer bag for up to 2 months. Thaw overnight in the fridge and bake briefly to refresh. Add cream cheese centers just before serving for best results.
Flavors tend to develop and meld after a day, so leftovers often taste even better. I love making these ahead for gatherings because they hold up nicely and save time without sacrificing taste.
Nutritional Information & Benefits
This gluten-free chickpea shawarma is packed with plant-based protein and fiber from chickpeas, making it a wholesome choice. Chickpeas support digestion and steady energy levels, while spices like turmeric and cumin bring anti-inflammatory benefits.
The cream cheese centers add a creamy texture and a dose of calcium and healthy fats, though you can opt for dairy-free versions to keep it vegan. This recipe is naturally gluten-free and can easily be adapted for low-carb or paleo diets by swapping ingredients.
While it contains dairy, it’s a balanced snack or appetizer that feels indulgent without the guilt. I appreciate how it fits into my wellness goals without compromising flavor or satisfaction.
Conclusion
In short, this savory gluten-free chickpea shawarma with cream cheese centers is a winner for anyone craving bold, comforting flavors without gluten hassle. It’s quick, simple, and packed with personality. Whether you’re new to chickpeas or a seasoned lover, this recipe brings a little joy to the table.
Feel free to tweak the spices or fillings to suit your taste buds—cooking is all about making it yours. I love this recipe because it’s both familiar and exciting, proving that gluten-free doesn’t have to mean boring.
Give it a try, share your adaptations, and let me know how your family reacts (spoiler: they’ll love it). Remember, the best recipes are the ones you make your own—so have fun with it and enjoy every bite!
FAQs
Can I make this recipe vegan?
Absolutely! Replace the cream cheese with a dairy-free alternative like cashew cream or coconut-based spread, and you’re good to go.
How do I store leftover chickpea shawarma?
Store them in an airtight container in the fridge for up to 3 days. Reheat gently to keep them crispy. For longer storage, freeze the chickpea rounds before adding cream cheese centers.
Can I use dried chickpeas instead of canned?
Yes, but make sure to soak and cook dried chickpeas thoroughly until tender before using. The texture should be firm but not mushy for best results.
Is this recipe suitable for meal prep?
Definitely! The chickpea rounds can be made ahead and stored separately from the cream cheese filling. Add the centers just before serving to keep things fresh.
What can I serve with this dish?
This pairs beautifully with fresh salads, roasted vegetables, or warm gluten-free flatbreads. A drizzle of tahini or a squeeze of fresh lemon brightens it up perfectly.
Pin This Recipe!
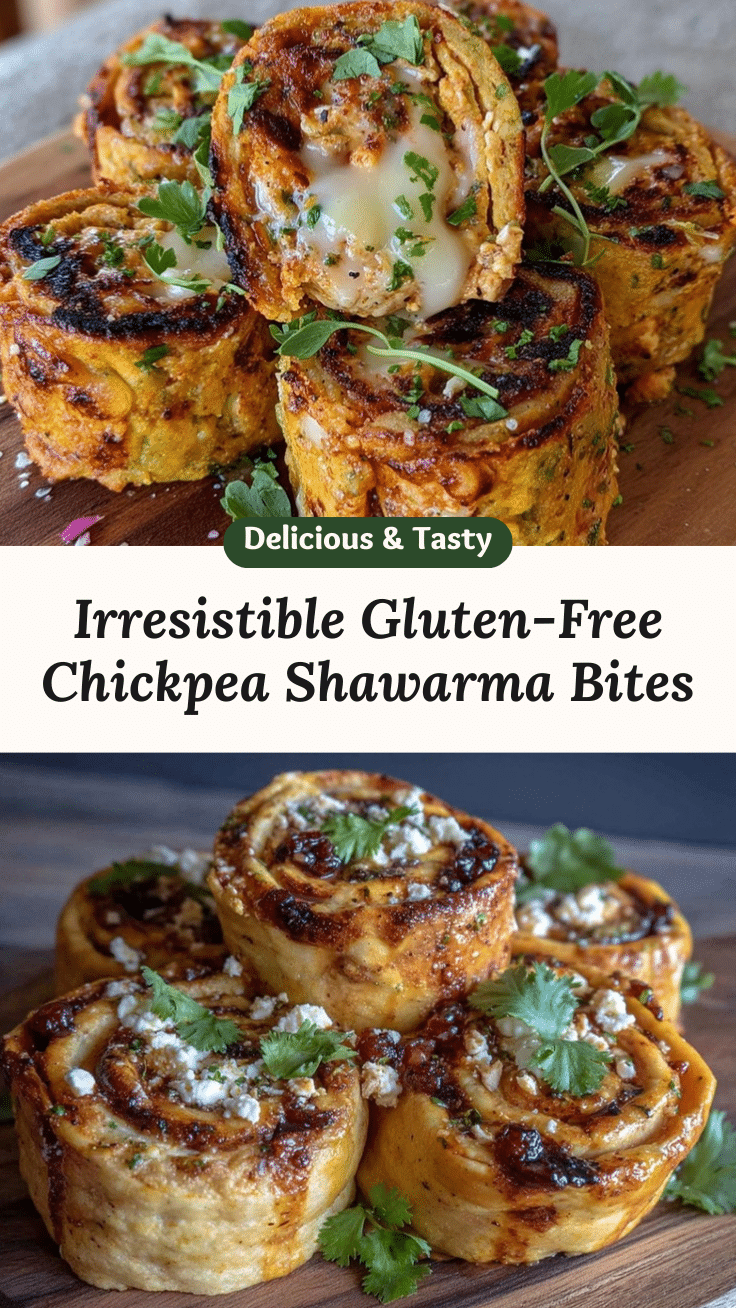
Savory Gluten-Free Chickpea Shawarma Recipe with Cream Cheese Centers Made Easy

A quick and easy gluten-free chickpea shawarma with a creamy cream cheese center, packed with warm spices and perfect for snacks or gatherings.
- Prep Time: 10 minutes
- Cook Time: 20 minutes
- Total Time: 30 minutes
- Yield: 12 servings 1x
- Category: Snack / Appetizer
- Cuisine: Middle Eastern
Ingredients
- 1 can (15 oz / 425 g) chickpeas, drained and rinsed
- 2 tablespoons olive oil (extra virgin, cold-pressed)
- 1 teaspoon ground cumin
- 1 teaspoon smoked paprika
- ½ teaspoon ground coriander
- ½ teaspoon turmeric powder
- ¼ teaspoon cinnamon
- ½ teaspoon garlic powder
- Salt and pepper to taste
- 4 oz (115 g) cream cheese, softened (use dairy-free cream cheese if needed)
- 1 tablespoon fresh lemon juice
- 1 teaspoon finely chopped fresh parsley
- Salt and pepper to taste
- Optional garnishes: chopped fresh cilantro or parsley, fresh lemon wedges, pinch of red pepper flakes
Instructions
- Preheat your oven to 400°F (200°C). Line a baking sheet with parchment paper or lightly grease it.
- Drain and rinse canned chickpeas thoroughly. Pat dry with paper towels.
- In a medium bowl, combine cumin, smoked paprika, coriander, turmeric, cinnamon, garlic powder, salt, and pepper.
- Add olive oil to the chickpeas, then sprinkle the spice mix over them. Toss gently until evenly coated.
- Scoop about 2 tablespoons (30 g) of the spiced chickpeas and press into small rounds or patties about 2 inches (5 cm) wide on the baking sheet.
- Mix softened cream cheese, lemon juice, parsley, salt, and pepper in a small bowl until smooth.
- Bake chickpea rounds for 15 minutes, flipping halfway through until golden and slightly crisp.
- Remove baking sheet, make a shallow indentation in each chickpea round, and fill with cream cheese mixture.
- Return to oven and bake for another 5 minutes to warm the cream cheese.
- Let cool for a couple of minutes, garnish with fresh parsley or cilantro and a squeeze of lemon. Serve warm or at room temperature.
Notes
Dry chickpeas thoroughly before seasoning to ensure crispiness. Flip chickpea rounds halfway through baking for even browning. For extra crispiness, broil 1-2 minutes at the end but watch closely. Cream cheese centers can be swapped with dairy-free alternatives for vegan option. Store leftovers in airtight container in fridge up to 3 days; freeze unfilled rounds up to 2 months.
Nutrition
- Serving Size: 1 chickpea round wit
- Calories: 110
- Sugar: 1
- Sodium: 150
- Fat: 7
- Saturated Fat: 2
- Carbohydrates: 9
- Fiber: 3
- Protein: 4
Keywords: gluten-free, chickpea shawarma, cream cheese centers, savory snack, easy recipe, plant-based, dairy-free option


