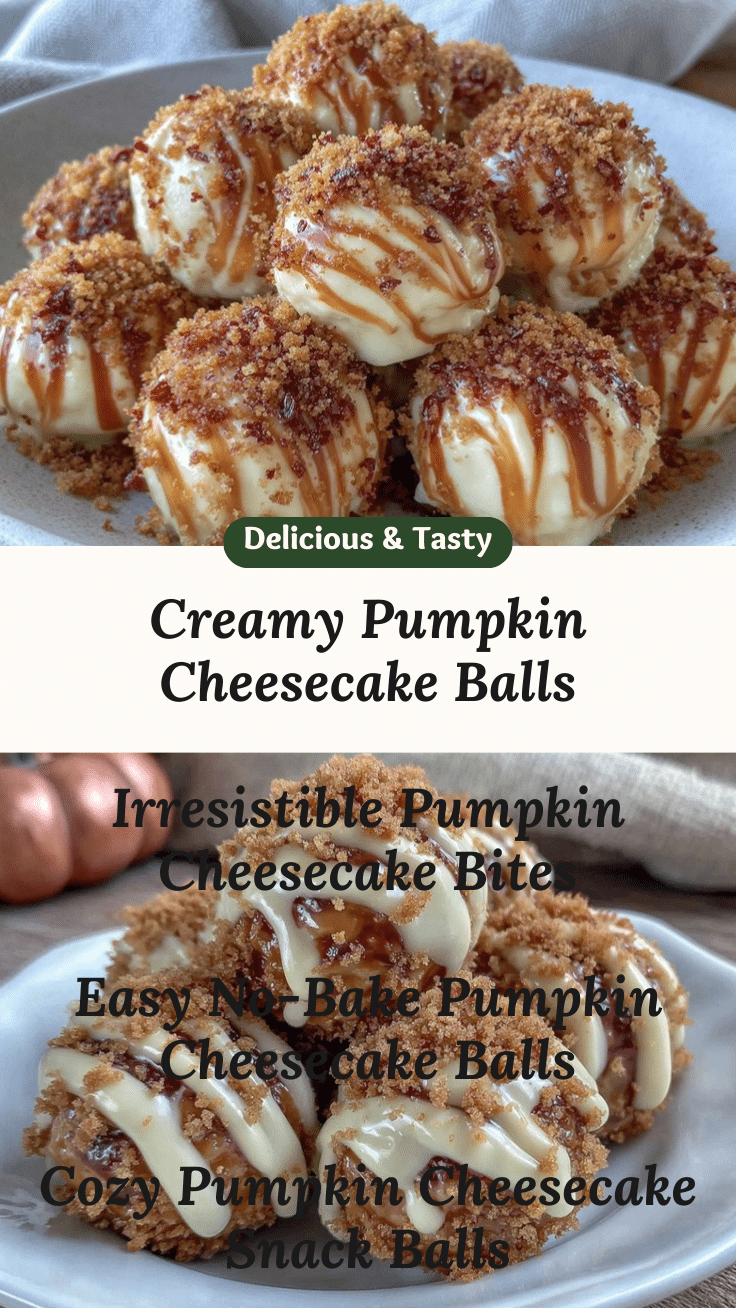
Let me paint a picture for you: the moment I open a can of pumpkin puree and that warm, spicy aroma wafts up, my whole kitchen feels instantly cozier. There’s something downright magical about the scent of cinnamon and nutmeg swirling together with creamy cheesecake—it’s like the fall season decided to throw a party right on my countertop! The first time I rolled these Creamy Pumpkin Cheesecake Balls, I knew I’d stumbled onto a treat that would become a family legend. It was a rainy October afternoon, and I just wanted something fun, festive, and easy to whip up for my kids (who were, let’s face it, bored and hungry).
I remember sneaking a taste before they’d even chilled, and I had to pause—one of those moments where you close your eyes, savor the bite, and realize you’ve hit gold. These little bites are pure, nostalgic comfort but with a playful twist. They remind me of the pumpkin desserts my grandma used to make when I was knee-high to a grasshopper, except these are way less fussy and much easier to share at parties or tuck into lunchboxes.
My family couldn’t keep their hands off the cooling rack (and honestly, neither could I). The reactions were priceless—giggles, sticky fingers, and a chorus of “just one more, please!” They’re dangerously easy to make and disappear even faster. Whether you’re looking to brighten up your Pinterest cookie board, need a sweet treat for your kids, or want something impressive for a fall potluck, these pumpkin cheesecake balls are your new go-to. I’ve tested this recipe more times than I care to admit—in the name of research, of course—and it’s now a staple for family gatherings and edible gifting. Trust me, this one feels like a warm hug in dessert form, and you’re going to want to bookmark it!
Why You’ll Love This Creamy Pumpkin Cheesecake Balls Recipe
Honestly, after years of tinkering with fall desserts (and far too many pumpkin fails to count), I can tell you right away—these Creamy Pumpkin Cheesecake Balls are a game-changer. They pack all the irresistible flavors of autumn into the cutest, poppable bites. Here’s why you’ll be hooked:
- Quick & Easy: Ready in under 30 minutes, no baking required. Perfect for busy weeknights or when you need a last-minute treat for surprise guests.
- Simple Ingredients: No need for fancy grocery runs—you probably already have everything you need. Just grab some cream cheese, pumpkin puree, and a handful of pantry staples.
- Perfect for Fall Gatherings: These little balls are ideal for potlucks, school parties, cozy movie nights, or even Thanksgiving dessert tables.
- Crowd-Pleaser: Kids love them because they’re cute and bite-sized, adults go crazy for that creamy, spiced flavor. I’ve never had leftovers, not once!
- Unbelievably Delicious: The combination of tangy cream cheese, sweet pumpkin, and warm spices is comfort food at its finest. The texture is rich, velvety, and just the right amount of sweet.
What makes this recipe stand out? Well, instead of just mixing pumpkin with cream cheese, I use a blend of graham cracker crumbs for that classic cheesecake flavor, and a touch of white chocolate to help everything set perfectly (without being overly sugary). You can roll these in chopped pecans, cookie crumbs, or even toasted coconut for a fun twist. I’ve tried a bunch of pumpkin dessert recipes, but this one is hands-down the easiest and most foolproof. It’s one of those treats that makes you close your eyes after the first bite and just smile. Plus, you can prep them ahead and freeze for later—making them a total lifesaver during busy holiday seasons. If you’re looking for a fall dessert that’s stress-free, customizable, and guaranteed to impress, you’ve found it right here.
Seriously, these Creamy Pumpkin Cheesecake Balls turn a simple moment into a special memory. I can’t recommend them enough for anyone craving a taste of autumn without any fuss!
What Ingredients You Will Need for Creamy Pumpkin Cheesecake Balls
This recipe uses simple, wholesome ingredients to deliver bold pumpkin flavor and that satisfying cheesecake texture—no complicated steps or rare finds required! Most of these are pantry staples (with a little seasonal pumpkin magic thrown in). Here’s what you’ll need:
- For the Cheesecake Base:
- 8 oz (225 g) cream cheese, softened (full-fat for best results, but low-fat works too)
- 1/2 cup (120 g) pumpkin puree (not pumpkin pie filling—just pure pumpkin)
- 1/4 cup (55 g) granulated sugar (or coconut sugar for a slightly caramel flavor)
- 1/2 tsp ground cinnamon (adds warmth and depth)
- 1/4 tsp ground nutmeg (optional, but I love the classic fall touch)
- 1/4 tsp ground ginger (for a little zing)
- 1/2 tsp pure vanilla extract (I like Nielsen-Massey for a rich flavor)
- For Structure & Texture:
- 1 cup (100 g) graham cracker crumbs (or digestive biscuits, finely crushed; gluten-free options work great)
- 1/4 cup (40 g) white chocolate chips, melted (helps the balls set and adds creamy sweetness)
- For Rolling & Decoration:
- 1/2 cup (60 g) chopped pecans (or walnuts, toasted for extra crunch)
- 1/4 cup (25 g) shredded coconut (unsweetened or toasted, if you like)
- 1/4 cup (30 g) extra graham cracker crumbs (for a classic look)
- Optional: orange sprinkles or mini chocolate chips for kid-friendly flair
Ingredient Notes and Tips:
- If you need a dairy-free option, swap the cream cheese for dairy-free cream cheese and use dairy-free white chocolate.
- Don’t have graham crackers? Use vanilla wafers or ginger snaps for a cozy, spicy twist.
- Sweetness is adjustable—taste the mixture before rolling and add more sugar if you prefer.
- Fresh pumpkin puree works if you’re feeling ambitious, but canned is just fine (and honestly, way easier).
- If nut allergies are a concern, skip the pecans and use extra cookie crumbs or colored sprinkles!
I love using Philadelphia cream cheese for the creamiest texture, and Ghirardelli white chocolate chips for reliable melting. If you want to go gluten-free, Pamela’s Graham Crackers taste fantastic. In summer, I’ve even swapped pumpkin for pureed sweet potato—surprisingly delicious!
Equipment Needed for Creamy Pumpkin Cheesecake Balls
You don’t need fancy gadgets for these little bites, which is half the fun! Here’s what I use every time (plus a few swap-outs if you’re missing something):
- Mixing bowl (large enough to fit all your ingredients comfortably)
- Hand mixer or stand mixer (makes it easy to cream the cheese and pumpkin together—though a sturdy whisk and elbow grease work in a pinch!)
- Spatula (for scraping the sides and folding in crumbs)
- Small cookie scoop or tablespoon (keeps your balls uniform—honestly, a regular spoon works if you don’t mind a little variety)
- Baking sheet or large plate (lined with parchment paper for easy cleanup)
- Microwave-safe bowl (for melting white chocolate)
I’ve found that using a cookie scoop makes portioning a breeze, especially when making a double batch. If you don’t own a mixer, just make sure your cream cheese is really soft and mix by hand. For cleanup, parchment paper is a lifesaver. As for budget-friendly options, any sturdy bowl and spoon will do the trick—you don’t need anything fancy to make these pumpkin cheesecake balls come out perfect. Just a little patience and a good playlist!
How to Make Creamy Pumpkin Cheesecake Balls – Step-by-Step Guide

- Prep the Ingredients
Take the cream cheese out of the fridge about 30 minutes before starting, so it’s nice and soft. Line a baking sheet with parchment paper. Get all your ingredients measured and ready. - Mix the Base
In a large mixing bowl, beat 8 oz (225 g) cream cheese with a hand mixer until smooth (about 1 minute). Add 1/2 cup (120 g) pumpkin puree, 1/4 cup (55 g) sugar, 1/2 tsp cinnamon, 1/4 tsp nutmeg, 1/4 tsp ginger, and 1/2 tsp vanilla. Mix until creamy and well combined. The mixture should be pale orange and smell like fall in a bowl. - Incorporate the Crumbs
Add 1 cup (100 g) graham cracker crumbs to the pumpkin mixture. Stir with a spatula until fully blended. The mixture will start to thicken—if it’s still very sticky, add an extra tablespoon of crumbs. - Melt the Chocolate
In a microwave-safe bowl, melt 1/4 cup (40 g) white chocolate chips in 30-second bursts, stirring in between, until smooth (usually about 1 minute total). Pour the melted chocolate into your pumpkin mixture and stir until completely incorporated. This helps the balls set up and adds creamy sweetness. - Chill the Mixture
Refrigerate the bowl for 15-20 minutes. This firms up the mixture and makes rolling much easier. If you’re in a rush, pop it in the freezer for 10 minutes instead. - Form the Balls
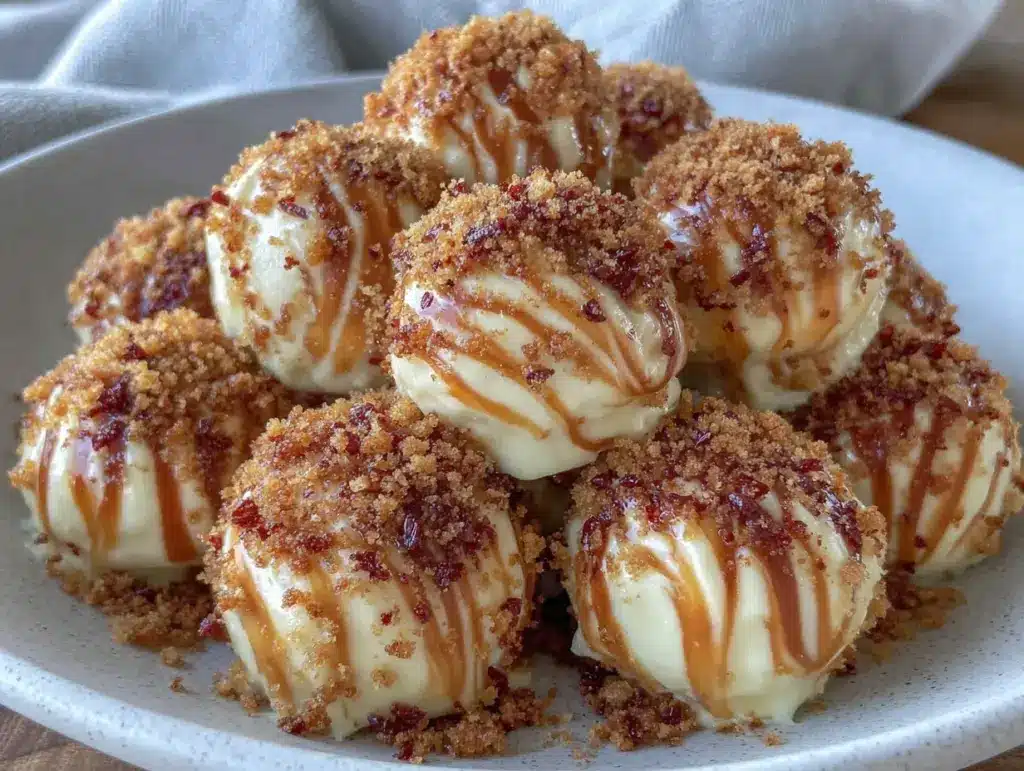
Using a small cookie scoop or tablespoon, portion out the mixture. Roll each scoop between your hands to form smooth balls, about 1 inch (2.5 cm) in diameter. Place them on the lined baking sheet. You should get about 18-20 balls. - Decorate and Roll
Set up bowls with chopped pecans, coconut, and extra graham cracker crumbs. Roll each ball in your desired coating. Press gently to help the toppings stick. For extra fun, add orange sprinkles or mini chocolate chips! - Chill Again
Place the decorated balls back in the fridge for at least 30 minutes to set. If you want them firmer, chill for up to 2 hours. The longer they chill, the easier they are to handle. - Serve and Enjoy
Arrange the chilled pumpkin cheesecake balls on a pretty plate or in mini cupcake liners. Serve cold or at room temperature. Get ready for them to disappear fast!
Troubleshooting Tips:
- If the mixture is too sticky to roll, add more graham cracker crumbs, 1 tablespoon at a time.
- If the balls look too soft after chilling, freeze for 15 minutes before serving.
- If your white chocolate seizes, try melting it with a teaspoon of coconut oil.
Trust your senses—when the mixture smells fragrant and looks creamy, you’re on the right track. The finished balls should feel firm but yield a little when bitten. My personal tip: make a double batch and freeze half for surprise guests!
Top Cooking Tips & Techniques for Pumpkin Cheesecake Balls
Over the years, I’ve learned a few tricks that make these Creamy Pumpkin Cheesecake Balls foolproof (and, you know, save you from a few messy kitchen adventures):
- Room-Temperature Cream Cheese: Always let your cream cheese sit out before mixing. Cold cream cheese leads to lumps and uneven texture. Trust me, patience pays off.
- Use a Mixer (If You Have One): Hand mixing works, but a hand mixer or stand mixer gets things ultra-smooth in seconds.
- Melt the Chocolate Slowly: White chocolate can seize if overheated. Microwave in short bursts, stirring after each, or melt gently over a double boiler.
- Chill Twice: Don’t skip the chilling steps. First chill firms up the mixture for rolling, second chill sets the balls for perfect texture.
- Don’t Overmix: Once you add crumbs and chocolate, just mix until combined. Overmixing can make the balls tough instead of creamy.
- Batch Rolling: Portion all your balls first, then roll and coat. Makes the process smoother and keeps your hands cleaner.
- If Your Balls Won’t Hold Shape: Add more crumbs, chill longer, or freeze briefly before decorating.
Common mistakes? Not chilling long enough (leads to sticky mess), using pumpkin pie filling by accident (too sweet and runny), or rushing the rolling. My worst fail was doubling the pumpkin—delicious, but the balls refused to set! If you multitask, make the mixture first, chill while you clean up, then roll and decorate while catching up on your favorite show. For consistent results, always measure ingredients and use parchment paper for easy cleanup.
Variations & Adaptations for Creamy Pumpkin Cheesecake Balls
One of the best things about this recipe is how flexible it is! Whether you’re dealing with dietary needs or just want to switch things up, here are my favorite variations (and some I’ve tried myself):
- Gluten-Free: Use gluten-free graham crackers or crushed almond flour cookies. Works perfectly—no one can tell the difference!
- Vegan/Dairy-Free: Swap cream cheese for vegan cream cheese (like Kite Hill or Tofutti) and use dairy-free white chocolate chips. The flavor is still incredible!
- Flavor Twists: Add a dash of maple extract for extra autumn flavor, or mix in mini chocolate chips for a chocolate-pumpkin combo. Sometimes I use crushed ginger snaps instead of graham crackers for a spicy kick.
- Nut-Free: Skip the pecans and roll in cookie crumbs, coconut, or colored sprinkles. Great for lunchboxes!
- Cooking Method: Want a firmer texture? Freeze the balls after chilling for 30 minutes, then serve semi-frozen (so good on warm days).
- Personal Favorite: I love rolling the balls in toasted coconut and a pinch of cinnamon sugar—something about that combo just screams fall!
For holiday parties, I’ll often split the batch and decorate half with orange sprinkles and half with chopped nuts. If you prefer a lighter dessert, use low-fat cream cheese and reduce the sugar. Honestly, you can mix and match toppings to suit any taste—these pumpkin cheesecake balls are like a blank canvas for flavor!
Serving & Storage Suggestions
These Creamy Pumpkin Cheesecake Balls are best served chilled, straight from the fridge. I love arranging them on a platter lined with festive paper cups or mini cupcake liners—makes them look extra cute (and Pinterest-worthy). For parties, stack them in a pyramid or scatter chopped nuts and sprinkles around for easy snacking.
- Serving Suggestions: Pair with hot apple cider, pumpkin spice lattes, or a cozy mug of herbal tea. They make an adorable addition to a fall dessert board alongside chocolate bark and caramel apples.
- Storage: Store in an airtight container in the fridge for up to 5 days. If you want to keep them longer, freeze on a baking sheet, then transfer to a freezer bag. They’ll last up to 2 months frozen—just thaw in the fridge before serving.
- Reheating: No reheating needed (unless you like a gooey center—then microwave for 5 seconds, but be careful not to melt them!).
- Flavor Development: The pumpkin and spice flavors deepen after a day in the fridge. Sometimes I make them a day ahead for extra richness.
For gifting, pop them into cellophane bags tied with ribbon—they hold up beautifully and make the sweetest homemade presents. Just remember, they’re best enjoyed cold, so keep them chilled until serving!
Nutritional Information & Benefits
| Serving Size | 1 ball (approx. 25g) |
|---|---|
| Calories | 90 |
| Fat | 5g |
| Carbohydrates | 10g |
| Protein | 2g |
Health Benefits: Pumpkin is loaded with vitamin A, fiber, and antioxidants—great for vision and immune health. Cream cheese adds calcium and protein, while spices like cinnamon and ginger have natural anti-inflammatory properties. If you use nuts or coconut for coating, you’re sneaking in healthy fats!
Dietary Notes: This recipe is easy to adapt for gluten-free or dairy-free diets. Contains dairy and may contain nuts if using pecans—always check labels for allergens. I love that you can tweak the sugar or use alternative sweeteners without sacrificing flavor. For me, these are an awesome balance of indulgence and wholesome ingredients—perfect for a guilt-free treat!
Conclusion
If you’re looking for a fall dessert that’s easy, adorable, and bursting with creamy pumpkin flavor, these Creamy Pumpkin Cheesecake Balls are your golden ticket. They’re the kind of treat that turns a regular day into something special, with just a handful of pantry staples and a little bit of rolling fun. Whether you go classic or try one of the tasty twists, this recipe is endlessly customizable—so don’t be shy, make it your own!
I love these for their nostalgia, simplicity, and how they always bring a smile to anyone who tries them. Go ahead and bookmark this recipe, share it with friends, or leave a comment below with your favorite variation. If you snap a photo for Pinterest, tag me—I can’t wait to see your creations! Honestly, I hope these pumpkin cheesecake balls become a staple in your fall kitchen too. Happy rolling, and enjoy every bite!
Frequently Asked Questions – Creamy Pumpkin Cheesecake Balls
Can I make Creamy Pumpkin Cheesecake Balls ahead of time?
Absolutely! You can prepare them a day or two in advance. Just store in the fridge until you’re ready to serve—they actually taste better after chilling overnight.
Can I freeze these pumpkin cheesecake balls?
Yes, they freeze beautifully. Lay them out on a baking sheet, freeze until solid, then transfer to a freezer bag. Thaw in the fridge before serving.
What can I use instead of graham crackers?
You can substitute with vanilla wafers, digestive biscuits, or ginger snaps for a spicy twist. Gluten-free cookies work just as well.
Are these balls suitable for kids with nut allergies?
Definitely! Just skip the nuts and use cookie crumbs, coconut, or sprinkles for rolling. Always check labels for hidden allergens, though.
Can I make these vegan or dairy-free?
Yes! Use dairy-free cream cheese and vegan white chocolate chips. The texture is a little softer, but the flavor is still delicious.
Pin This Recipe!
Creamy Pumpkin Cheesecake Balls
These Creamy Pumpkin Cheesecake Balls are a quick, no-bake fall dessert packed with pumpkin, warm spices, and creamy cheesecake flavor. Perfect for parties, gifting, or a cozy treat, they’re easy to make and endlessly customizable.
- Prep Time: 15 minutes
- Cook Time: 0 minutes
- Total Time: 45 minutes
- Yield: 18-20 balls 1x
- Category: Dessert
- Cuisine: American
Ingredients
- 8 oz cream cheese, softened
- 1/2 cup pumpkin puree
- 1/4 cup granulated sugar (or coconut sugar)
- 1/2 tsp ground cinnamon
- 1/4 tsp ground nutmeg (optional)
- 1/4 tsp ground ginger
- 1/2 tsp pure vanilla extract
- 1 cup graham cracker crumbs (or digestive biscuits, finely crushed; gluten-free options work)
- 1/4 cup white chocolate chips, melted
- 1/2 cup chopped pecans (or walnuts, toasted for extra crunch)
- 1/4 cup shredded coconut (unsweetened or toasted)
- 1/4 cup extra graham cracker crumbs
- Optional: orange sprinkles or mini chocolate chips for decoration
Instructions
- Take the cream cheese out of the fridge about 30 minutes before starting to soften. Line a baking sheet with parchment paper and measure out all ingredients.
- In a large mixing bowl, beat cream cheese until smooth (about 1 minute). Add pumpkin puree, sugar, cinnamon, nutmeg, ginger, and vanilla. Mix until creamy and well combined.
- Add graham cracker crumbs to the pumpkin mixture and stir with a spatula until fully blended. If mixture is very sticky, add an extra tablespoon of crumbs.
- In a microwave-safe bowl, melt white chocolate chips in 30-second bursts, stirring in between, until smooth (about 1 minute total). Pour melted chocolate into pumpkin mixture and stir until completely incorporated.
- Refrigerate the bowl for 15-20 minutes to firm up the mixture. For a quicker chill, freeze for 10 minutes.
- Using a small cookie scoop or tablespoon, portion out the mixture and roll each scoop between your hands to form smooth balls, about 1 inch in diameter. Place on lined baking sheet (makes about 18-20 balls).
- Set up bowls with chopped pecans, coconut, and extra graham cracker crumbs. Roll each ball in desired coating and press gently to help toppings stick. Add sprinkles or mini chocolate chips if desired.
- Place decorated balls back in the fridge for at least 30 minutes to set (up to 2 hours for firmer texture).
- Arrange chilled pumpkin cheesecake balls on a plate or in mini cupcake liners. Serve cold or at room temperature.
Notes
For gluten-free, use gluten-free graham crackers. For dairy-free, use vegan cream cheese and dairy-free white chocolate. If mixture is too sticky, add more crumbs. Balls can be made ahead and freeze well. Decorate with nuts, coconut, cookie crumbs, or sprinkles for variety.
Nutrition
- Serving Size: 1 ball (approx. 25g)
- Calories: 90
- Sugar: 6
- Sodium: 60
- Fat: 5
- Saturated Fat: 3
- Carbohydrates: 10
- Fiber: 1
- Protein: 2
Keywords: pumpkin cheesecake balls, fall dessert, no bake, pumpkin recipe, easy dessert, party treat, kid friendly, gluten free option, dairy free option, autumn sweets


