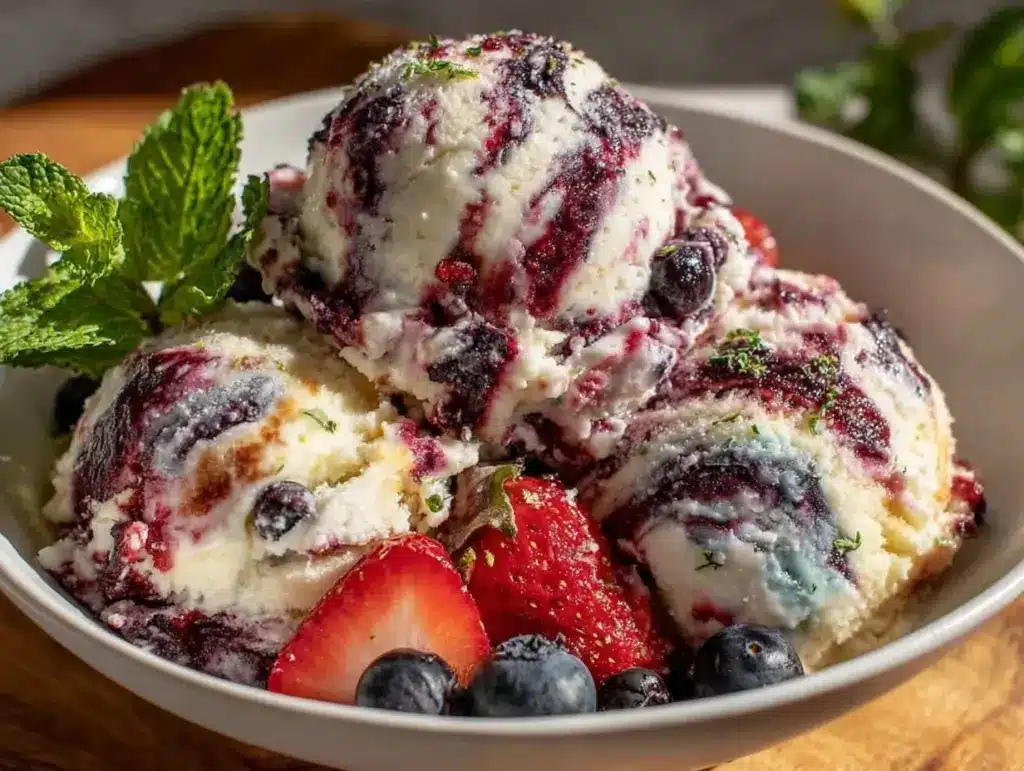
“Hey, did you bring the dessert?” my neighbor asked as we set up the backyard for the summer party. Honestly, I hadn’t planned on making anything complicated — but then I remembered that bag of frozen berries and a tub of whipped cream tucked in my fridge. That’s when the idea of this Easy No-Churn Red White and Blue Ice Cream popped into my head. No fancy ice cream maker, no fuss — just a quick, colorful treat that somehow felt like the perfect end to a long, hot day.
The best part? It came together so fast, I barely believed it myself. I was skeptical at first that it could taste as good as traditional ice cream, but one spoonful later, I was hooked. Its creamy texture and those fresh bursts of sweet strawberries and blueberries made it a hit with everyone — kids and adults alike. It’s the kind of recipe that’s so simple, you’ll find yourself making it more than once during summer, especially when you want to impress guests without turning your kitchen into a mess.
What stuck with me most about this recipe is how it channels that easy-going summer vibe — patriotic colors, refreshing flavors, and zero stress. It’s become my go-to whenever I need a quick, crowd-pleasing dessert that doesn’t require a million ingredients or hours of waiting. That quiet little realization, that sometimes the best things are the easiest, is why this no-churn red white and blue ice cream has become a staple in my summer lineup.
Why You’ll Love This Recipe
Coming from someone who’s juggled a busy schedule and last-minute party invitations, this Easy No-Churn Red White and Blue Ice Cream is a real lifesaver. It’s not just an eye-catching dessert — it’s genuinely delicious and approachable. Here’s what makes it stand out in the sea of summer treats:
- Quick & Easy: Ready in under 15 minutes, perfect for when you need a last-minute dessert that looks like you planned ahead.
- Simple Ingredients: No fancy shopping trips required — just a handful of pantry staples and fresh or frozen berries you might already have.
- Perfect for Summer Parties: Whether it’s a 4th of July BBQ or a casual get-together, this recipe’s patriotic colors bring the fun without the fuss.
- Crowd-Pleaser: I’ve yet to meet a party guest who didn’t ask for seconds — it’s sweet, creamy, and just the right balance of fruity.
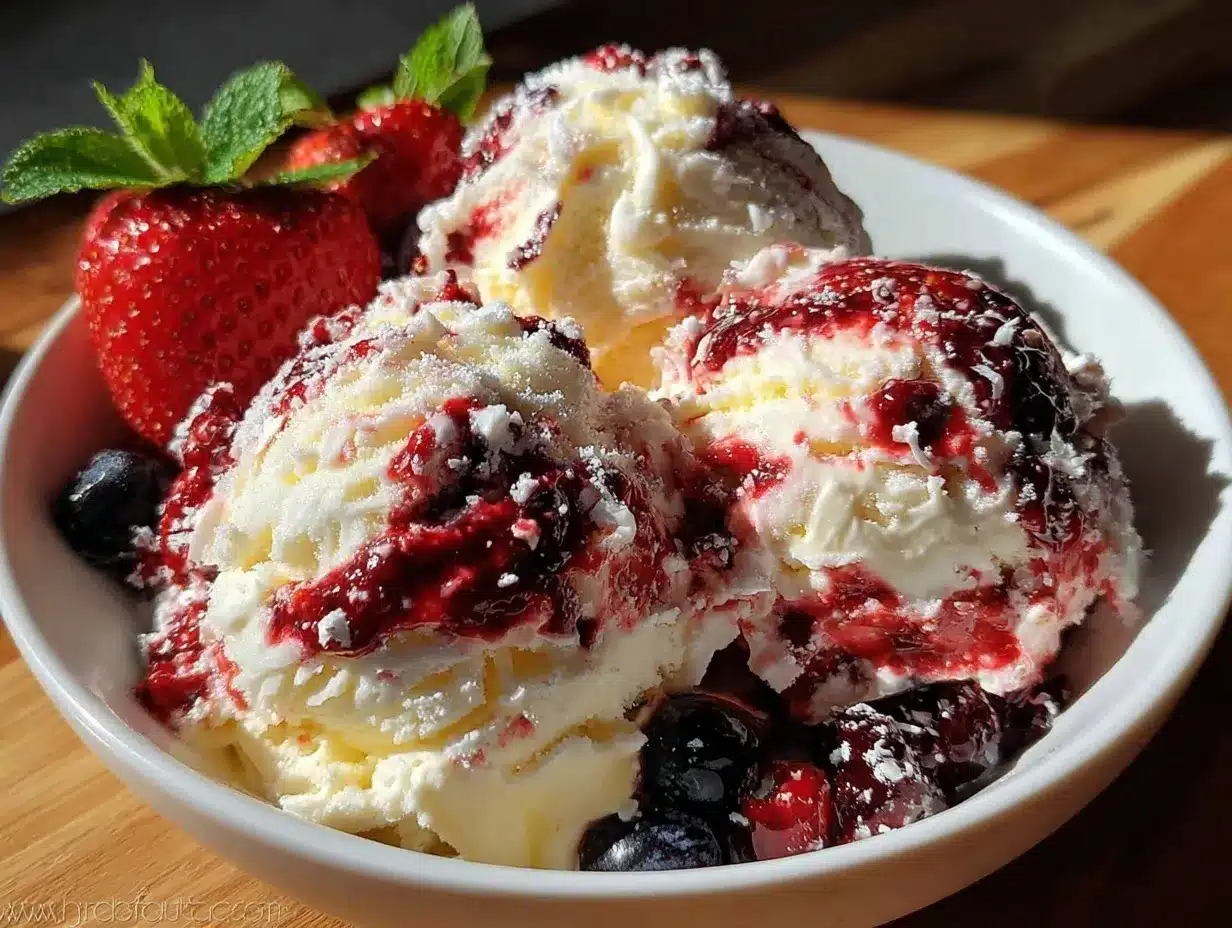
- Unbelievably Delicious: The no-churn method keeps it light yet creamy, with layers of red and blue berry flavors that feel fresh and homemade.
This isn’t just any no-churn ice cream recipe. The layering trick to keep the colors distinct is what really makes it pop visually and taste-wise. Plus, swapping in Greek yogurt creates a tangy undertone that keeps it from feeling too heavy — a small twist that makes a big difference. I’ve made this recipe several times, tweaking the berry ratios and sometimes sneaking in a little fresh lemon zest for brightness. It’s comfort food that feels festive and refreshing at once, and honestly, it’s become my favorite way to bring a little celebration to the table without breaking a sweat.
What Ingredients You Will Need
This recipe uses straightforward, wholesome ingredients to deliver bold flavor and that satisfying creamy texture without complicated steps or hard-to-find items. Most are pantry staples or seasonal fruits you can easily swap depending on what’s fresh or frozen.
- Heavy Whipping Cream (2 cups / 480 ml) — For a rich, creamy base. I usually reach for Organic Valley for the best whipping results.
- Sweetened Condensed Milk (1 can, 14 oz / 397 g) — Adds sweetness and creaminess without extra sugar granules.
- Vanilla Extract (1 tsp / 5 ml) — The classic flavor enhancer that ties everything together.
- Strawberries (1 cup / 150 g, fresh or frozen, hulled and sliced) — For the red layer; fresh is best when in season.
- Blueberries (1 cup / 150 g, fresh or frozen) — The blue layer; bursting with natural sweetness.
- Powdered Sugar (2 tablespoons / 15 g) — Optional, to sweeten berries if they’re a bit tart.
- Lemon Juice (1 teaspoon / 5 ml) — Brightens the berry flavors; feel free to omit if you prefer.
Substitution tips: If you want a lighter option, swap heavy cream for full-fat coconut cream, but keep in mind the flavor will shift slightly. For dairy-free, use coconut condensed milk or a similar sweetened alternative. You can replace strawberries and blueberries with any red and blue fruits you like — raspberries or blackberries work well for variation.
Equipment Needed
- Mixing Bowls: A few medium and large bowls for whipping cream and preparing berry mixtures.
- Electric Hand Mixer or Stand Mixer: Essential for whipping the cream to stiff peaks efficiently. A whisk works but takes longer and requires some muscle.
- Spatula: For folding ingredients gently without deflating the cream.
- Loaf Pan or Medium Container: For layering and freezing the ice cream. A 9×5 inch (23×13 cm) loaf pan fits perfectly.
- Plastic Wrap or Lid: To cover the ice cream container during freezing.
If you don’t have a stand mixer, an electric hand mixer is a budget-friendly option that does the job well. I’ve even used a handheld whisk in a pinch — just give yourself extra time and patience. For freezing, using a metal loaf pan helps it freeze faster, but any freezer-safe container works fine. I also like to keep a silicone spatula handy for scraping every bit of the creamy mixture out of the bowls.
Preparation Method
- Prepare the Berry Purees (10 minutes): In two separate bowls, mash the strawberries and blueberries. Add 1 tablespoon of powdered sugar and half a teaspoon of lemon juice to each bowl. Stir well and set aside to macerate while you whip the cream.
- Whip the Heavy Cream (5-7 minutes): Using an electric mixer on medium-high speed, whip the heavy cream until it holds stiff peaks — this means it should stand up firmly when you lift the beaters. Be careful not to overwhip, or it might turn grainy.
- Fold in Sweetened Condensed Milk and Vanilla (2 minutes): Gently fold the sweetened condensed milk and vanilla extract into the whipped cream. Use a spatula to mix until just combined, keeping the airy texture intact.
- Divide the Cream Mixture (1 minute): Separate the whipped cream mixture evenly into three bowls — one for each color layer.
- Color the Cream Layers (3 minutes): Fold the mashed strawberries into one bowl, blueberries into the second, and leave the third plain for the white layer. Make sure the fruit is evenly distributed but keep the mixture fluffy.
- Layer the Ice Cream (5 minutes): Spoon the red (strawberry) mixture into the bottom of your loaf pan, spreading it evenly. Next, add the white cream layer on top, smoothing it gently. Finally, add the blue (blueberry) layer. Avoid mixing the layers to keep the red, white, and blue effect.
- Freeze for at Least 6 Hours: Cover the pan tightly with plastic wrap or a lid. Freeze the ice cream for at least 6 hours or overnight until firm.
- Serve and Enjoy: When ready, remove the ice cream from the freezer and let it sit for 5 minutes before scooping. This softens it slightly for easier serving.
Pro tip: If you notice the berries release too much juice, drain the excess before folding them into the cream to avoid a watery texture. Also, layering gently keeps the colors vibrant and distinct, so don’t rush this step.
Cooking Tips & Techniques
Whipping cream properly is the heart of this no-churn ice cream. I’ve learned the hard way that underwhipping leads to a runny mess while overwhipping can cause the cream to clump. Stop whipping as soon as you see stiff peaks — the cream should hold its shape but still feel smooth and velvety.
When folding in the condensed milk and fruit, take your time and use a spatula to gently combine without deflating the air you worked so hard to whip in. This airiness is what gives the ice cream that lovely, scoopable texture without churning.
Another little nugget: use cold bowls and beaters for whipping cream. It helps the cream whip faster and hold its volume longer. I usually pop my mixing bowl in the freezer for 10 minutes before starting.
For layering, the key is patience. Spoon each layer carefully and smooth it gently. If you’re worried about colors mixing, you can freeze each layer for 20-30 minutes before adding the next, but I find it’s not necessary if you’re gentle.
One last thing — don’t forget to let the ice cream soften for a few minutes before scooping. It’s tempting to dig right in, but this rest period makes serving so much easier and keeps your scoops looking picture-perfect.
Variations & Adaptations
This recipe is flexible and can easily be adjusted to suit your tastes or dietary needs. Here are a few ideas I’ve tried or recommend:
- Fruit Swaps: Use raspberries and blackberries instead of strawberries and blueberries for a twist on the colors and flavors.
- Dairy-Free Version: Replace heavy cream with full-fat coconut cream and sweetened condensed milk with canned coconut milk sweetened with maple syrup.
- Added Crunch: Stir in crushed graham crackers or toasted coconut flakes between layers for extra texture and flavor contrast.
- Lower Sugar: Use unsweetened condensed milk and adjust the powdered sugar in the berries to taste, or try a sugar substitute like stevia.
- Alcohol-Infused: Add a tablespoon of bourbon or raspberry liqueur to the berry purees for an adult-friendly version.
Personally, I once tried mixing a layer of fresh peaches into the white layer, which brought a lovely summer sweetness that surprised everyone. The key is to keep the fruit finely mashed or pureed so it blends well without freezing too hard.
Serving & Storage Suggestions
This Easy No-Churn Red White and Blue Ice Cream is best served chilled but not rock solid. Let it rest at room temperature for 5 minutes before scooping to get those smooth, creamy spoonfuls everyone loves.
For presentation, I like to serve it in clear glass bowls or vintage ice cream dishes to show off the vibrant layers — it’s a real conversation starter. Pair it with light desserts like no-bake strawberry cheesecake bites or a fresh fruit salad for a full summer spread.
Store leftovers tightly covered in the freezer for up to one week. To prevent ice crystals, press a sheet of parchment or plastic wrap directly onto the ice cream surface before sealing. When reheating, just let it soften at room temperature rather than microwaving, which can ruin the texture.
The flavors actually mellow and blend beautifully after a day or two, so if you can wait, the ice cream tastes even better the next day (if it lasts!).
Nutritional Information & Benefits
Here’s a rough estimate per serving (based on 8 servings): approximately 250 calories, 15g fat, 25g carbohydrates, and 3g protein. This ice cream offers a good source of calcium and vitamin C from the berries, plus protein from the cream.
The berries pack antioxidants and fiber, making this treat a little more wholesome than your average store-bought version. Though it’s not sugar-free, using natural fruit and a modest amount of added sugar keeps it balanced — and it’s a no-churn recipe that skips artificial stabilizers or preservatives.
For gluten-free or keto-friendly options, you can swap berries and sweeteners accordingly, keeping in mind the texture might vary. I appreciate this recipe as a realistic indulgence that feels homemade and fresh rather than overly processed.
Conclusion
This Easy No-Churn Red White and Blue Ice Cream is one of those recipes that works every single time — simple, quick, and festive. It’s perfect when you want a cool treat that’s as pretty as it is tasty, without spending hours in the kitchen or hunting for weird ingredients.
Feel free to tweak the fruit layers or sweetness to fit your tastes; the base is forgiving and adaptable. I love this recipe because it turns a handful of everyday ingredients into something special that sparks smiles and keeps the party going.
Give it a try next time you’re looking for an effortless dessert with a little patriotic flair, and don’t be shy to share your own twists or questions below — I’m always eager to hear how you make it your own!
Frequently Asked Questions
Can I use frozen berries instead of fresh?
Absolutely! Frozen berries work well and can be used straight from the freezer. Just thaw and drain any excess juice before mashing to avoid a watery texture.
Do I need an ice cream maker for this recipe?
Nope! This is a no-churn recipe, so no special equipment is necessary beyond a mixer to whip the cream.
How long can I store this ice cream in the freezer?
Stored properly in an airtight container, it keeps well for up to one week without losing texture or flavor.
Can I make this recipe vegan?
Yes, by substituting heavy cream with coconut cream and using a dairy-free sweetened condensed milk alternative, you can make a vegan-friendly version.
What’s the best way to serve this ice cream?
Let it sit at room temperature for 5 minutes before scooping. Serve in clear bowls to show off the red, white, and blue layers, and pair with light summer desserts or fresh fruit.
Pin This Recipe!
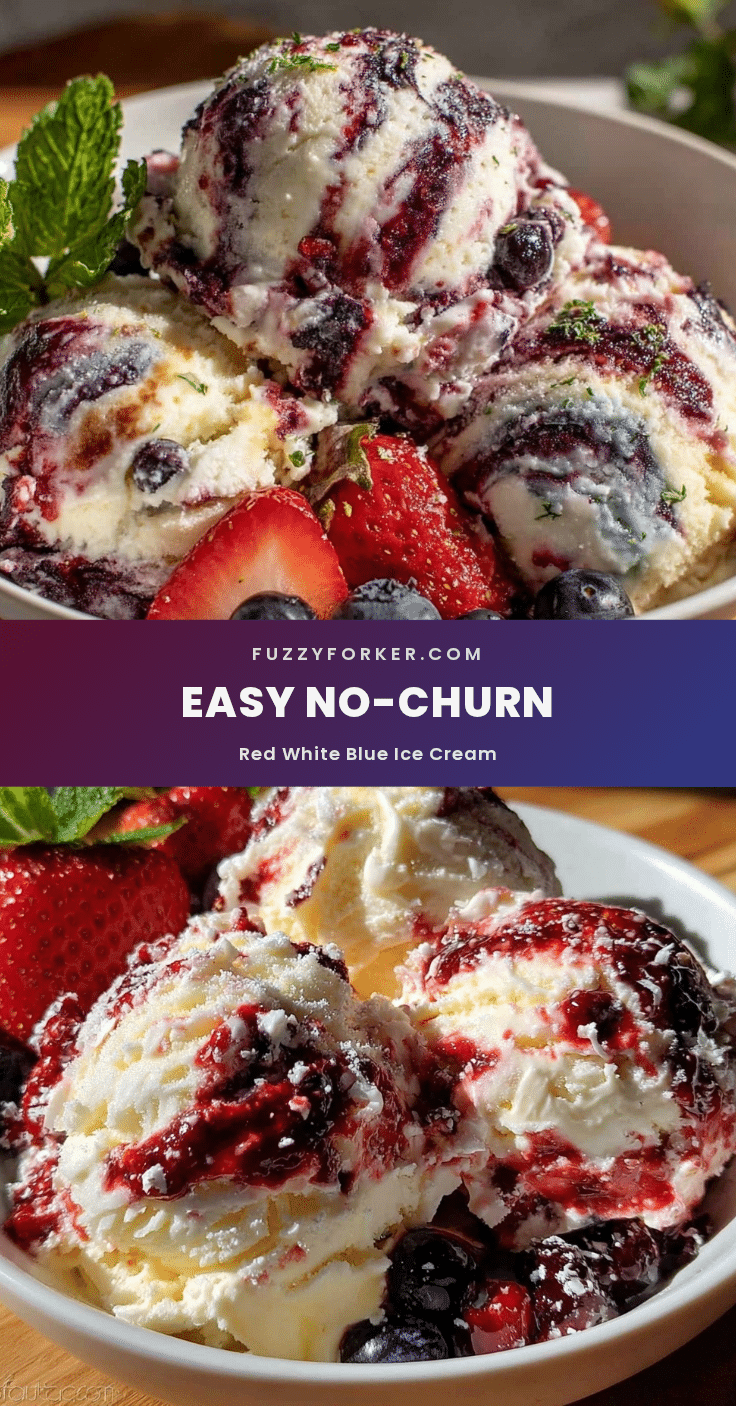
Easy No-Churn Red White and Blue Ice Cream Recipe Perfect for Summer Parties
A quick and colorful no-churn ice cream featuring patriotic red, white, and blue layers made with fresh or frozen berries and whipped cream. Perfect for summer parties and requires no ice cream maker.
- Prep Time: 15 minutes
- Cook Time: 0 minutes
- Total Time: 6 hours 15 minutes
- Yield: 8 servings 1x
- Category: Dessert
- Cuisine: American
Ingredients
- 2 cups (480 ml) heavy whipping cream
- 1 can (14 oz / 397 g) sweetened condensed milk
- 1 tsp (5 ml) vanilla extract
- 1 cup (150 g) strawberries, fresh or frozen, hulled and sliced
- 1 cup (150 g) blueberries, fresh or frozen
- 2 tablespoons (15 g) powdered sugar (optional)
- 1 teaspoon (5 ml) lemon juice
Instructions
- Prepare the Berry Purees (10 minutes): In two separate bowls, mash the strawberries and blueberries. Add 1 tablespoon of powdered sugar and half a teaspoon of lemon juice to each bowl. Stir well and set aside to macerate while you whip the cream.
- Whip the Heavy Cream (5-7 minutes): Using an electric mixer on medium-high speed, whip the heavy cream until it holds stiff peaks.
- Fold in Sweetened Condensed Milk and Vanilla (2 minutes): Gently fold the sweetened condensed milk and vanilla extract into the whipped cream using a spatula until just combined.
- Divide the Cream Mixture (1 minute): Separate the whipped cream mixture evenly into three bowls.
- Color the Cream Layers (3 minutes): Fold the mashed strawberries into one bowl, blueberries into the second, and leave the third plain for the white layer.
- Layer the Ice Cream (5 minutes): Spoon the red (strawberry) mixture into the bottom of a loaf pan, spread evenly. Add the white cream layer on top, smoothing gently. Finally, add the blue (blueberry) layer. Avoid mixing layers.
- Freeze for at Least 6 Hours: Cover the pan tightly with plastic wrap or a lid and freeze until firm.
- Serve and Enjoy: Let the ice cream sit at room temperature for 5 minutes before scooping.
Notes
Use cold bowls and beaters for whipping cream to help it whip faster and hold volume longer. Drain excess juice from berries before folding to avoid watery texture. Layer gently to keep colors distinct. Let ice cream soften for 5 minutes before scooping. For dairy-free version, substitute heavy cream with full-fat coconut cream and use coconut condensed milk.
Nutrition
- Serving Size: 1/8 of the loaf pan
- Calories: 250
- Fat: 15
- Carbohydrates: 25
- Protein: 3
Keywords: no-churn ice cream, red white and blue ice cream, summer dessert, patriotic dessert, easy ice cream recipe, berry ice cream, no ice cream maker


