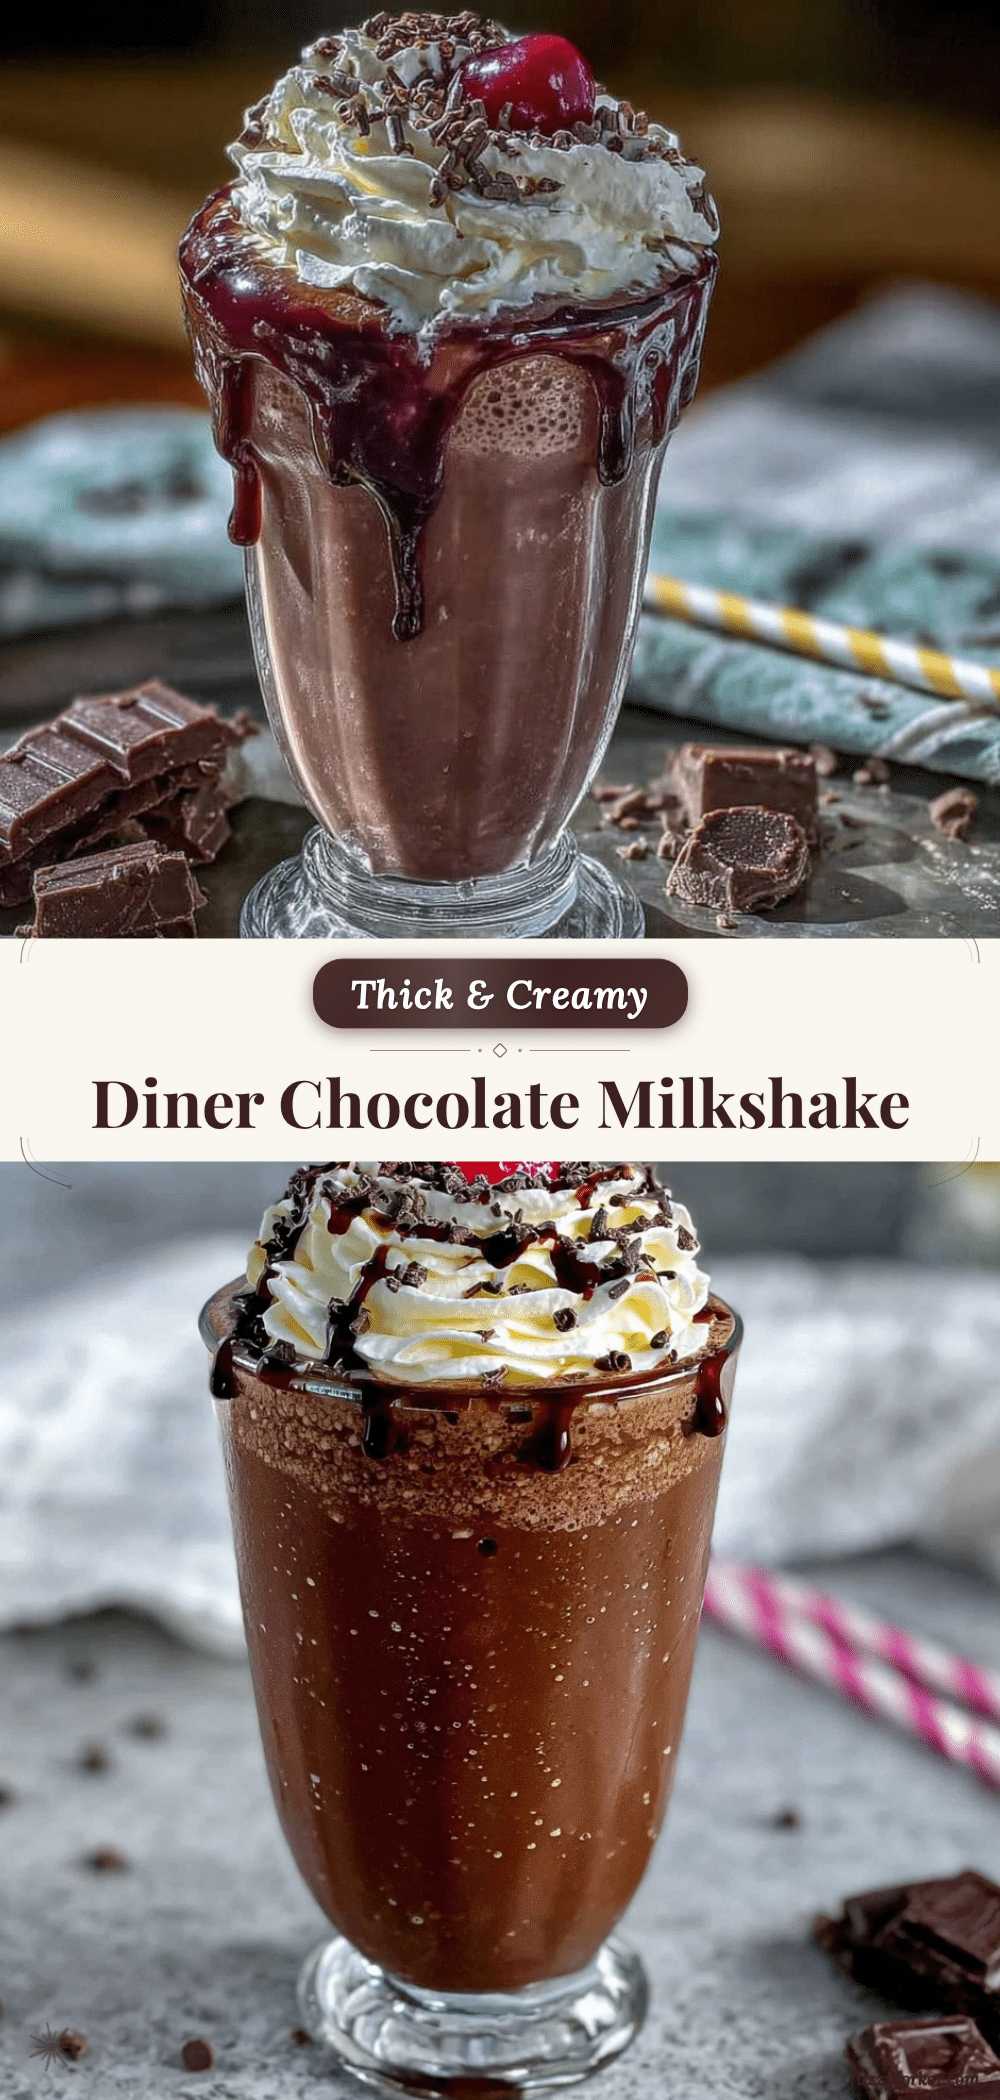
One Friday night, after a long week of juggling work, kids, and life’s endless to-do list, I found myself craving something nostalgic and indulgent. I wasn’t in the mood to fuss over complicated desserts or head out to a crowded ice cream shop. I just wanted a thick, creamy chocolate milkshake that tasted like it came straight from a classic diner—rich, smooth, and satisfying. So, I rolled up my sleeves and got to work in my little kitchen. After a few tweaks and a couple of taste tests (okay, maybe more than a couple), I finally nailed a chocolate milkshake recipe easy enough for weeknight cravings, but thick and luscious enough to feel like a treat.
This chocolate milkshake thick diner style recipe is my go-to when I want something that feels special but doesn’t eat up my evening. I’ve tested it over a dozen times, tweaking it just right so you get that perfect creamy, rich texture every time. And here’s the best part: you only need a few simple ingredients you probably already have in the fridge or pantry. It’s easy to make, tastes like a nostalgic diner classic, and you won’t believe how thick and creamy it is without using any weird additives.
Whether you want to impress the kids after school, treat yourself on a cozy night in, or serve something fun and retro for a party, this chocolate milkshake recipe easy thick diner style creamy rich version has you covered. Plus, I’ll share my secrets on how to get that perfect thickness and richness without breaking the bank or spending hours in the kitchen.
Why You’ll Love This Recipe
This recipe has completely changed the way I handle chocolate milkshakes at home. I’ve made this for picky kids and even my husband, who claims he’s “not really a milkshake person,” and everyone asks for seconds.
- Thick and Creamy Every Time — The secret is the right balance of ice cream and milk, plus a quick chill in the freezer before serving. It’s like a milkshake you’d order at a diner counter, not a thin smoothie.
- Simple Ingredients You Already Have — No fancy syrups or weird powders. Just good-quality chocolate syrup, vanilla ice cream, and milk. I usually keep these stocked so I can whip this up anytime.
- Super Quick to Make — From fridge to glass in under 10 minutes, including blending and chilling. Perfect for when you want a rich treat but don’t want to wait.
- Kid-Friendly and Crowd-Pleasing — I’ve served this at birthday parties and family movie nights. It’s a hit with everyone, no matter their age.
- Great for Any Occasion — Whether it’s a casual weeknight dessert or part of a retro-themed gathering, this diner-style chocolate milkshake fits right in.
This is my go-to for busy weeknight treats or casual weekend indulgences. No complicated steps, no weird ingredients — just reliable, creamy chocolate milkshake magic.
Ingredients for Chocolate Milkshake Thick Diner Style
Here’s the best part: you probably have most of this already. I’m pretty picky about the ice cream and chocolate syrup — they make or break the whole thing.
- Vanilla Ice Cream (3 cups / 720 ml) — Use full-fat, creamy vanilla ice cream. It’s the base that gives the shake its thickness and richness. I always go for a brand with minimal stabilizers to get that authentic diner taste.
- Whole Milk (1 cup / 240 ml) — Adds creaminess without watering down the shake. Skim or low-fat makes it too thin, so stick with whole for that classic texture.
- Chocolate Syrup (½ cup / 120 ml) — I use Hershey’s or a good-quality store brand. Use a real chocolate syrup, not cocoa powder mixed with sugar — it just doesn’t blend the same way.
- Vanilla Extract (1 teaspoon / 5 ml) — Just a touch to enhance the flavors. Don’t skip this; it makes the milkshake taste richer and more rounded.
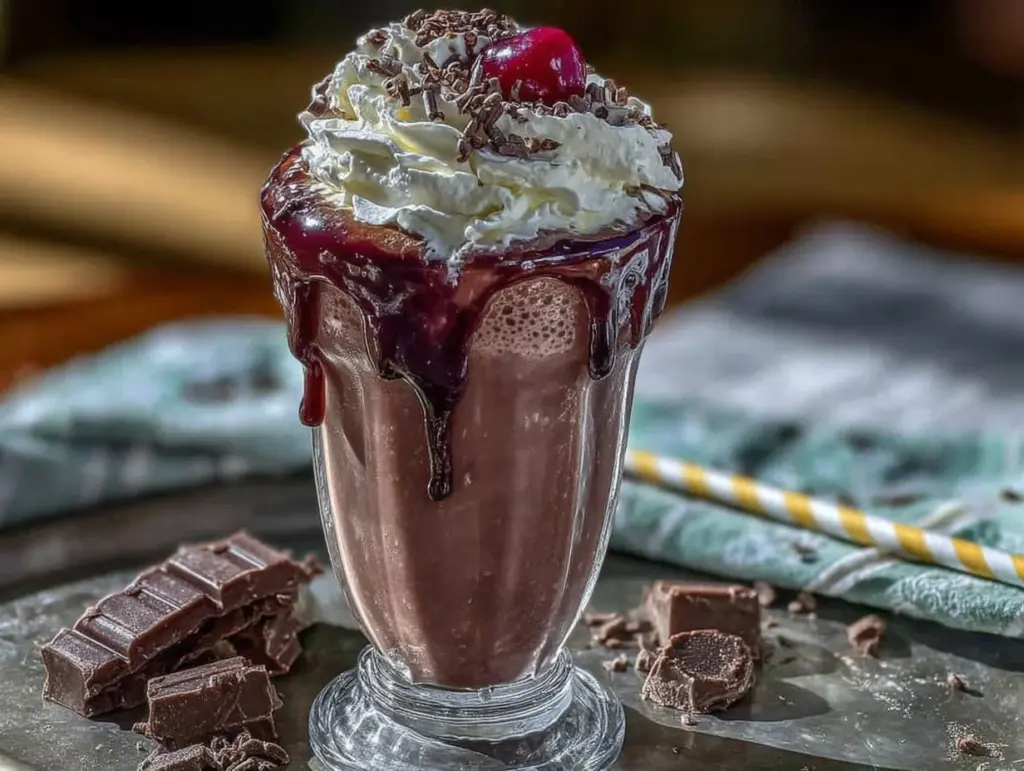
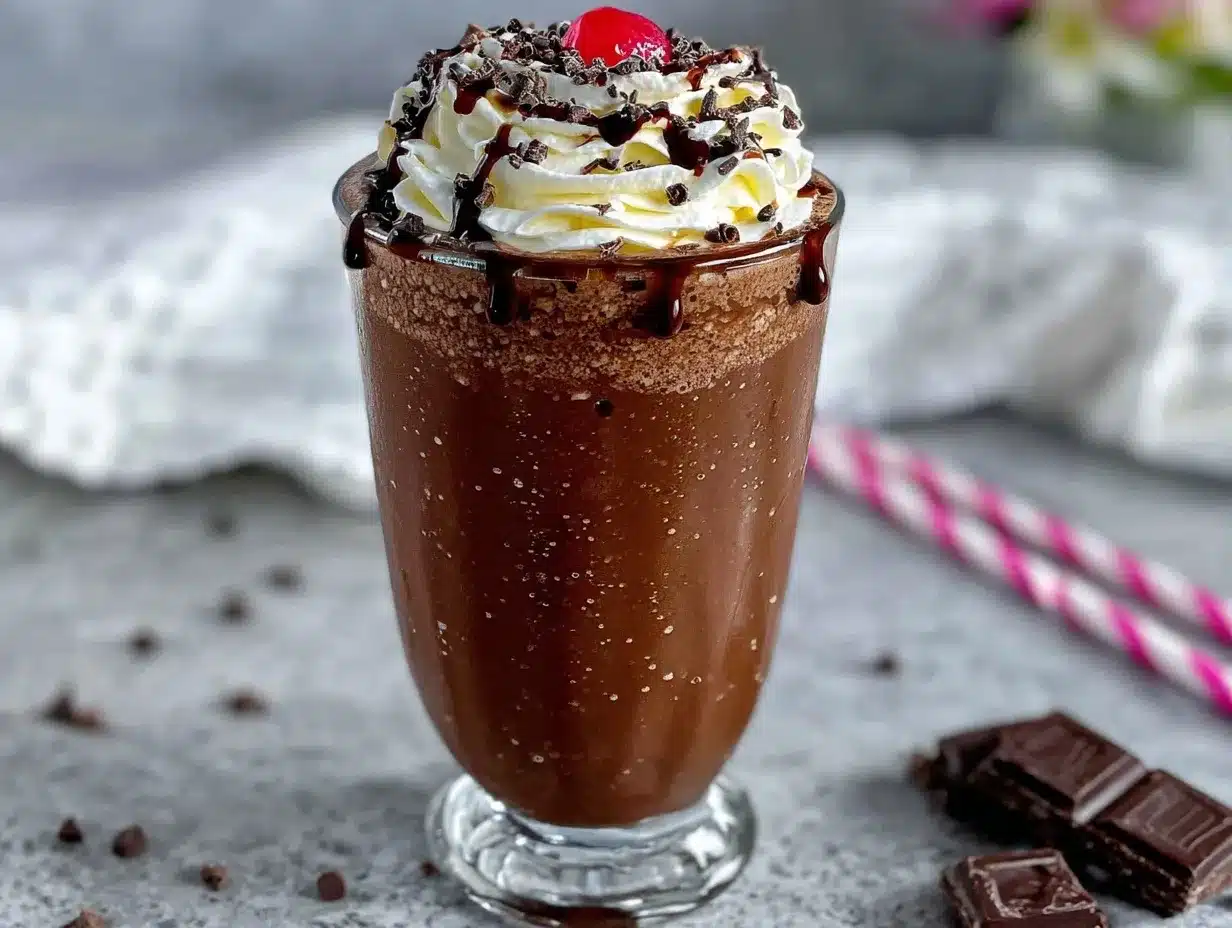
- Optional: Whipped Cream — For topping. Because a diner-style chocolate milkshake isn’t complete without a fluffy crown of whipped cream.
Equipment Needed
You don’t need anything fancy for this. Here’s what I actually use.
- Blender — A regular countertop blender works perfectly. I’ve tried with an immersion blender, but it doesn’t get the shake as smooth or thick.
- Measuring Cups and Spoons — For accuracy, especially with the chocolate syrup and vanilla extract.
- Large Glasses or Milkshake Cups — To serve in true diner style. Bonus points for striped paper straws.
- Ice Cream Scoop — Makes it easier to get perfect portions of ice cream without melting it in your hands.
- Optional But Useful: Tall Spoon — For stirring and savoring every last drop.
How to Make Chocolate Milkshake Thick Diner Style
Alright, let’s get into it. I’ll walk you through exactly how I make this, including the small tricks that actually make a difference.
- Step 1: Gather and Chill Ingredients (5 minutes)
Pull your ice cream from the freezer first so it softens slightly but isn’t melted. Measure out the milk and chocolate syrup. Having everything ready means no scrambling once the blender is on. - Step 2: Blend Ice Cream and Milk (2-3 minutes)
Add the vanilla ice cream and whole milk to the blender. Pulse a few times to start combining, then blend on medium-high until smooth but still thick. You want the mixture to look creamy and glossy, not runny. - Step 3: Add Chocolate Syrup and Vanilla Extract (1-2 minutes)
Pour in the chocolate syrup and vanilla extract. Blend again until fully incorporated. The color should turn a rich chocolate brown and the aroma will be irresistible. - Step 4: Taste and Adjust Thickness (1 minute)
If the shake feels too thin, add a little more ice cream and pulse again. If it’s too thick to blend, add a splash more milk. The goal is that thick, spoon-stand-up consistency. - Step 5: Chill Before Serving (5-10 minutes)
Pour the milkshake into glasses and pop them in the freezer for 5-10 minutes. This extra chill firms up the shake, making it taste even creamier and more like the diner version. If you’re impatient like me, serve immediately — it’s still delicious. - Step 6: Optional Whipped Cream Crown
Top with a generous swirl of whipped cream and maybe a drizzle of extra chocolate syrup. Because every diner-style chocolate milkshake deserves a little flair.
Total time: about 15-20 minutes, including chilling. Active blending takes less than 10.
Expert Tips & Tricks
Here’s everything I’ve figured out from making this recipe dozens of times. These tips will save you from the mistakes I already made.
- Use Full-Fat Ice Cream and Whole Milk
This combo is the key to that authentic thick diner-style texture. Tried it with lighter options and the shake turned watery and disappointing. - Don’t Skip the Chill
Letting the milkshake chill for a few minutes after blending makes a huge difference in creaminess and thickness. It’s a simple step that turns good into great. - Measure Your Chocolate Syrup
Adding syrup by eye can lead to a shake that’s either too sweet or not chocolatey enough. It’s worth the extra minute to measure precisely. - Pulse First, Then Blend
Starting with pulses breaks up the ice cream gently and prevents the blender from overworking or overheating, which can make the shake thin. - Mistake: Shake too thin?
Fix: Add a scoop of ice cream and blend again. If it’s still too thin, freeze the milkshake for 10 minutes before serving. - Mistake: Shake too thick to blend?
Fix: Add a splash more milk, but only a tablespoon at a time. You want thick, not sloppy.
Variations & Substitutions
Once you’ve got the base version down, here’s how I mix it up. I’ve actually tried all of these.
- Peanut Butter Chocolate Shake
Add 2 tablespoons of creamy peanut butter with the ice cream. It’s like a diner classic with a twist. My kids love this one. - Mint Chocolate Shake
Swap vanilla extract for peppermint extract and add a handful of fresh mint leaves before blending. Perfect for a refreshing summer treat. - Dairy-Free Version
Use coconut milk ice cream and almond milk instead of dairy. The texture isn’t quite as thick, but still creamy and delicious. My lactose-intolerant friend swears by this. - For a Party
Double or triple the recipe and blend in batches. Serve in vintage soda fountain glasses for a fun retro vibe. I always pair it with some creamy deviled eggs for a classic diner-style spread. - Chocolate Shake with a Boozy Kick
Add 1-2 tablespoons of coffee liqueur or bourbon for an adult-only version. I keep this one in my back pocket for casual weekend evenings.
Gluten-Free? Yes, naturally. Just double-check your chocolate syrup label to be sure.
Serving & Storage
I usually serve this milkshake straight from the glass with a thick straw and a long spoon. It looks and tastes like something out of a 1950s diner, and the kids love it.
Here are some side ideas that pair beautifully:
- Classic crispy fries or onion rings for a true diner vibe
- Simple cookie or brownie bites for extra chocolate indulgence
- A fresh fruit salad if you want a lighter contrast
Storage: This milkshake is best enjoyed fresh. If you have leftovers (lucky you!), store them in an airtight container in the fridge for up to 24 hours. The shake will thicken and separate a bit — quick stir or blend before drinking.
Reheating/Reblending: Pour back into a blender and pulse a few times to refresh the texture. Don’t microwave; it ruins the creamy consistency.
Freezing: Not recommended. The texture suffers when frozen and thawed.
Nutrition Information
I’m not a nutritionist, but here’s the breakdown if you’re keeping track. This is for one generous serving, based on about 3 servings total.
| Calories | Protein | Carbs | Fiber | Sugar | Fat | Saturated Fat | Sodium |
|---|---|---|---|---|---|---|---|
| 420 | 7g | 45g | 2g | 38g | 22g | 14g | 110mg |
Look — this is comfort food made with ice cream and chocolate syrup. It’s not a diet recipe and I’m not going to pretend it is. But it’s way better than a soda fountain shake, costs less, and you know exactly what’s going in it. When I want something lighter, I cut back on the syrup and swap half the ice cream for frozen banana. Most nights though? I make the real thing and enjoy every sip.
Final Thoughts
Remember that Friday night when I just needed a simple, thick, creamy chocolate milkshake that tasted like it came from a diner? Well, now I have this recipe locked down and it’s become a staple in my home. It’s my little slice of nostalgia and comfort, ready whenever I need it.
Make it yours. More chocolate? Always a yes. Add a pinch of espresso powder to deepen the flavor. Toss in a scoop of your favorite nut butter or swirl in some caramel. The base is forgiving and fun to customize.
If you make this, drop a comment and tell me how it went. And if something goes wrong, tell me that too — I genuinely want to help troubleshoot. That’s what the comments are for.
Happy cooking — I hope your kitchen smells amazing.
Frequently Asked Questions
Q: Can I make this chocolate milkshake recipe easy thick diner style creamy rich without ice cream?
A: You can, but it won’t be anywhere near as thick or creamy. I’ve tried with frozen bananas and yogurt for a healthier twist, but it’s more smoothie than milkshake. If you’re out of ice cream, try blending frozen banana with a bit of milk and cocoa powder instead, but expect a thinner texture.
Q: Why did my chocolate milkshake turn out watery instead of thick and creamy?
A: This usually happens when there’s too much milk or the ice cream is too soft or low-fat. I once made the mistake of using skim milk and a light ice cream, and it was basically chocolate milk. Stick with whole milk and full-fat ice cream, and don’t rush the chilling step — that extra freezer time firms it up nicely.
Q: Can I make this milkshake ahead for a party or special occasion?
A: Yes, but I recommend blending it just before serving for the best texture. If you want to prep ahead, blend everything and pour into a container, then chill in the fridge. Give it a quick stir or re-blend before serving. For a party, making it fresh keeps it thick and creamy, especially if you’re serving it in classic diner-style glasses.
Q: Is there a gluten-free or dairy-free option for this chocolate milkshake?
A: The classic recipe is naturally gluten-free (just check your chocolate syrup label). For dairy-free, use coconut milk ice cream and almond or oat milk. The texture will be a bit lighter, but still tasty. My lactose-intolerant friend swears by this version for a rich treat without the dairy.
Q: Can I double or halve this recipe?
A: Absolutely. I double it often for family movie nights. Just blend in batches if your blender isn’t large enough. Halving works great too if you only want a small treat. Adjust chilling times accordingly — smaller batches chill faster.
Q: How do I get the perfect thickness every time?
A: The trick is balancing ice cream with milk and chilling before serving. If it’s too thin, add more ice cream and blend again; if too thick to blend, add a splash of milk. Don’t skip the chilling step — it’s what really sets this milkshake apart from the run-of-the-mill blends.
Q: Can I add mix-ins like cookies or candy to this milkshake?
A: Yes! I often blend in crushed Oreos or chocolate chips for extra texture. Just pulse them in after the main blending to keep some crunch. It’s a fun way to customize and make the shake feel even more special.
By the way, if you love creamy textures and easy recipes, you might enjoy my creamy classic hummus or the creamy baked crab dip — both simple, comforting, and crowd-pleasers in their own right.
Pin This Recipe!
Chocolate Milkshake Recipe Easy Thick Diner Style Creamy Rich
A thick, creamy chocolate milkshake recipe that tastes like a classic diner treat. Easy to make with simple ingredients and perfect for any occasion.
- Prep Time: 5 minutes
- Cook Time: 5-10 minutes
- Total Time: 15-20 minutes
- Yield: 3 servings 1x
- Category: Dessert
- Cuisine: American
Ingredients
- 3 cups (720 ml) full-fat vanilla ice cream
- 1 cup (240 ml) whole milk
- ½ cup (120 ml) chocolate syrup (e.g., Hershey’s)
- 1 teaspoon (5 ml) vanilla extract
- Optional: whipped cream for topping
Instructions
- Gather and chill ingredients: soften ice cream slightly but do not melt, measure milk and chocolate syrup.
- Add vanilla ice cream and whole milk to blender. Pulse a few times, then blend on medium-high until smooth but thick.
- Add chocolate syrup and vanilla extract. Blend until fully incorporated and color is rich chocolate brown.
- Taste and adjust thickness: add more ice cream if too thin and blend again; add a splash more milk if too thick to blend.
- Pour milkshake into glasses and chill in freezer for 5-10 minutes to firm up, or serve immediately if preferred.
- Optional: top with whipped cream and drizzle extra chocolate syrup before serving.
Notes
Use full-fat ice cream and whole milk for authentic thickness. Chill milkshake before serving for best creaminess. Measure chocolate syrup for balanced sweetness. Pulse ice cream first to avoid overheating blender. Adjust thickness by adding ice cream or milk as needed. Store leftovers in fridge up to 24 hours and re-blend before serving. Do not microwave leftovers.
Nutrition
- Serving Size: One generous glass (
- Calories: 420
- Sugar: 38
- Sodium: 110
- Fat: 22
- Saturated Fat: 14
- Carbohydrates: 45
- Fiber: 2
- Protein: 7
Keywords: chocolate milkshake, thick milkshake, diner style, creamy milkshake, easy chocolate shake, rich milkshake


