One rainy Wednesday afternoon, I found myself rummaging through my pantry, trying to come up with a dessert that would hit that sweet spot of nostalgia and simplicity. My kids were home from school, restless and craving something familiar but a little different than the usual cookies or brownies. That’s when I remembered my own lunchbox favorites — peanut butter and jelly sandwiches — and thought, why not turn that classic lunchbox treat into a dessert? After 15+ tests (and a few sticky kitchen mishaps), I finally cracked the perfect PB&J bars recipe easy enough for any home cook to whip up on a whim.
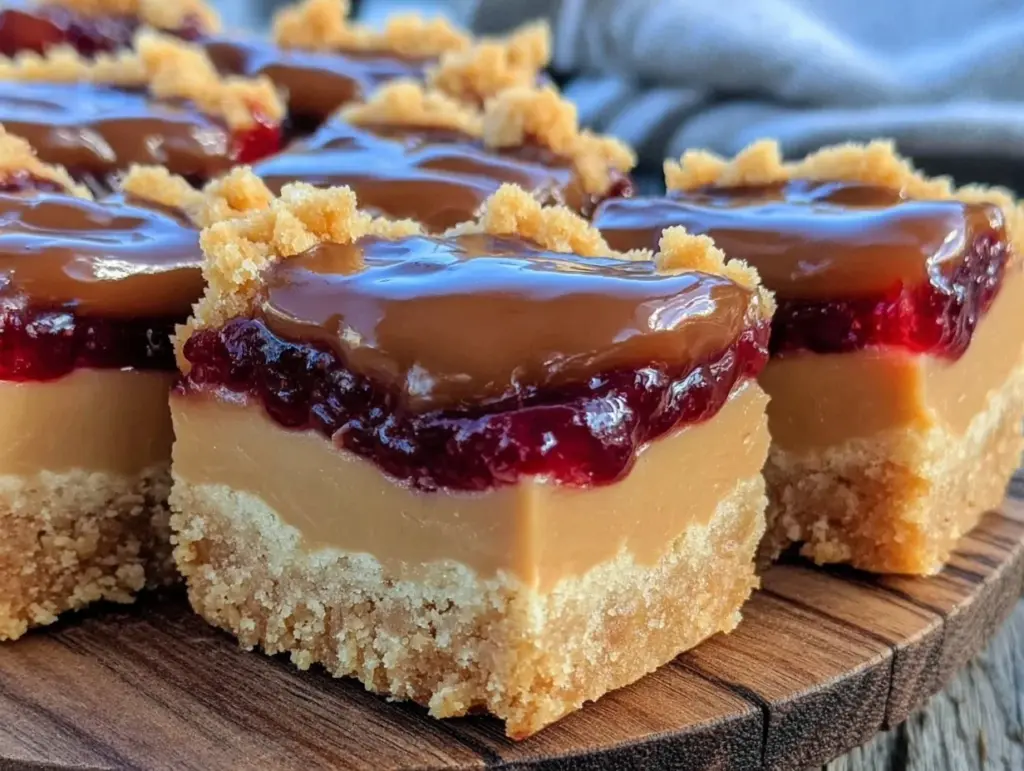
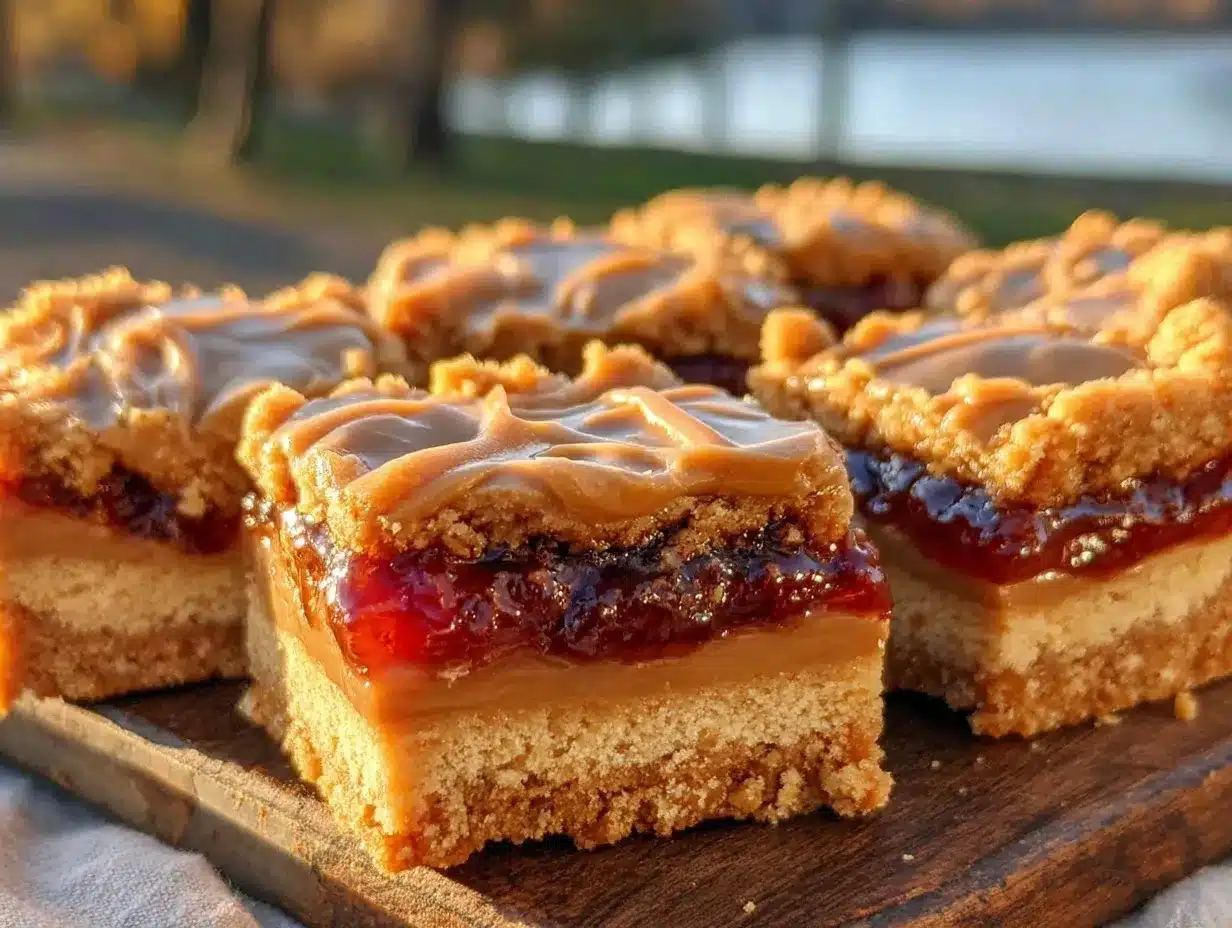
This classic lunchbox nostalgia dessert recipe brings back the best of childhood in every bite, with a buttery, crumbly base, a generous layer of sweet jelly, and a rich peanut butter topping that’s just the right balance of creamy and chewy. The best part? You don’t need any fancy ingredients or complicated steps — just pantry staples and about 40 minutes of your time. I love making these bars for busy weeknight dinners or casual weekend get-togethers because they’re quick, crowd-pleasing, and downright comforting.
If you’re wondering how to make PB&J bars for a crowd or just want a sweet snack that reminds you of simpler times, this recipe is the one to bookmark. Plus, I’ll share my favorite twists and troubleshooting tips so you get that perfect chewy-crisp texture every time.
Why You’ll Love This PB&J Bars Recipe for Classic Lunchbox Nostalgia
This recipe has completely changed the way I approach simple desserts with kids — and adults — in the house. Here’s why it’s a keeper:
- Foolproof and Fast — Seriously, if you can mix peanut butter and jelly, you can make these bars. No mixer required and no fancy baking skills. I’ve taught my son to make them on his own, and he nails it every time.
- Perfect for Any Occasion — These bars work just as well for a casual after-school snack, a potluck party, or even a nostalgic holiday dessert. I’ve served them alongside a batch of creamy deviled eggs at a family gathering, and they disappeared fast.
- Pantry-Friendly Ingredients — You likely have all the ingredients on hand: peanut butter, jelly, flour, sugar, and a few basics. That makes it easy to mix up a batch anytime the craving hits.
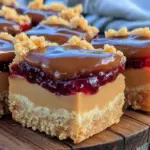
- Great Texture Contrast — The buttery shortbread base is crumbly but sturdy, while the jelly layer is sweet and sticky, topped with a chewy peanut butter crumble. It’s that texture combo that makes these bars addictive.
- Kid-Approved — My kids love the nostalgic flavors, and honestly, so do the adults. It’s the kind of dessert that sparks conversation and memories every time.
Whether you’re making these for a quick weeknight family dessert or a fun addition to your next potluck, these PB&J bars are a no-fail crowd-pleaser. They’re also a perfect homemade treat if you want to avoid the artificial stuff in store-bought snacks.
Ingredients You’ll Need for PB&J Bars
Here’s the scoop on the ingredients — I’m picky about a couple of them, and I’ll tell you why.
- All-purpose flour (2 cups / 250g) — The base of the shortbread crust. I use Gold Medal or King Arthur for consistent results.
- Granulated sugar (3/4 cup / 150g) — Adds sweetness to the dough. You can swap half for brown sugar if you want a deeper flavor, but granulated keeps the texture crisp.
- Peanut butter (1 cup / 250g, creamy) — Creamy peanut butter works best here for that smooth melt-in-your-mouth texture. Avoid natural peanut butter with oil separation — it makes the bars crumbly.
- Unsalted butter (1 cup / 2 sticks / 225g, softened) — The richness that makes the crust tender and the topping luscious. Don’t use margarine or salted butter.
- Vanilla extract (1 teaspoon / 5 ml) — Just a touch to round out the flavors.
- Strawberry or raspberry jelly (3/4 cup / 240 ml) — The classic pairing with peanut butter. Homemade or store-bought — just make sure it’s thick and not too runny, or the bars get soggy.
- Baking powder (1/2 teaspoon / 2g) — Helps the crust rise just enough to stay tender without getting cakey.
- Salt (1/4 teaspoon / 1.5g) — Enhances all the flavors, especially the peanut butter and jelly.
Quick tip: If you want to save time, many brands offer pre-softened butter sticks, which makes mixing faster. Also, I always keep a jar of my favorite creamy classic hummus on hand for savory snacks while these bars bake!
Equipment Needed
You don’t need anything fancy for this. Here’s what I actually use:
- 8×8-inch baking pan — I like glass because I can see the edges browning, but metal works too. Just grease it well or line with parchment paper for easy removal.
- Mixing bowls — One for dry ingredients, one for wet. No stand mixer needed; a sturdy spoon or spatula does the job.
- Measuring cups and spoons — Accurate measurements are key for the perfect crust.
- Spatula or wooden spoon — For mixing the dough and spreading the jelly evenly.
- Cooling rack (optional but useful) — Helps the bars cool quickly and evenly.
Optional but handy:
- Parchment paper — Makes cleanup a breeze and helps lift the bars out without breaking.
- Offset spatula — Great for spreading jelly smoothly without tearing the crust.
How to Make PB&J Bars for a Classic Lunchbox Nostalgia Dessert
Alright, let’s get into it. I’ll walk you through exactly how I make this, including the small tricks that actually make a difference.
- Prep your pan and ingredients (5 minutes)
Grease your 8×8-inch pan or line it with parchment paper. Measure out your dry ingredients (flour, baking powder, salt) and wet ingredients (butter, peanut butter, sugar, vanilla) before you start mixing. Having everything ready makes the process smooth and stress-free. - Mix the dry ingredients (2 minutes)
In a medium bowl, whisk together the flour, baking powder, and salt. This helps distribute the leavening evenly and prevents clumps in your crust. - Cream butter, peanut butter, and sugar (3-4 minutes)
In a large bowl, use a sturdy spoon or electric mixer on low speed to beat the softened butter, peanut butter, and sugar until smooth and creamy. You want a light, fluffy texture here—the sugar should be mostly dissolved. This step is key to a tender crust that’s not dense. - Add vanilla and combine with dry ingredients (2 minutes)
Stir in the vanilla extract. Then gradually add the dry ingredients to the wet, folding gently but thoroughly. The dough will be thick and slightly sticky — perfect. - Press two-thirds of the dough into the pan (3 minutes)
Using your hands or a spatula, press about two-thirds of the dough evenly into the bottom of your prepared pan. Don’t press too hard — you want it firm but not compacted. The crust should look even and smooth. This base is the foundation of your bars, so take your time. - Spread the jelly layer (2 minutes)
Dollop the jelly over the crust and spread gently with a spatula or back of a spoon. Try to keep it an even layer without mixing into the dough. If your jelly is too runny, pop it in the fridge for 10 minutes before spreading. - Crumble the remaining dough on top (3 minutes)
Break the remaining dough into small chunks and sprinkle evenly over the jelly layer. Don’t press down; you want a crumbly, rustic top that bakes crisp and golden. - Bake (30-35 minutes)
Place the pan in a preheated 350°F (175°C) oven. Bake until the top is golden brown and the edges pull slightly away from the pan. You’ll smell that warm peanut butter and jelly aroma filling your kitchen — that’s your cue that it’s ready. - Cool completely before slicing (30 minutes)
This is essential. The jelly sets as the bars cool, and the crust firms up. Trying to cut them warm will make a sticky mess. I usually let them cool on a wire rack.
Total time: about 1 hour, including cooling. Active hands-on time is less than 20 minutes.
Expert Tips & Tricks for Perfect PB&J Bars
Here’s everything I’ve figured out from making this recipe dozens of times. These tips will save you from the mistakes I already made.
- Don’t Skip the Cooling Step — This is the hardest part for impatient snackers, but seriously, wait. The jelly needs time to firm up so the bars cut cleanly instead of oozing everywhere.
- Use Thick Jelly or Jam — Runny jelly is the #1 reason these bars turn out soggy or too soft. If you only have runny jelly, chill it before spreading or use less.
- Press, Don’t Pack — When pressing the crust into the pan, be gentle. Overpacking leads to a dense, tough base instead of a tender crumb.
- Peanut Butter Matters — Go for creamy peanut butter without oil separation. Natural peanut butters with separated oil make the dough greasy and crumbly.
- Storage Makes a Difference — Store bars in an airtight container at room temperature for up to 3 days or refrigerate for up to a week. They get chewier as they sit, which I actually love.
If you want to get fancy, these bars pair wonderfully with a cup of tea or alongside the light and fresh flavors of a Italian marinated olives at a casual gathering.
Variations & Substitutions for PB&J Bars
Once you’ve got the base version down, here’s how I mix it up. I’ve actually tried all of these.
- Nut-Free Version — Swap peanut butter for sunflower seed butter and use a fruit jam free from cross-contamination. Great for school lunches where allergies are a concern.
- Mixed Berry Jam — Instead of classic strawberry or raspberry, try blackberry or blueberry jam for a tangy twist. My daughter’s favorite for weekend treats.
- Chunky Peanut Butter — Love a little crunch? Use chunky peanut butter in the topping for extra texture contrast. Be sure to mix it well with the butter in the dough.
- Vegan Version — Use coconut oil or vegan butter substitute and your favorite vegan peanut butter. Swap sugar for coconut sugar or maple syrup and use jelly without gelatin.
- Gluten-Free — Use a 1:1 gluten-free baking flour blend. The texture changes slightly but still delicious. I keep a gluten-free batch in the fridge for guests.
These bars are perfect for family potlucks and casual get-togethers, bringing a nostalgic vibe that’s both playful and comforting.
Serving & Storage Tips
I usually serve these PB&J bars straight from the pan — rustic and homey, just like the dessert itself. They hold up well on a platter and travel nicely for picnics or school snacks.
Here are a few side suggestions that pair nicely:
- Cold milk or a creamy iced coffee for a classic lunchbox feel.
- A fresh fruit salad to balance the sweetness.
- Simple cheese plate or savory bites like brie cherry pastry cups for a fun sweet-savory combo at parties.
Storage:
- Fridge: Airtight container, up to 5 days. Bars firm up and get chewier.
- Room temperature: Covered, up to 3 days. Best within the first two.
- Freezing: Not recommended. The jelly and crust texture suffer when thawed.
Reheating: If you want a warm bar, microwave for 10-15 seconds. I prefer them at room temperature or chilled to keep that chewy texture.
Nutrition Information
I’m not a nutritionist, but here’s the breakdown if you’re keeping track. Nutritional values are approximate per serving based on 16 bars from this recipe.
| Calories | Protein | Carbs | Fiber | Sugar | Fat | Saturated Fat | Sodium |
|---|---|---|---|---|---|---|---|
| 220 | 5g | 25g | 2g | 14g | 12g | 4g | 90mg |
Look — this is comfort food made with peanut butter and jelly. It’s not a diet recipe and I’m not going to pretend it is. But it’s way better than store-bought sugary snacks, and I love knowing exactly what’s inside. When I want something lighter, I make a smaller batch or swap in natural peanut butter and less sugar. Most days though? I go all in and enjoy every nostalgic bite.
Final Thoughts
That rainy Wednesday afternoon turned into a tiny tradition in our house. Now, whenever the weather’s gray or the kids need a pick-me-up, I pull out this PB&J bars recipe for a quick dose of nostalgia and homemade comfort. It’s easy, forgiving, and totally customizable — more jelly, less sugar, chunky peanut butter — make it yours.
If you make these bars, drop a comment and tell me how it went. And if something goes sideways, tell me that too — I genuinely want to help troubleshoot. That’s what the comments are for.
Happy cooking — I hope your kitchen smells amazing and your family loves these as much as mine does.
Frequently Asked Questions
Q: Can I make PB&J bars without peanut butter?
A: Yes, you can swap peanut butter for sunflower seed butter or almond butter. I’ve tried sunflower seed butter for nut-free needs, and it works well, though the flavor changes slightly. Just use creamy versions for the best texture.
Q: Why did my PB&J bars turn out soggy or too soft?
A: This usually happens if the jelly is too runny or you spread too thick a layer. I recommend using thick jam or jelly and chilling it before spreading if it’s runny. Also, don’t press the topping dough down too hard, or the jelly can mix into the base and get soggy.
Q: Can I make PB&J bars ahead for a potluck or party?
A: Absolutely! These bars hold up well at room temperature for several hours, making them perfect for potlucks or casual gatherings. I’ve brought them alongside creamy baked crab dip and they were a hit. Just store them in an airtight container and slice right before serving.
Q: Are PB&J bars gluten-free or dairy-free?
A: Not in the basic recipe — it contains all-purpose flour and butter. But you can make gluten-free bars using a 1:1 gluten-free flour blend and swap butter for vegan butter or coconut oil to make them dairy-free. I’ve tested both versions and they’re tasty, though the texture changes slightly.
Q: Can I double or halve this recipe?
A: Yes, doubling works great if you want a bigger batch. Use a 9×13-inch pan for double the recipe. Halving is fine too, just use a smaller pan (around 8×4-inch) and adjust baking time slightly — start checking at 25 minutes.
Q: Can I make PB&J bars without baking?
A: Not really. The crust needs to bake to get that crumbly texture and to hold the jelly layer properly. I’ve tried no-bake versions using crushed cookies, but the texture and flavor don’t compare. Baking is worth the wait.
Q: Can I use other jams or preserves in this recipe?
A: Definitely! I love switching out strawberry for raspberry, blackberry, or even apricot jam. Just make sure your jam isn’t too runny, or chill it first to prevent sogginess. Each jam gives the bars a slightly different twist on the classic flavor.
Pin This Recipe!
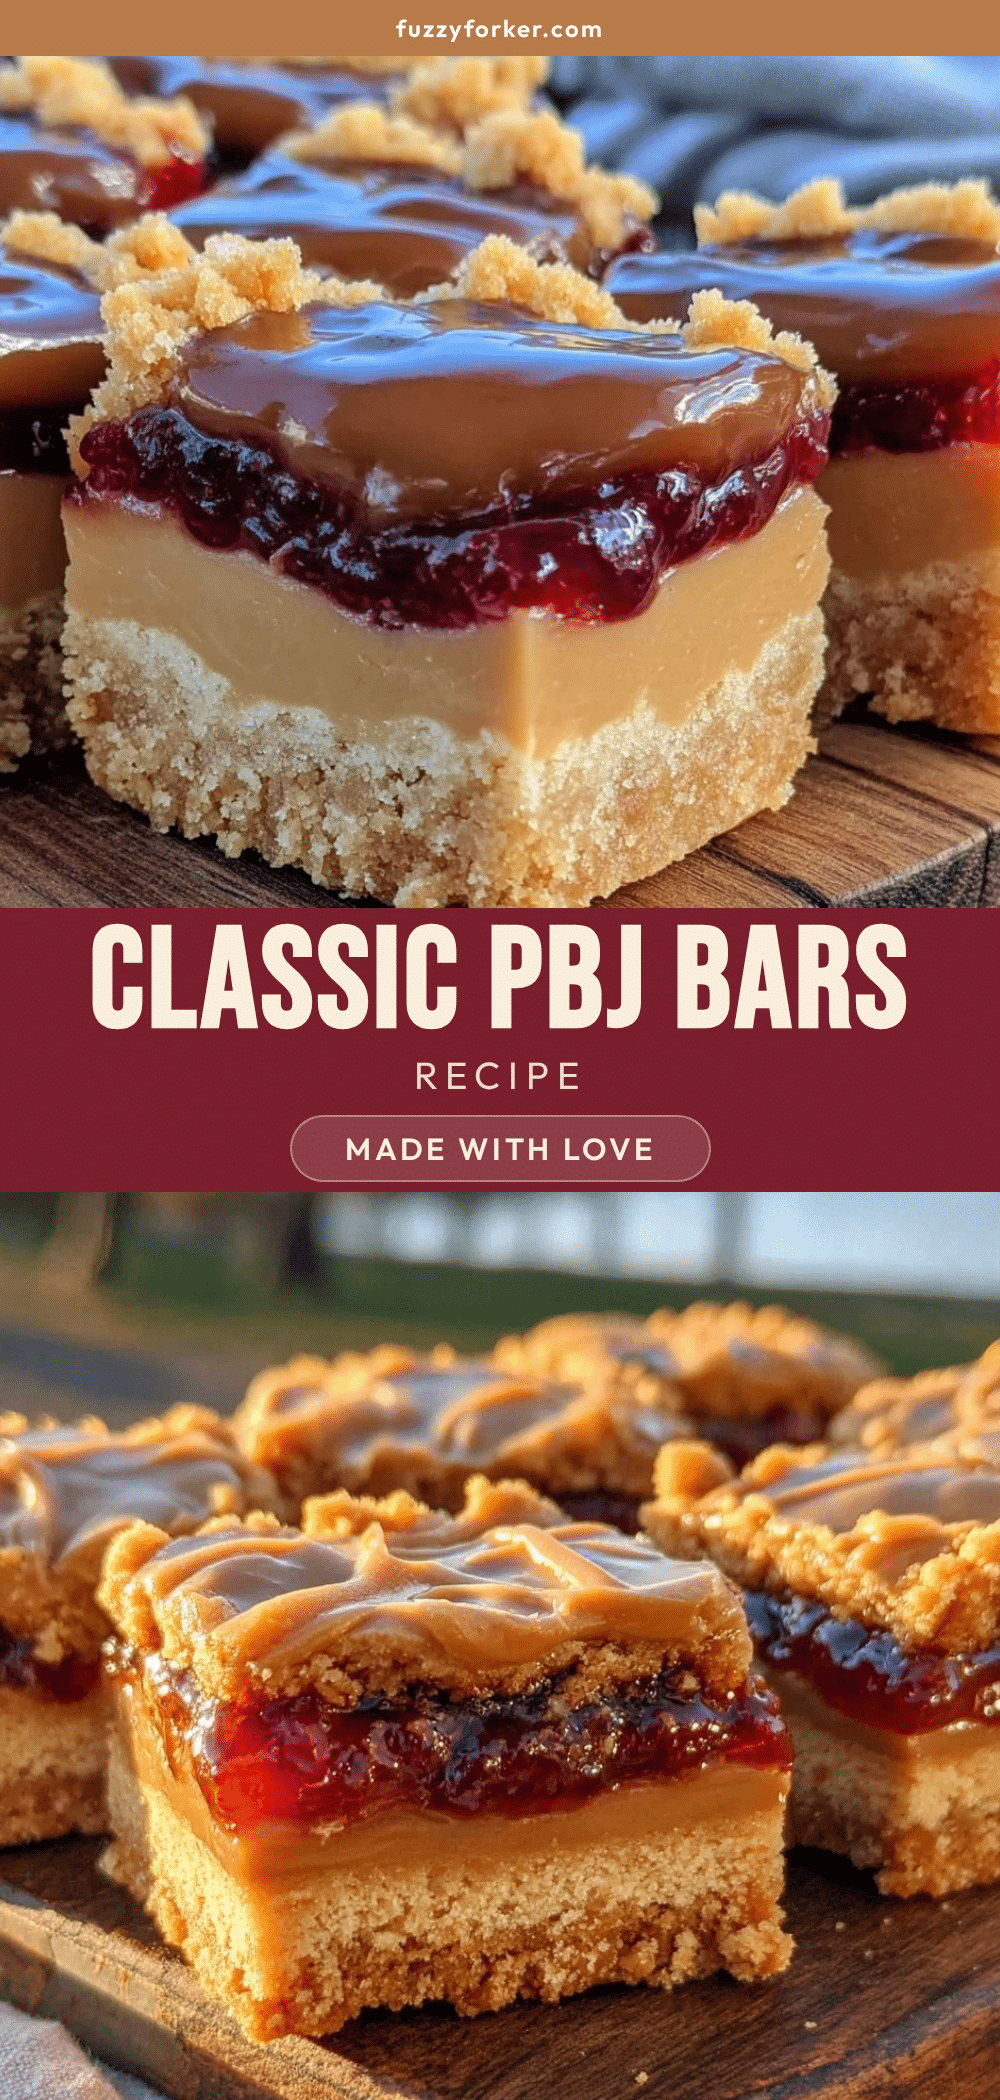
PB&J Bars Recipe Easy Homemade Classic Lunchbox Dessert Idea
A nostalgic and simple dessert inspired by peanut butter and jelly sandwiches, featuring a buttery shortbread base, a sweet jelly layer, and a creamy peanut butter topping. Perfect for quick, crowd-pleasing treats.
- Prep Time: 15 minutes
- Cook Time: 30-35 minutes
- Total Time: 1 hour
- Yield: 16 bars 1x
- Category: Dessert
- Cuisine: American
Ingredients
- 2 cups all-purpose flour (250g)
- 3/4 cup granulated sugar (150g)
- 1 cup creamy peanut butter (250g)
- 1 cup unsalted butter, softened (2 sticks / 225g)
- 1 teaspoon vanilla extract (5 ml)
- 3/4 cup strawberry or raspberry jelly (240 ml)
- 1/2 teaspoon baking powder (2g)
- 1/4 teaspoon salt (1.5g)
Instructions
- Grease an 8×8-inch baking pan or line it with parchment paper. Measure out dry ingredients (flour, baking powder, salt) and wet ingredients (butter, peanut butter, sugar, vanilla).
- In a medium bowl, whisk together flour, baking powder, and salt to distribute leavening evenly.
- In a large bowl, beat softened butter, peanut butter, and sugar with a sturdy spoon or electric mixer on low speed until smooth and creamy.
- Stir in vanilla extract, then gradually fold in dry ingredients until dough is thick and slightly sticky.
- Press about two-thirds of the dough evenly into the bottom of the prepared pan, firm but not compacted.
- Spread jelly evenly over the crust layer, keeping it an even layer without mixing into the dough.
- Crumble the remaining dough into small chunks and sprinkle evenly over the jelly layer without pressing down.
- Bake in a preheated 350°F (175°C) oven for 30-35 minutes until top is golden brown and edges pull slightly away from the pan.
- Cool completely on a wire rack for about 30 minutes before slicing to allow jelly to set and crust to firm.
Notes
Use thick jelly or jam to prevent sogginess. Cool bars completely before slicing for clean cuts. Use creamy peanut butter without oil separation for best texture. Store in airtight container at room temperature up to 3 days or refrigerated up to 5 days. Not recommended to freeze.
Nutrition
- Serving Size: 1 bar (assuming 16 b
- Calories: 220
- Sugar: 14
- Sodium: 90
- Fat: 12
- Saturated Fat: 4
- Carbohydrates: 25
- Fiber: 2
- Protein: 5
Keywords: PB&J bars, peanut butter and jelly dessert, lunchbox dessert, easy homemade bars, nostalgic dessert, peanut butter bars, jelly bars