Last Fourth of July, I was scrambling to pull together a picnic spread after realizing we were short on sides. The grill was fired up, the burgers were almost ready, but something was missing. That’s when I remembered a family recipe for classic deviled eggs that my mom used to make every summer. I whipped up a batch with what I had in the fridge, and by the time we sat down on the blanket, those creamy, tangy bites had vanished faster than the watermelon. Since then, this classic deviled eggs recipe for picnic occasions has become my secret weapon for easy, crowd-pleasing treats that everyone asks for again and again.
I’ve tested this recipe over 15 times now, tweaking it to get the perfect balance of creamy and flavorful without any fuss. What I love about making classic deviled eggs for picnic gatherings is how simple they are to prep ahead and how well they travel. No fancy ingredients, just the basics done right — and a little pinch of paprika on top for that unmistakable pop. If you’re hunting for an easy, creamy, crowd-pleasing picnic treat that’s always a hit, this is it.
Here’s the thing — you don’t need to be a kitchen pro to nail this recipe. Whether it’s a last-minute potluck or your annual family BBQ, these deviled eggs will make you look like you planned the whole thing weeks in advance.
Why You’ll Love This Classic Deviled Eggs Recipe for Picnic Treats
This recipe has completely changed how I handle picnic side dishes. I’ve served it at everything from neighborhood block parties to casual Sunday family lunches, and it never disappoints.
- Easy to Make Ahead — You can boil the eggs the day before, and the filling comes together in minutes. I usually make a double batch to save time when prepping for a crowd.
- Creamy, Not Dry — Unlike some deviled eggs that end up chalky or crumbly, this one stays silky and smooth thanks to a bit of mayo and just the right amount of mustard. I’ve tried versions with sour cream and cream cheese too, but this classic combo wins every time.
- Perfect for Picnics — They travel well in a container with a lid, and the flavors actually deepen after a few hours in the fridge. No soggy mess, just a simple, fresh bite every time.
- Feeds a Crowd — Whether you’re making these for a family reunion or a neighborhood potluck, they disappear fast. I’ve brought these alongside dishes like the creamy deviled eggs with fresh herbs and the contrast is always a hit.
- Budget-Friendly — Eggs, mayo, mustard, and a few pantry staples. That’s it. No need for expensive or obscure ingredients.
This is my go-to recipe for busy summer weekends and picnic occasions when I want something that’s easy to prep and easy to love. It’s all about simple ingredients coming together to make a creamy, crowd-pleasing treat.
Ingredients for Classic Deviled Eggs
Here’s the best part: you probably have most of this already. I’m particular about three ingredients here. I’ll tell you exactly why.
- Large eggs (12) — Fresh eggs are important for easy peeling. I use eggs that are at least a week old because super fresh eggs can be a nightmare to peel once boiled.
- Mayonnaise (½ cup / 120ml) — Use a good-quality mayo like Hellmann’s or Duke’s. It makes the filling creamy and smooth without overpowering the flavor.
- Dijon mustard (2 teaspoons) — Adds just enough tang and depth. I’ve tried yellow mustard but it’s too mild, and spicy brown can be too much for picky eaters.
- White vinegar (1 teaspoon) — This brightens the filling and helps balance the richness. Apple cider vinegar works too, but I prefer white for its clean taste.
- Salt (½ teaspoon) — Don’t skimp here. Salt brings out all the flavors and keeps the filling from tasting flat.
- Black pepper (¼ teaspoon, freshly ground) — Adds a subtle kick without being overpowering.
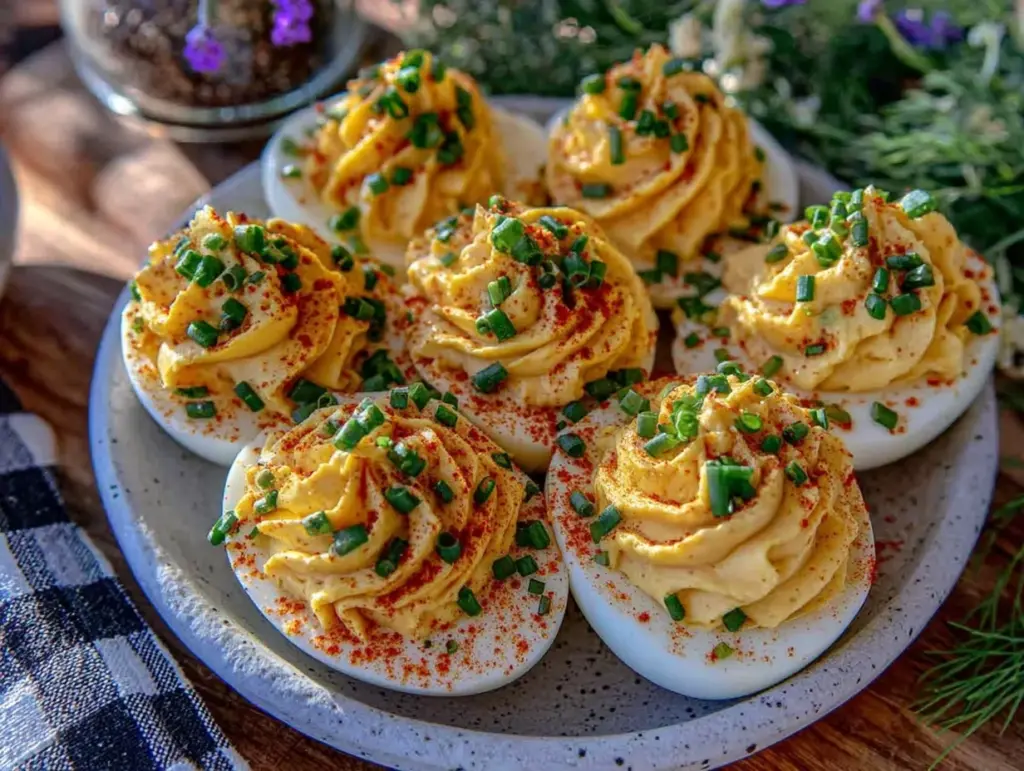
- Paprika (for garnish) — Smoked or sweet paprika both work. I like smoked for a little extra warmth, but sweet is classic and colorful.
Equipment Needed
You don’t need anything fancy for this. Here’s what I actually use.
- Large pot — For boiling the eggs. I use a 6-quart pot that fits a dozen eggs comfortably without overcrowding.
- Bowl of ice water — Essential for shocking the eggs and making peeling easier.
- Mixing bowl — To mash the yolks and mix the filling. I like a medium-sized glass or ceramic bowl.
- Spoon or fork — For mashing. I prefer a fork because it gives a little texture instead of pure paste.
- Piping bag or plastic sandwich bag (optional) — For filling the egg whites neatly. I usually cut a small corner off a sandwich bag and pipe the filling for a nice presentation.
How to Make Classic Deviled Eggs for Picnic Treats: Step by Step

Alright, let’s get into it. I’ll walk you through exactly how I make this, including the small tricks that actually make a difference.
- Step 1: Boil the Eggs (10-12 minutes)
Place the eggs in a single layer in a large pot and cover with cold water by about an inch. Bring to a rolling boil over medium-high heat. As soon as the water boils, turn off the heat, cover the pot, and let the eggs sit for 10-12 minutes. This gentle cooking prevents rubbery whites and overcooked yolks. - Step 2: Shock the Eggs (5 minutes)
Drain the hot water and immediately transfer the eggs to a bowl of ice water. Let them cool completely, about 5 minutes. This stops the cooking and makes peeling way easier — eggshells slide right off without stubborn bits. - Step 3: Peel and Halve the Eggs (5 minutes)
Gently tap each egg on the counter, then peel under running water to rinse off any tiny shell pieces. Slice each egg in half lengthwise. The whites should be firm but tender, not rubbery or cracked. - Step 4: Prepare the Filling (5 minutes)
Scoop the yolks into a bowl and mash them with a fork until mostly smooth but with a little texture. Add mayonnaise, Dijon mustard, white vinegar, salt, and black pepper. Mix until creamy and well combined. Taste and tweak salt or mustard if needed — the filling should be tangy, creamy, and a bit bright. - Step 5: Fill the Egg Whites (5-7 minutes)
Spoon or pipe the yolk mixture back into the egg white cavities. If you want a fancy look, use a piping bag with a star tip or a plastic bag with a small corner snipped. The filling should look smooth and glossy, not dry or crumbly. - Step 6: Garnish and Chill (at least 30 minutes)
Sprinkle paprika over the tops for color and a subtle smoky flavor. Cover and refrigerate for at least 30 minutes before serving. This lets the flavors meld and the filling firm up slightly.
Total time: about 45 minutes, mostly hands-off once the eggs are boiling.
Expert Tips & Tricks for Perfect Classic Deviled Eggs
Here’s everything I’ve figured out from making this recipe dozens of times. These tips will save you from the mistakes I already made.
- Use Older Eggs for Easy Peeling
Fresh eggs are great for eating raw, but not for boiling. I always buy my eggs a week ahead so they peel without a fight. - Don’t Overmix the Filling
Overmixing can make the yolks pasty and dry. Aim for creamy with a little texture — that makes the filling taste homemade and not like baby food. - Remove from Heat Immediately After Boiling
Letting the eggs sit covered off heat prevents that green ring around the yolk and keeps the yolks tender. - Chill Before Serving
I’ve tried serving deviled eggs right after filling, but chilling them helps the flavors meld and the filling firm up, making them easier to eat at picnics or parties. - Save the Recipe for Parties
These are crowd-pleasers not just at picnics but also at holiday gatherings. They pair beautifully with dishes like the creamy baked crab dip for an elevated appetizer spread.
Mistake: Filling too dry or crumbly? Add a teaspoon of mayo at a time until smooth but still firm.
Mistake: Eggs hard to peel? Try peeling under running water and make sure to use older eggs.
Mistake: Filling too bland? Don’t forget the vinegar and salt — they brighten and balance the richness.
Variations & Substitutions for Classic Deviled Eggs for Picnic Occasions
Once you’ve got the base version down, here’s how I mix it up. I’ve actually tried all of these.
- Herb-Infused Deviled Eggs
Add finely chopped fresh chives, dill, or parsley to the filling. This version is perfect for summer potlucks and pairs well with fresh salads. - Spicy Sriracha Deviled Eggs
Mix in 1 teaspoon of Sriracha or your favorite hot sauce. Great for casual gatherings where people like a little heat. - Avocado Deviled Eggs
Replace half the mayo with mashed avocado for a creamier, lighter filling. This twist works well for health-conscious picnics. - Classic Deviled Eggs with Bacon
Fold in crispy cooked bacon bits for a smoky crunch. These are always the first to go at family get-togethers. - Gluten-Free
Naturally gluten-free — just double-check your mayo and mustard labels for hidden gluten. - Dairy-Free
This recipe is naturally dairy-free, making it easy for guests with lactose intolerance.
Serving & Storage for Classic Deviled Eggs
I usually serve these straight from the chilled platter — the classic presentation never goes out of style. For picnics, I pack them in a container with a snug lid and a little paper towel underneath to prevent sliding.
Here are a few favorite sides that go perfectly:
- Crunchy garlic bread — obviously, never skip this.
- A simple green salad with balsamic vinaigrette — bright and fresh.
- Roasted asparagus or green beans — my go-to when I want to add some veggies.
Storage:
- Fridge: Store in an airtight container for up to 3 days. The filling firms up and flavors intensify — totally normal.
- Reheating: These are best served cold or at room temperature. Reheating is not recommended as the texture changes.
- Freezing: Don’t freeze deviled eggs. The texture of both whites and filling will suffer.
Nutrition Information
I’m not a nutritionist, but here’s the breakdown if you’re keeping track. Per serving (based on 12 deviled eggs or 6 servings):
| Calories | Protein | Carbs | Fiber | Sugar | Fat | Saturated Fat | Sodium |
|---|---|---|---|---|---|---|---|
| 140 | 9g | 1g | 0g | 1g | 11g | 3g | 230mg |
Look — this is classic comfort food made with eggs and mayo. It’s not a diet recipe and I’m not going to pretend it is. But it’s way better than most picnic sides you grab pre-packaged, it costs less, and I know exactly what’s in it. When I want something lighter, I add avocado or cut back on mayo. Most days though? I make the real thing and enjoy every creamy, tangy bite.
Final Thoughts
Remember that Fourth of July picnic when I was scrambling last minute? That batch of classic deviled eggs saved the day, and every time I make them now, it brings back that easy, laid-back summer vibe. Make it yours. More mustard or a little extra paprika is always the right call in my opinion. Throw in fresh herbs or swap mayo for avocado if you want to mix things up. The base is forgiving and welcoming.
If you make this, drop a comment and tell me how it went. And if something goes wrong, tell me that too — I genuinely want to help troubleshoot. That’s what the comments are for.
Happy cooking — I hope your kitchen smells amazing.
Frequently Asked Questions
Q: Can I make this classic deviled eggs recipe for picnic treats ahead of time?
A: Yes, definitely! I usually boil and peel the eggs a day before, mix the filling the morning of, and assemble a few hours before the picnic. Chilling them lets the flavors meld and makes transport easier. Just keep them in a well-sealed container in the fridge until ready to serve.
Q: Why did my deviled eggs filling turn out watery or grainy?
A: Watery filling usually means too much mayo or vinegar was added at once. Mix slowly and adjust gradually. Grainy texture can happen if you overmix the yolks or use pre-grated ingredients in some variations. Using a fork to mash yolks gently keeps the filling smooth but not pasty.
Q: Can I make this recipe classic deviled eggs easy creamy crowd-pleasing picnic treats without mayonnaise?
A: You can, but the texture and flavor will change. I’ve experimented with Greek yogurt or avocado as mayo substitutes. Greek yogurt adds tang but can be thinner, so add a bit more yolk for creaminess. Avocado gives a creamy, green twist that’s great for health-conscious eaters. Just remember, it won’t taste like the classic.
Q: Is this recipe gluten-free or dairy-free?
A: Yes! Classic deviled eggs are naturally gluten-free and dairy-free, as long as your mayo and mustard don’t have hidden ingredients. I always check labels to be safe, especially for store-bought condiments.
Q: Can I double or halve this classic deviled eggs recipe for picnic treats?
A: Absolutely. The recipe scales well both ways. Just keep in mind that mixing the filling is easiest in batches if you’re making a large quantity, so the texture stays perfect.
Q: What’s the best way to peel eggs for deviled eggs?
A: The trick I swear by is to use eggs that are at least a week old, boil them gently, then shock them in ice water immediately. Peel under running water to help slide off stubborn bits. I’ve learned this the hard way after peeling dozens of eggs stuck to their shells!
Q: Can I make this deviled eggs recipe for picnic treats for a crowd?
A: Yes, this is one of the best crowd-pleasers for picnics and parties. It’s easy to multiply, travels well, and is usually the first dish to disappear. For larger groups, I also like pairing it with other simple appetizers like the Italian marinated olives to round out the spread.
Pin This Recipe!
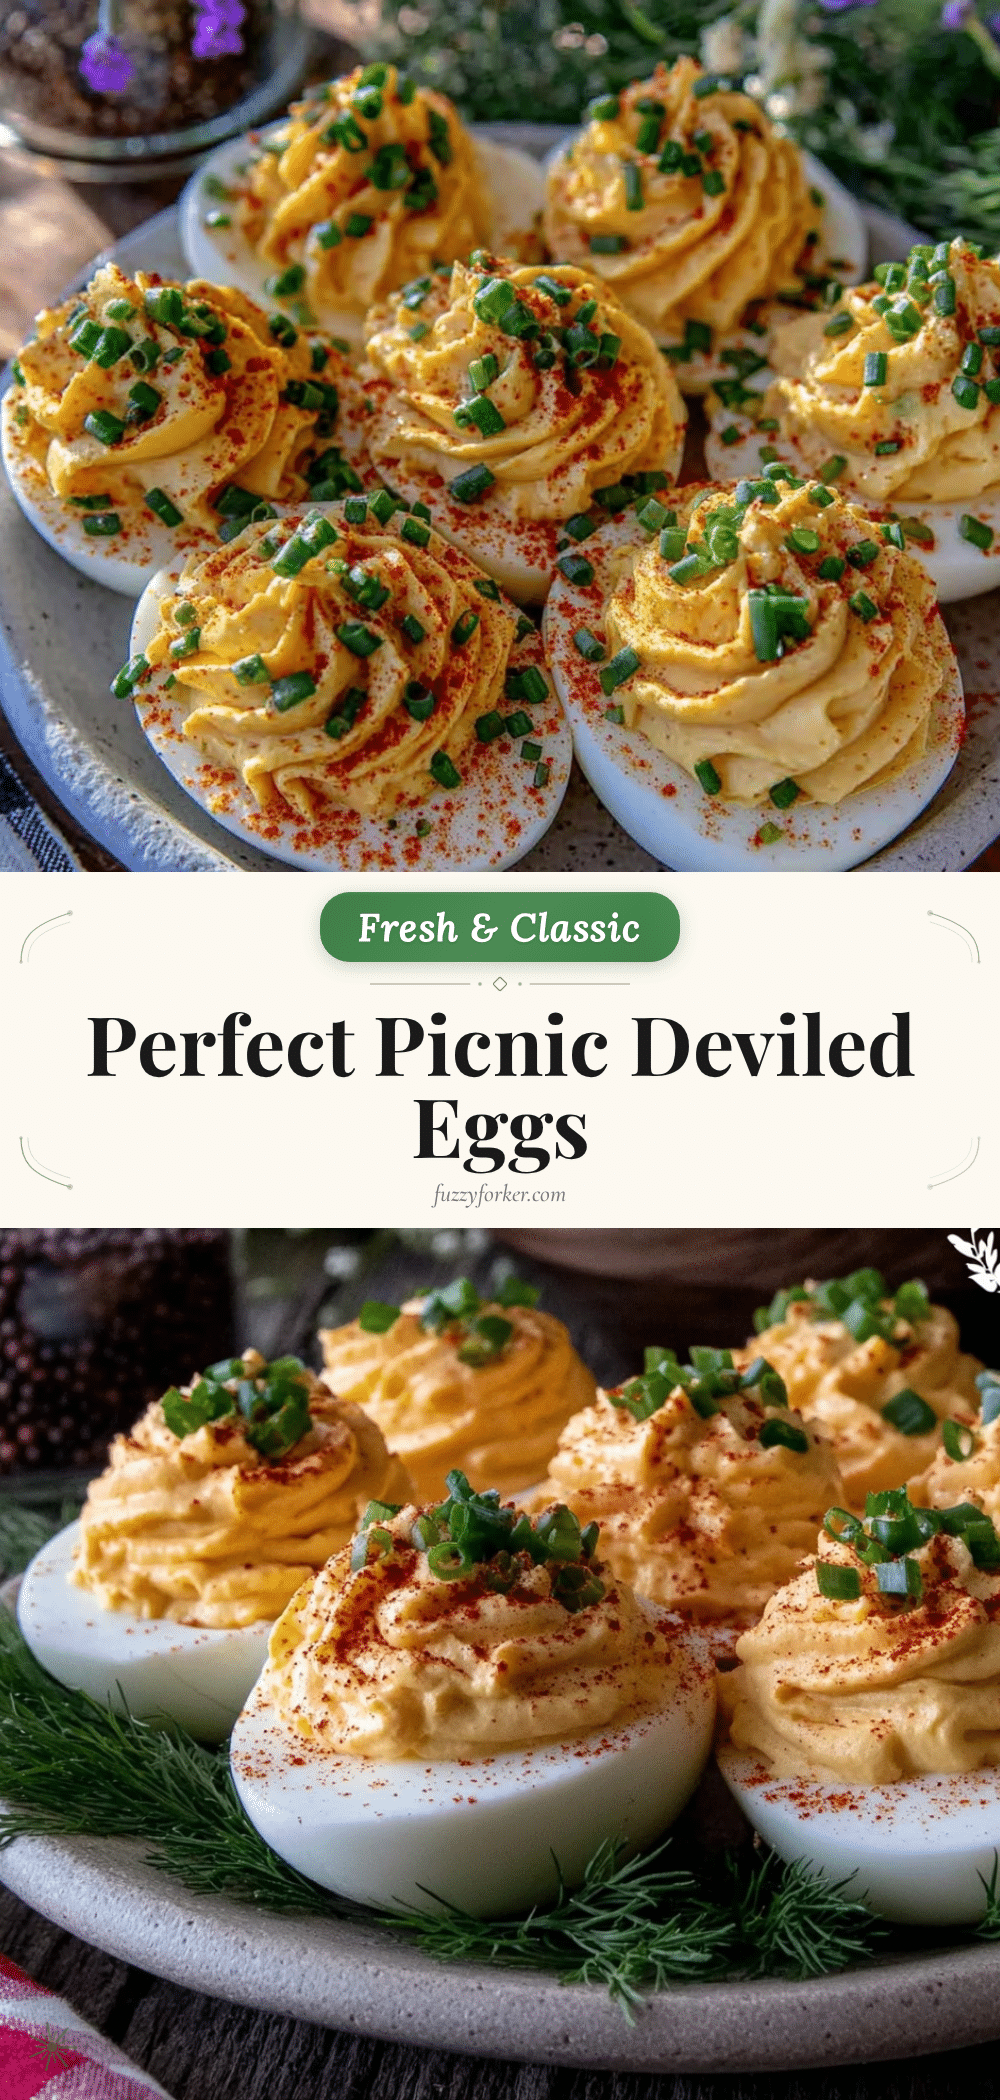
Classic Deviled Eggs Recipe Easy Creamy Crowd-Pleasing Picnic Treats

A simple, creamy, and tangy classic deviled eggs recipe perfect for picnics and crowd-pleasing occasions. Easy to prep ahead and travels well.
- Prep Time: 15 minutes
- Cook Time: 12 minutes
- Total Time: 45 minutes
- Yield: 12 deviled eggs (6 servings) 1x
- Category: Appetizer
- Cuisine: American
Ingredients
- 12 large eggs
- ½ cup (120 ml) mayonnaise
- 2 teaspoons Dijon mustard
- 1 teaspoon white vinegar
- ½ teaspoon salt
- ¼ teaspoon freshly ground black pepper
- Paprika for garnish (smoked or sweet)
Instructions
- Place the eggs in a single layer in a large pot and cover with cold water by about an inch. Bring to a rolling boil over medium-high heat. As soon as the water boils, turn off the heat, cover the pot, and let the eggs sit for 10-12 minutes.
- Drain the hot water and immediately transfer the eggs to a bowl of ice water. Let them cool completely, about 5 minutes.
- Gently tap each egg on the counter, then peel under running water to rinse off any tiny shell pieces. Slice each egg in half lengthwise.
- Scoop the yolks into a bowl and mash them with a fork until mostly smooth but with a little texture. Add mayonnaise, Dijon mustard, white vinegar, salt, and black pepper. Mix until creamy and well combined. Taste and adjust salt or mustard if needed.
- Spoon or pipe the yolk mixture back into the egg white cavities. Use a piping bag or plastic sandwich bag with a small corner snipped for a neat presentation if desired.
- Sprinkle paprika over the tops for color and a subtle smoky flavor. Cover and refrigerate for at least 30 minutes before serving.
Notes
Use eggs that are at least a week old for easier peeling. Do not overmix the filling to avoid a pasty texture. Chill deviled eggs for at least 30 minutes before serving to let flavors meld and filling firm up. Store in an airtight container in the fridge for up to 3 days. Do not freeze. Reheating is not recommended.
Nutrition
- Serving Size: 2 deviled eggs
- Calories: 140
- Sugar: 1
- Sodium: 230
- Fat: 11
- Saturated Fat: 3
- Carbohydrates: 1
- Protein: 9
Keywords: deviled eggs, classic deviled eggs, picnic treats, creamy deviled eggs, easy appetizer, crowd-pleaser, party food


