It was a Sunday afternoon in early summer, and the sun poured through the kitchen window just like it always did when Grandma baked her famous cherry pie. I remember sitting on the counter, watching her hands expertly weave the lattice crust, the smell of sweet cherries mingling with cinnamon filling the air. That pie was more than dessert—it was a ritual, a moment of calm and warmth in a busy week. Years later, when I tried making cherry pie homemade lattice style, I realized it wasn’t about complicated steps or fancy ingredients. It was about the simple, classic method Grandma taught me, perfected over decades. After testing this cherry pie homemade lattice recipe 15+ times, I finally cracked the code for that flaky crust and perfectly balanced cherry filling every time. If you’ve ever wanted to make a grandma style classic dessert that feels like a hug in pie form, this is it.
Here’s the thing about this cherry pie homemade lattice for a classic dessert: it’s approachable, even if you’re not a baker. That lattice crust? It looks fancy but is surprisingly easy once you know the trick. Plus, the filling is just the right mix of tart and sweet, with fresh or frozen cherries that cook down to juicy perfection. This recipe fits beautifully into any weekend family meal or holiday dessert spread—and yes, it’s worth the little extra time it takes to make the lattice. I’ve made it for Sunday dinners, holiday gatherings, and even casual potlucks, and it’s always a hit.
Why You’ll Love This Cherry Pie Homemade Lattice Recipe
This cherry pie homemade lattice recipe changed how I think about classic desserts. I’ve served this pie to picky eaters, dessert aficionados, and kids who usually prefer cookies, and everyone asks for a slice (or two).
- Timeless Comfort — This isn’t just any cherry pie. It’s that grandma style classic dessert that brings back memories and makes new ones. The flaky crust and warm cherry filling feel like home in every bite.
- Simple Ingredients, Big Flavor — Most of what you need is probably sitting in your pantry or fridge right now. No weird extras or specialty items required. I’m picky about using fresh cherries when I can, but frozen works just fine when out of season.
- Showstopper Presentation — The homemade lattice crust is easier than you think, and it makes the pie look like you spent all day on it. I promise, your family and guests will be impressed.
- Perfect for Family and Holiday Gatherings — Whether it’s a cozy weeknight family dinner or a festive holiday dessert, this pie fits the occasion. I’ve brought it as a potluck contribution multiple times, and it disappears fast.
- Keeps Well and Tastes Better the Next Day — I often bake this pie the night before an event. The flavors deepen overnight, and reheating it just right brings back that fresh-baked magic.
If you want a dessert that feels like a warm hug from Grandma, this cherry pie homemade lattice recipe is your new go-to. It’s straightforward, comforting, and full of real, honest flavor.
Ingredients for Cherry Pie Homemade Lattice: What You’ll Need
Here’s the best part: you probably have most of these ingredients already. I’m picky about three things here, and I’ll tell you why as we go.
- Fresh or Frozen Cherries (about 5 cups / 700g, pitted) — Fresh is best when in season, but frozen cherries work well too. Just thaw and drain excess juice to avoid a watery filling.
- Sugar (1 to 1 ¼ cups / 200–250g) — Adjust based on your cherries’ tartness. I use granulated sugar, but you can swap part for brown sugar for a deeper flavor.
- Cornstarch (3 tablespoons / 24g) — This thickens the filling perfectly without cloudiness. Tapioca starch works if you want a glossy finish.
- Lemon Juice (1 tablespoon / 15ml) — Brightens and balances the sweetness. Fresh is always best, but bottled is fine.
- Cinnamon (½ teaspoon / 1g) — Adds subtle warmth without overpowering. Optional but highly recommended.
- Pie Crust Dough (2 discs, about 9 inches each / 23 cm) — Use your favorite homemade dough or store-bought for a shortcut. I prefer homemade for that flaky, buttery crust grandma style that store-bought just can’t match.
- Egg Wash (1 egg beaten with 1 tablespoon water) — Gives the lattice a golden, shiny finish. Don’t skip it; it makes all the difference in presentation.
Equipment Needed for Cherry Pie Homemade Lattice
You don’t need anything fancy for this. Here’s what I actually use:
- 9-inch Pie Dish — Glass or ceramic works best. I like glass because I can peek at the crust color through the bottom.
- Rolling Pin — Essential for rolling out the dough evenly. If you don’t have one, a clean wine bottle works in a pinch!
- Sharp Knife or Pastry Wheel — For cutting the lattice strips. I use a serrated pizza cutter for speed and clean edges.
- Pastry Brush — To apply the egg wash. You can use a clean paintbrush if you don’t have one dedicated to baking.
Optional but useful:
- Pastry Blender — If you’re making dough from scratch. Mine’s a simple, inexpensive one that’s lasted years.
- Cooling Rack — Helps the pie cool evenly and keeps the bottom crust crisp.
How to Make Cherry Pie Homemade Lattice: 5 Easy Steps
Alright, let’s get into it. I’ll walk you through exactly how I make this cherry pie homemade lattice, including the small tricks that actually make a difference.
- Prep Your Filling (10 minutes)
In a large bowl, toss the pitted cherries with sugar, cornstarch, lemon juice, and cinnamon. Stir gently until everything is evenly coated. You’ll notice the cornstarch starts to absorb some of the cherry juices—that’s exactly what you want. This mix will thicken as it bakes, so don’t worry if it looks a little loose now. - Roll Out Your Pie Dough (8–10 minutes)
On a lightly floured surface, roll out one disc of dough into a 12-inch circle, about ⅛ inch thick. This will be your pie base. Transfer it carefully to your pie dish, letting the edges hang over slightly. Repeat with the second disc, but roll it into long strips about ½ to ¾ inch wide for the lattice top. The dough should feel cool and pliable—if it gets too warm, pop it in the fridge for 10 minutes. - Assemble the Pie with a Lattice Top (12–15 minutes)
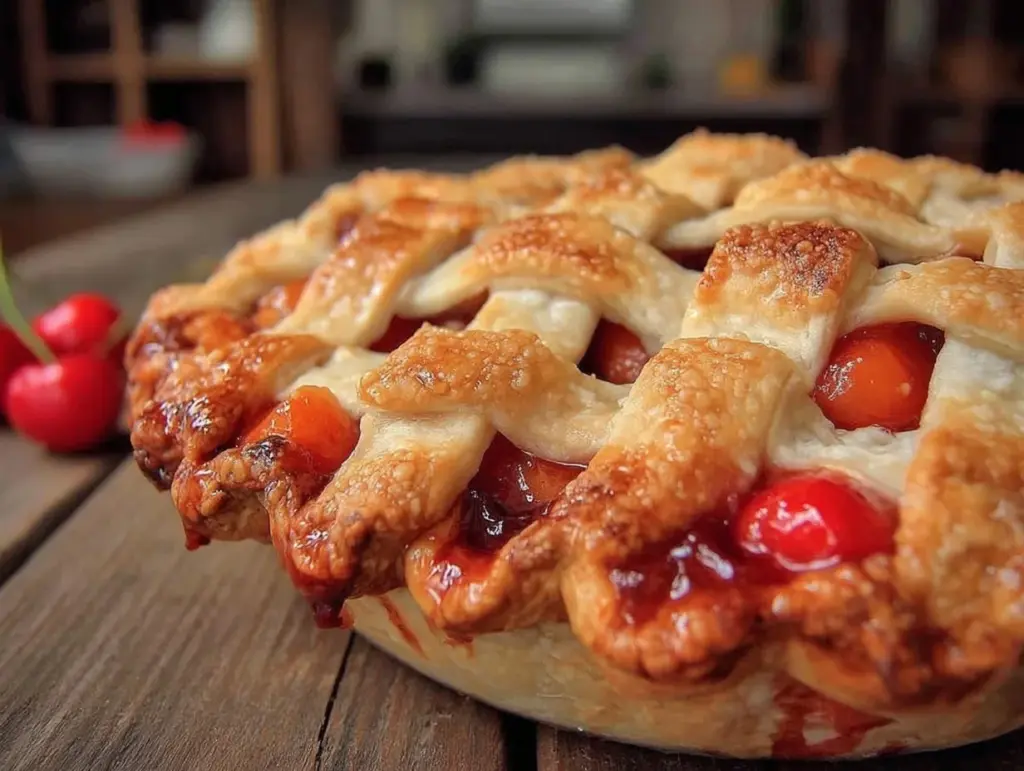
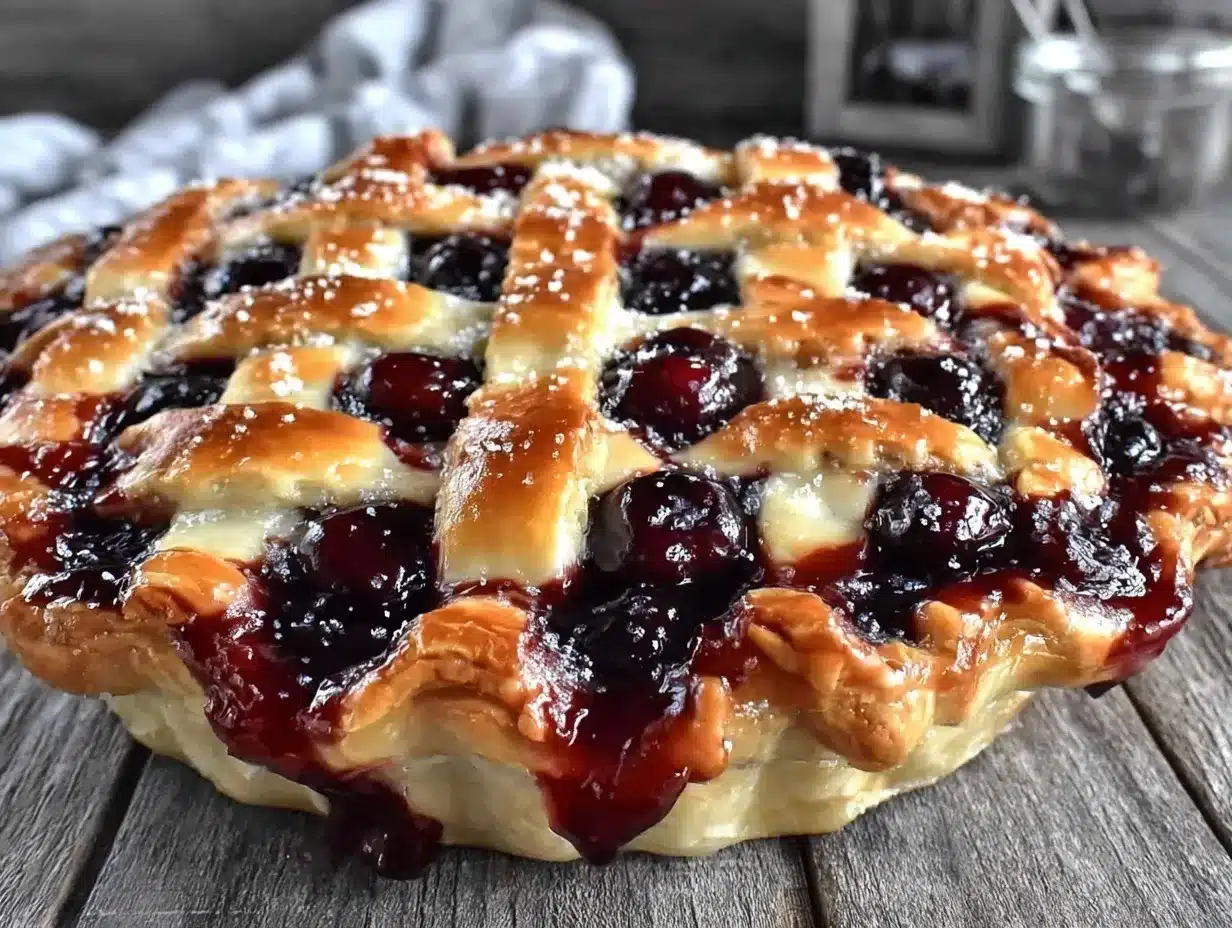
Pour the cherry filling into the pie crust, spreading it evenly but gently. Now for the lattice: lay out half the strips parallel across the pie, spaced about an inch apart. Fold back every other strip halfway, then lay a strip perpendicular. Unfold the folded strips over the new strip. Repeat this weaving pattern until the top is covered. Trim any overhang and crimp the edges to seal. This lattice looks impressive but is just a simple over-under weave—once you do it, you’ll want to make lattice tops on everything. - Apply Egg Wash and Vent the Pie (3 minutes)
Brush the lattice crust with the egg wash—the shine and color this gives are worth the extra step. Use a sharp knife to cut a few small vents in the dough to let steam escape during baking. This keeps the filling from bubbling over and the crust crisp. - Bake and Cool (50–60 minutes)
Place the pie on the middle rack of a preheated 375°F (190°C) oven. Bake until the crust is golden and the filling is bubbling—usually about 50 to 60 minutes. If the edges brown too fast, cover them loosely with foil. Once out of the oven, let the pie cool on a rack for at least 2 hours so the filling sets. This wait is hard, but trust me, it’s worth it.
Total time: about 1 hour 30 minutes, including baking and cooling. Most of that is hands-off; the real work is in the prep and lattice weaving.
Expert Tips & Tricks for Cherry Pie Homemade Lattice Success
Here’s everything I’ve figured out from making this recipe dozens of times. These tips will save you from the mistakes I already made.
- Keep Your Dough Cold
Warm dough tears and becomes sticky, making lattice weaving a nightmare. If your kitchen is warm, chill the dough between rolling and cutting. I keep a small bowl of ice water nearby and pat my hands dry often. - Don’t Skip the Cornstarch
This thickener is the difference between a runny filling and one that holds beautifully. Tapioca starch is a great alternative if you want a glossy look, but don’t leave it out. - Save Some Cherry Juice
If you’re using frozen cherries, drain but save a tablespoon or two of the juice to stir into the filling. It boosts flavor and color without watering it down. - Egg Wash Is Non-Negotiable
It gives the lattice that irresistible golden shine. Brush gently and evenly. If you want extra sparkle, sprinkle a little coarse sugar on top before baking. - Watch the Edges
Pie edges brown faster. Use foil or an edge shield after 30 minutes to prevent burning but keep the rest of the crust crisp. - Don’t Rush Cooling
The filling needs time to set or it’ll slide out when you cut. If you can’t wait, serve with a scoop of vanilla ice cream to catch the drips.
Variations & Substitutions for Cherry Pie Homemade Lattice
Once you’ve got the base version down, here’s how I mix it up. I’ve actually tried all of these.
- Mixed Berry Version
Swap half the cherries for blueberries or raspberries for a colorful berry medley. This is a favorite for summer weekend family meals and adds a tart twist. - Almond Twist
Add ½ teaspoon almond extract to the filling and sprinkle sliced almonds on the lattice before baking. This gives a lovely nutty aroma perfect for holiday dessert tables. - Gluten-Free Crust
Use a store-bought gluten-free pie crust or make your own with almond flour blends. The filling stays the same and tastes just as good. I’ve made this version for a gluten-free potluck, and it disappeared fast. - Shortcut with Store-Bought Dough
No shame here—store-bought pie dough works fine if you’re short on time. Just make sure to roll out the dough a little thinner than usual for a flakier finish. - Spiced Cherry Pie
Add ¼ teaspoon ground cloves and a pinch of nutmeg to the filling. This variation is a cozy favorite for holiday gatherings and pairs beautifully with whipped cream.
Serving & Storage Tips for Cherry Pie Homemade Lattice
I usually serve this straight from the pie dish—rustic, inviting, and stays warm longer. A scoop of vanilla ice cream or a dollop of whipped cream makes it even better.
Great sides to pair with this classic dessert:
- Fresh whipped cream — light and airy, it balances the tart cherries perfectly.
- Simple homemade hummus — if you’re setting a broader dessert and appetizer table, this savory dip adds a nice contrast.
- Brie cherry pastry cups — a sweet and savory party appetizer that complements the cherry pie beautifully for holiday spreads.
Storage:
- Fridge: Store in an airtight container or cover loosely with foil for up to 4 days. The crust softens slightly but the flavor deepens.
- Reheating: Best reheated in a 350°F (175°C) oven for 15 minutes to bring back crispness. Microwave works in a pinch but can make the crust soggy.
- Freezing: Not recommended. Cherry pie filling becomes watery and the crust loses its flakiness after thawing.
Nutrition Information
I’m not a nutritionist, but here’s the breakdown if you’re keeping track. These numbers are approximate and based on 8 servings.
| Calories | Protein (g) | Carbs (g) | Fiber (g) | Sugar (g) | Fat (g) | Saturated Fat (g) | Sodium (mg) |
|---|---|---|---|---|---|---|---|
| 320 | 3 | 45 | 3 | 25 | 12 | 6 | 210 |
Look—this is classic comfort food made with buttery crust and sweet filling. It’s not a light recipe, and I’m not here to pretend it is. But it’s way better than most store-bought pies, cheaper, and you know exactly what’s inside. When I want something lighter, I pile on fresh fruit alongside it or serve smaller slices. Most times though? I make the real thing and savor every bite.
Final Thoughts
That Sunday afternoon with Grandma’s cherry pie still feels like yesterday—the smell, the feel of that lattice crust in my hands, the warm first bite. Making this cherry pie homemade lattice recipe brought back all those moments and created new ones with my own family. The best part? You can make it yours. More cinnamon, extra cherries, or a sprinkle of sugar on top—it’s forgiving and fun to customize.
If you make this recipe, drop a comment and tell me how it went. And if something goes wrong, tell me that too—I genuinely want to help troubleshoot. That’s what the comments are for.
Happy baking—I hope your kitchen smells amazing.
Frequently Asked Questions
Q: Can I make this cherry pie homemade lattice without fresh cherries?
A: Yes, you definitely can. I often use frozen cherries when fresh ones aren’t in season. Just thaw them completely and drain excess juice before mixing with sugar and cornstarch. This prevents the filling from becoming too watery. I’ve found this works well for weekend family meals when I’m short on fresh fruit.
Q: Why did my cherry pie filling turn out watery or runny?
A: This is a common issue. Usually, it’s because not enough thickener was used or the filling was too juicy. Make sure to use the right amount of cornstarch and toss the cherries well with it before baking. Also, avoid adding too much extra liquid like juice or water. If your pie is watery after baking, try reheating it gently to help thicken the filling a bit.
Q: Can I make this cherry pie homemade lattice ahead for holiday dinners?
A: Absolutely. I often bake the pie the day before a holiday gathering. Just cool it completely, then cover loosely and refrigerate. Before serving, let it sit at room temperature for 30 minutes or warm it briefly in the oven. This makes it easier to slice and keeps the filling from being too firm. It’s a great stress-saver for busy holiday cooking.
Q: Is there a gluten-free or dairy-free version of this pie?
A: Yes! For gluten-free, use a store-bought gluten-free pie crust or make your own with almond or rice flour blends. For dairy-free, swap the butter in your crust for coconut oil or a dairy-free margarine. The filling is naturally dairy-free as long as you avoid butter in the crust. I’ve made both versions for friends with dietary needs, and they loved the results.
Q: Can I double or halve this cherry pie recipe?
A: Yes, you can scale this recipe easily. Doubling means you’ll need two pie dishes and double the filling and crust. Halving works too but adjust your pie dish size accordingly—smaller pans need less filling and dough. Just keep an eye on baking time since smaller pies may bake faster.
Q: How do I prevent my lattice crust from shrinking or tearing?
A: Keep your dough cold and handle it gently. Overworking warms the dough and makes it elastic, so it shrinks back. Chill the dough strips before weaving and again before baking if your kitchen is warm. Also, don’t stretch the dough when placing it on the pie—let it rest naturally.
Q: Can I freeze leftover cherry pie?
A: I don’t recommend freezing cherry pie with homemade lattice crust. The filling can separate and the crust loses its crispness and flakiness after thawing. Instead, store leftovers in the fridge and eat within 4 days. If you want to freeze pie, it’s better to freeze it unbaked and bake it fresh when ready.
Pin This Recipe!
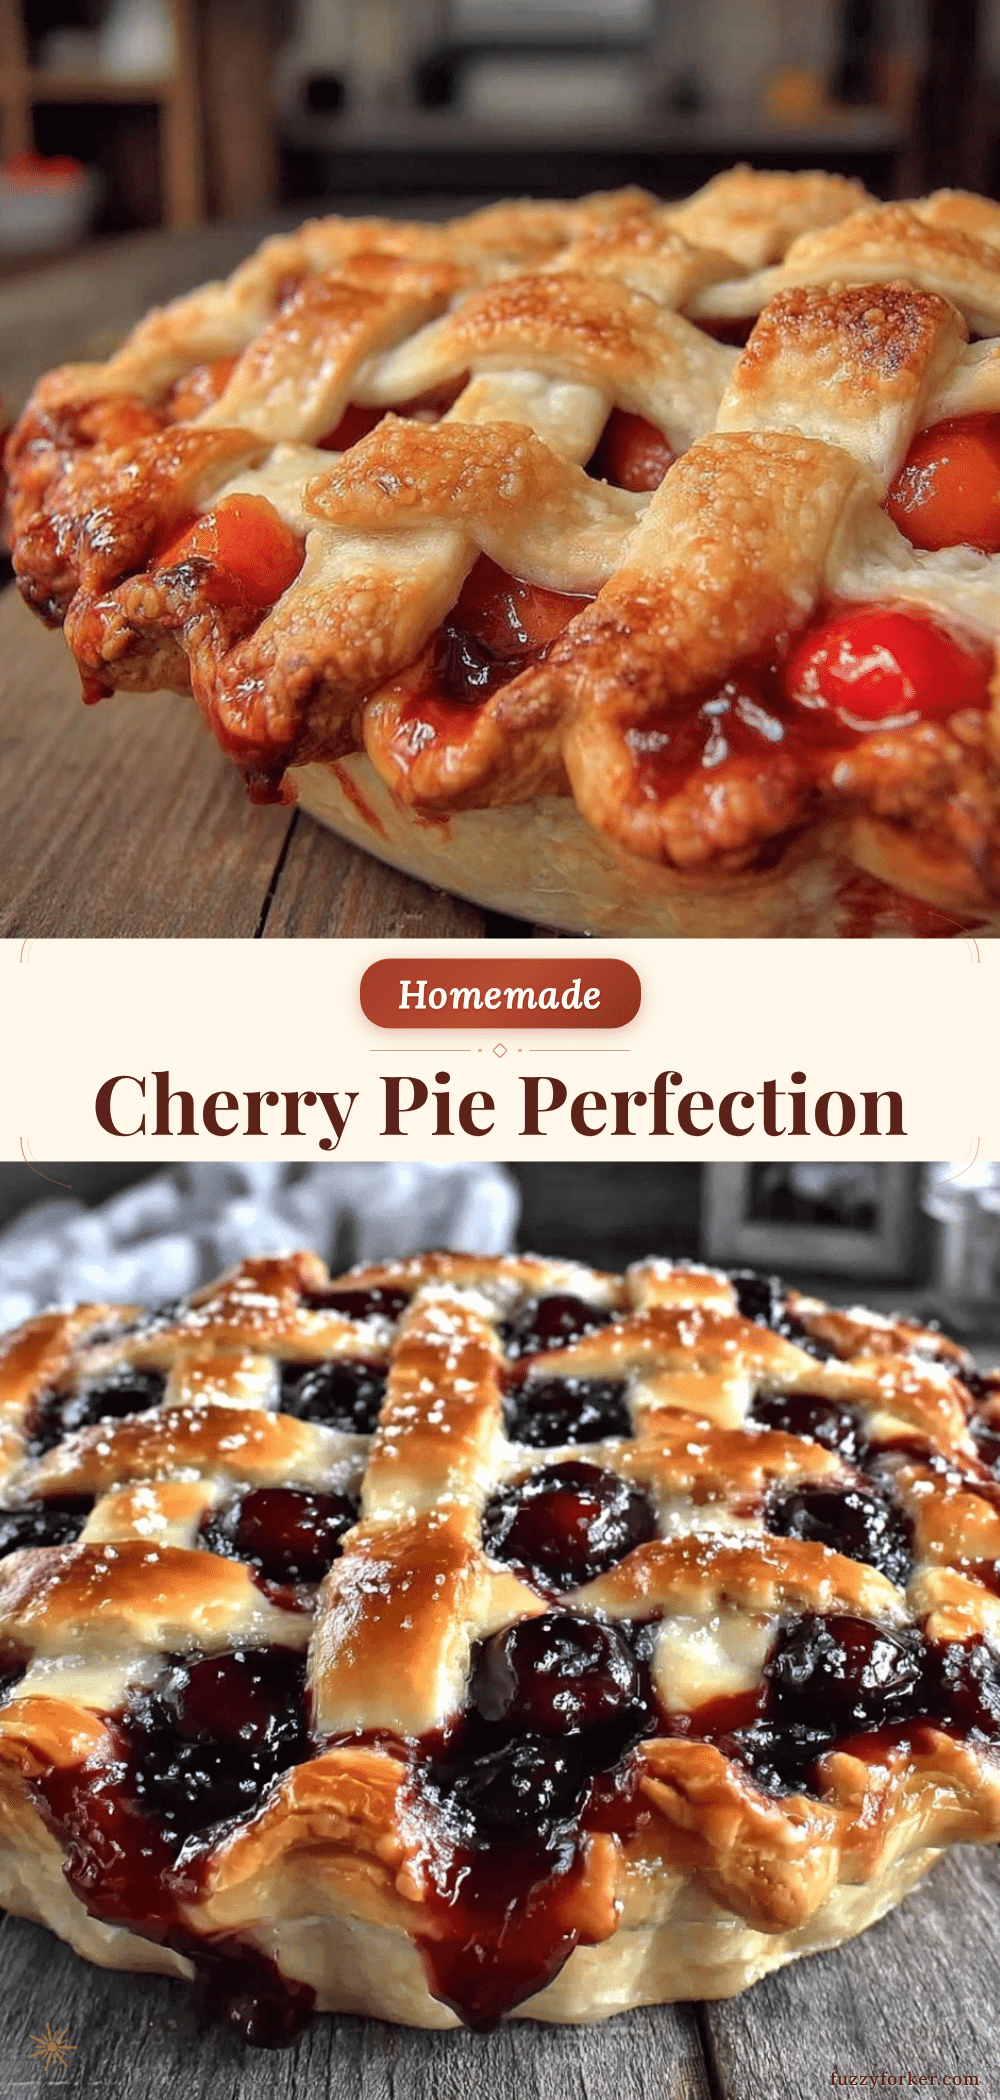
Cherry Pie Homemade Lattice Recipe 5 Easy Steps for Grandma Style Classic Dessert

A classic grandma-style cherry pie with a flaky homemade lattice crust and perfectly balanced tart and sweet cherry filling. This recipe is approachable for all skill levels and perfect for family meals and holiday gatherings.
- Prep Time: 20 minutes
- Cook Time: 50-60 minutes
- Total Time: 1 hour 30 minutes
- Yield: 8 servings 1x
- Category: Dessert
- Cuisine: American
Ingredients
- 5 cups (700g) fresh or frozen pitted cherries
- 1 to 1 ¼ cups (200–250g) granulated sugar (can substitute part with brown sugar)
- 3 tablespoons (24g) cornstarch (or tapioca starch for glossy finish)
- 1 tablespoon (15ml) lemon juice
- ½ teaspoon (1g) cinnamon (optional but recommended)
- 2 discs of pie crust dough, about 9 inches (23 cm) each (homemade or store-bought)
- 1 egg beaten with 1 tablespoon water (egg wash)
Instructions
- Prep Your Filling (10 minutes): In a large bowl, toss the pitted cherries with sugar, cornstarch, lemon juice, and cinnamon until evenly coated. The cornstarch will absorb some cherry juices and thicken during baking.
- Roll Out Your Pie Dough (8–10 minutes): On a lightly floured surface, roll out one disc of dough into a 12-inch circle about ⅛ inch thick for the pie base. Transfer to pie dish with edges hanging over. Roll the second disc into long strips ½ to ¾ inch wide for the lattice top. Chill dough if it becomes too warm.
- Assemble the Pie with a Lattice Top (12–15 minutes): Pour cherry filling into the pie crust. Lay half the dough strips parallel across the pie spaced about an inch apart. Fold back every other strip halfway, lay a perpendicular strip, then unfold the folded strips over it. Repeat weaving until covered. Trim overhang and crimp edges to seal.
- Apply Egg Wash and Vent the Pie (3 minutes): Brush lattice crust with egg wash for a golden shine. Cut small vents in the dough to let steam escape during baking.
- Bake and Cool (50–60 minutes): Bake pie at 375°F (190°C) on middle rack until crust is golden and filling bubbles, about 50-60 minutes. Cover edges with foil if browning too fast. Cool on a rack for at least 2 hours to set filling.
Notes
[‘Keep dough cold to prevent tearing and shrinking during lattice weaving.’, ‘Do not skip cornstarch to avoid runny filling; tapioca starch can be used for a glossy finish.’, ‘If using frozen cherries, thaw and drain excess juice to prevent watery filling; save a tablespoon of juice for flavor and color.’, ‘Egg wash is essential for a golden, shiny lattice crust; sprinkle coarse sugar on top for extra sparkle.’, ‘Cover pie edges with foil after 30 minutes if browning too fast.’, ‘Cool pie completely before slicing to allow filling to set; serve with vanilla ice cream to catch drips if serving warm.’, ‘Store leftovers in airtight container in fridge up to 4 days; reheat in oven at 350°F (175°C) for 15 minutes to restore crispness.’, ‘Freezing baked pie is not recommended as crust loses flakiness and filling becomes watery.’]
Nutrition
- Serving Size: 1 slice (1/8 of pie)
- Calories: 320
- Sugar: 25
- Sodium: 210
- Fat: 12
- Saturated Fat: 6
- Carbohydrates: 45
- Fiber: 3
- Protein: 3
Keywords: cherry pie, homemade lattice crust, classic dessert, grandma style pie, cherry pie recipe, lattice pie crust, holiday dessert, family dessert